Sourdough Caribbean Pigeon Pea and Coconut Rice Bread Bowl
A rustic sourdough bread bowl infused with Caribbean spices, pigeon peas, and toasted rice flour, enriched with coconut milk. The dough develops deep tangy flavor from a long fermentation, while pigeon peas and turmeric give it warm, savory character. Serve filled with stews, curries, or island-inspired dishes.
- Prep
- 30 min
- Cook
- 45 min
- Wait
- 11 hr
- Total
- 12 hr 15 min
- Makes
- 4 bread bowls (6-inch diameter, about 8 oz each)
Steps
Before you start
- Ensure your sourdough starter is fed and active (bubbly and doubling in 4–6 hours) before use
- Have all ingredients at room temperature (68–72°F) for optimal fermentation
- Use a Dutch oven or covered baker that fits 4 bowls or bake in two batches
- Plan ahead: bulk fermentation is 4 hours, cold rest is 8 hours or overnight
Toast rice flour and prepare components
- In a small skillet over medium heat, toast the rice flour, stirring occasionally, until it becomes fragrant and takes on a light golden hue, about 3–4 minutes.
- Spread on a plate to cool.
- Pat the pigeon peas dry with paper towels to remove excess moisture (this prevents the dough from becoming soggy).
- Mince the white parts of the scallions and set aside; reserve the green parts for topping the finished bowls.
+ Show details− Hide details
Ready when: Rice flour is light golden and aromatic
Tip: Toasting the rice flour deepens its nutty flavor and reduces any raw taste in the final bread.
Mix dough
- In a large bowl or the bowl of a stand mixer, combine the sourdough starter, bread flour, rice flour, water, and coconut milk.
- Using a dough hook on low speed (or your hands), mix for 2 minutes until shaggy.
- Let rest for 30 minutes (autolyse).
- After the rest, add salt, turmeric, cumin, minced white parts of scallions, and the Scotch bonnet if using.
- Mix on low speed for 4 minutes until the salt is fully incorporated and the dough is smooth.
- The dough should feel slightly tacky but hold together, with an internal temperature of 75–78°F.
+ Show details− Hide details
Ready when: Dough is smooth, elastic, and temperature is 75–78°F
Tip: The coconut milk and rice flour will make the dough slightly stickier; don't add extra flour or it will become dense.
Fold in pigeon peas and thyme
- After the dough has mixed, sprinkle the chopped pigeon peas and thyme over the dough.
- Using a bench scraper or your hand, fold them gently into the dough with 8–10 turns, rotating the bowl as you work.
- Be gentle to avoid crushing the peas.
- Cover the bowl with a damp kitchen towel.
+ Show details− Hide details
Ready when: Pigeon peas and thyme are evenly distributed without crushing
Tip: Fold gently to keep the peas intact; they contribute pleasant texture and visual appeal.
Bulk fermentation with folds
- Let the dough bulk ferment at room temperature (68–72°F) for 4 hours.
- Perform stretch-and-folds at 30-minute intervals for the first 2 hours: wet your hand, grab one side of the dough, stretch it up and fold it over the center, rotate the bowl 90 degrees, and repeat 4 times.
- After 2 hours, stop folding and let the dough rise undisturbed.
- The dough should increase by about 50–70% in volume and look puffy.
+ Show details− Hide details
Ready when: Dough has increased 50–70% in volume, pokes leave a slight indent that springs back slowly
Tip: Folds strengthen the gluten and help distribute the fermentation evenly. Use the oil to keep your hand from sticking.
Pre-shape and rest
- Dust your work surface lightly with flour.
- Turn the dough out onto the surface.
- Divide into 4 equal pieces (each about 280 g).
- Pre-shape each piece into a round by folding the edges toward the center and rotating gently to tighten the surface.
- Place seam-side up in a floured banneton or a bowl lined with a floured kitchen towel.
- Let rest at room temperature for 20 minutes (bench rest).
+ Show details− Hide details
Ready when: Dough feels relaxed but holds its shape
Tip: Resting now prevents the dough from shrinking during the final proof.
Final shaping for bowls
- Gently turn each pre-shaped round seam-side down onto a lightly floured surface.
- Using your hands, shape each piece into a tight round ball by pulling the dough toward you and rotating it.
- The goal is a surface-tension round that will puff up in the oven.
- Place each shaped dough seam-side up in a banneton or bowl lined with a floured towel, spacing them so they don't touch.
- Cover loosely with plastic wrap or a damp towel.
+ Show details− Hide details
Ready when: Each round is smooth and taut
Tip: Good surface tension helps the bread rise up and out in the oven, forming nice bowl shapes.
Cold fermentation overnight
- Place the shaped doughs in the refrigerator (38–40°F) for 8 hours to overnight.
- This slow fermentation develops deeper flavor and makes scoring easier.
- The dough is ready when a gentle poke leaves an indent that springs back very slowly or barely at all.
+ Show details− Hide details
Ready when: Poke test: indent fills in halfway or stays slightly indented
Tip: You can also do a room-temperature final proof for 2–3 hours if you're short on time, but overnight in the fridge yields better flavor.
Preheat oven and prepare for bakingOven 475°F / 245°C
- Remove the doughs from the refrigerator 20 minutes before baking (they will be very cold).
- Preheat a Dutch oven (or covered bread baker large enough for 2 bowls) in a 475°F (245°C) oven for 45 minutes.
- If baking all 4, you may bake in two batches.
- Have a lame or sharp serrated knife ready for scoring.
+ Show details− Hide details
Ready when: Oven fully preheated and Dutch oven is very hot
Tip: A hot vessel creates steam, which is crucial for good oven spring and a crispy exterior.
Score and load into ovenOven 475°F / 245°C
- Carefully remove the hot Dutch oven from the oven and place on a heat-safe surface.
- Gently turn one banneton over and place the dough seam-side up onto parchment paper or directly onto the hot Dutch oven surface (if confident).
- If using parchment, it can hang over the sides.
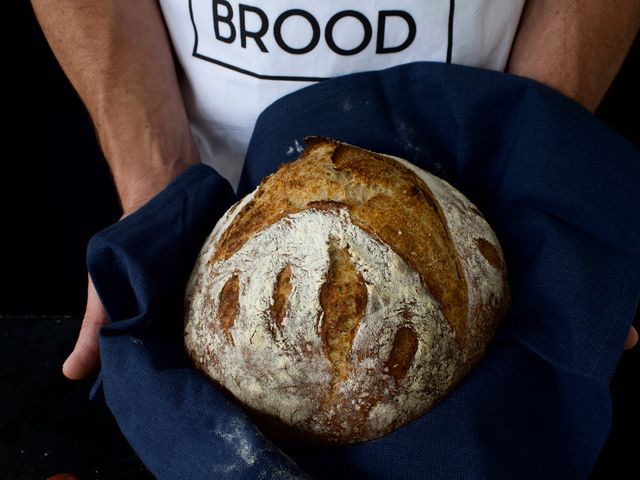
- Using a sharp lame or serrated knife, score the top of the dough with a single deep slash or an X pattern, cutting about ¼ inch deep.
- Repeat with the second dough if baking 2 in the Dutch oven.
- Cover the Dutch oven with its lid.
+ Show details− Hide details
Ready when: Both doughs are scored and covered in the hot Dutch oven
Tip: A wet lame or knife slides through cold dough more easily; dip it in water just before scoring.
Bake coveredOven 475°F / 245°C
- Bake the covered Dutch oven at 475°F (245°C) for 25 minutes.
- The steam trapped inside will help the dough expand and develop a crispy crust.
- Do not open the lid during this time.
+ Show details− Hide details
Ready when: Steam is generated inside the Dutch oven
Tip: The lid traps moisture for that coveted sourdough crust and open crumb structure.
Bake uncovered until goldenOven 450°F / 230°C
- Remove the lid carefully (watch for steam).
- Reduce the oven temperature to 450°F (232°C) and bake uncovered for 18–22 minutes, until the bread is deep golden brown on all sides.
- The internal temperature at the thickest part should reach 205–210°F (96–99°C).
- If the tops brown too quickly, loosely tent them with foil.
+ Show details− Hide details
Ready when: Deep golden brown all over, internal temperature 205–210°F
Tip: If you want extra-crispy bowls for holding thick soups or stews, bake an additional 2–3 minutes after reaching temperature.
Cool and hollow bowls (optional)
- Transfer the bread bowls to a wire rack to cool for 10 minutes.
- If you want to serve them as bowls to hold stew or curry, carefully cut off the top ¼ of each loaf using a serrated bread knife.
- Gently hollow out the interior with a spoon or small bread knife, leaving about ½ inch of walls and a bottom.
- Reserve the removed bread pieces to serve alongside or for snacking.
- Brush or drizzle the insides lightly with a little neutral oil if desired.
+ Show details− Hide details
Ready when: Bowls are cool enough to handle and walls are firm
Tip: If you skip this step, serve the whole loaves sliced, or lightly toast slices to serve alongside curry or stew.
Garnish and serve
- Sprinkle the tops of the bread bowls with reserved green scallion slices, and, if using, the toasted coconut shreds and a pinch of sea salt flakes.
- Serve warm, filled with Caribbean stew, curry, beans, or soup.
- The hollowed-out bread pieces can be toasted and served on the side for dipping.
+ Show details− Hide details
Ready when: Garnish applied and bread is warm
Tip: These bowls are best served within 2 hours of baking, while they still have a crispy exterior and tender crumb.
Good to know
Tips
- Active starter is essential: Feed your starter 4–6 hours before mixing the dough and use it when it's at peak (bubbly, doubled, and showing signs of a dome that has just started to recede). Under-fermented starter will result in slow fermentation and flat loaves.
- Pigeon pea texture: Chop or quarter the pigeon peas so they don't roll out of the dough during folding and shaping. Whole beans can create weak points in the structure.
- Dough temperature matters: Because of the coconut milk and rice flour, this dough may ferment slightly faster than a plain sourdough. Aim for a final dough temperature of 75–78°F after mixing. If your kitchen is warm, use cooler water.
- Scoring for bowls: A deep slash or X encourages the bread to expand upward rather than sideways, which helps form a natural bowl shape and makes hollowing easier later.
Make ahead
Prepare the dough through step 6 (shaping) and refrigerate for up to 24 hours. The cold fermentation actually improves flavor. Bake from chilled the next day. Baked bread bowls can be made up to 8 hours ahead and reheated wrapped in foil at 350°F for 5 minutes before serving.
Storage & reheating
Room temperature (up to 1 day): Store in a paper bag or bread box to maintain crispness. Refrigerator (3 days): Wrap in plastic wrap or place in a sealed container; crispness will diminish. Freezer (up to 3 months): Wrap tightly in plastic wrap and then foil. Reheat from frozen: Wrap in foil and warm at 350°F for 12–15 minutes. Do not microwave (bread will become gummy).
Substitutions
- rice flour → millet flour or sorghum flour. Use the same weight. Both add a similarly subtle nutty flavor and slightly sandy crumb. Toast before using.
- canned pigeon peas, drained and rinsed (or cooked fresh) → black-eyed peas, chickpeas, or canned beans. Use the same volume, drained and dried. Black-eyed peas add an earthier note. Reduce any remaining liquid in the dough by 1 tablespoon to compensate for beans with higher moisture.
- Scotch bonnet or habanero pepper (optional, for heat) → jalapeño or serrano pepper. Use 1 whole pepper, seeded and minced. These are milder; adjust quantity if you prefer more heat. Alternatively, omit entirely for a milder bread.
- unsweetened coconut milk (canned or fresh) → whole milk or oat milk. Use the same amount. The bread will have less tropical flavor but remain tender. Coconut flavor will be less pronounced.