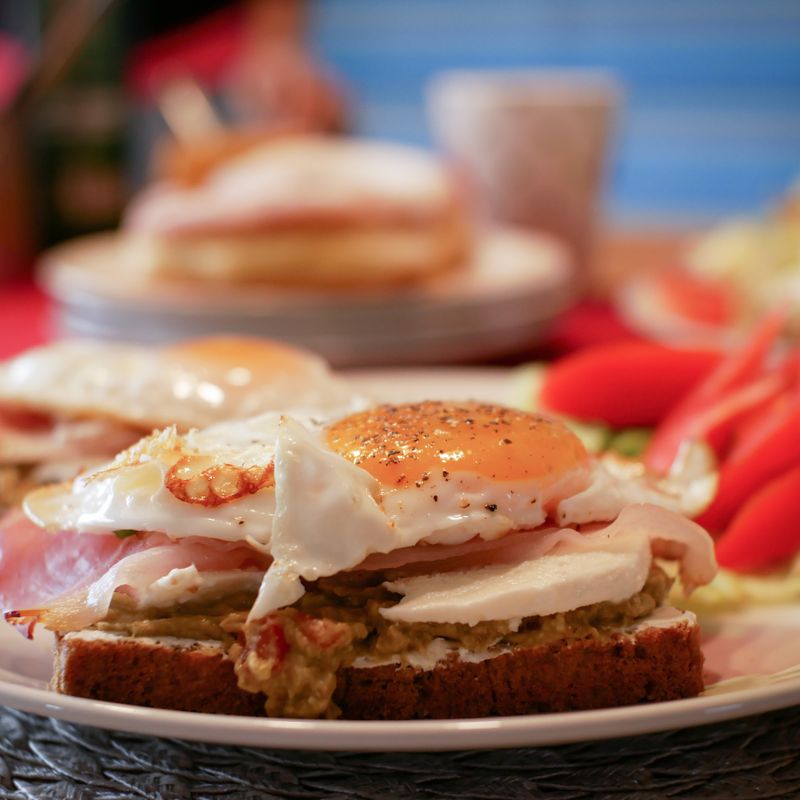
Sheet Pan Egg Breakfast Sandwiches with Ham and Swiss
A dozen fluffy baked-egg sliders with ham and melty Swiss, finished with a Dijon-butter glaze. Bake the eggs in one pan, cut them to fit, and skip the skillet. They're ideal for feeding a crowd or stocking the freezer.
- Prep
- 20 min
- Cook
- 35 min
- Wait
- 10 min
- Total
- 1 hr 5 min
- Makes
- 12 slider sandwiches
Steps
Before you start
- Use a pack of 12 connected slider buns (about 2½-inch / 6 cm) so you can split them as one slab.
- Set a rack in the middle of the oven. Preheat to 350°F (175°C) while you prep.
- Choose a pan with 1-inch (2.5 cm) sides, such as a quarter sheet pan. A flat cookie sheet will let the egg run off.
- Have foil ready. You'll cover the sandwiches for part of the bake.
Preheat and grease panOven 350°F / 175°C
- Set a rack in the middle of the oven and preheat to 350°F (175°C).
- Rub the 1 tablespoon soft butter over the bottom and sides of the 13×9-inch rimmed pan, getting into the corners.
+ Show details− Hide details
Ready when: The pan has a thin, even sheen of butter with no dry patches.
Tip: Missed spots will make the egg stick and tear when you cut it.
Whisk the eggs
- In a large bowl, whisk the eggs, milk, salt, and pepper for about 1 minute.
- The mixture should be uniform and slightly frothy, with no streaks of white.
- Pour it into the greased pan.
+ Show details− Hide details
Ready when: No visible clumps of egg white remain, and the egg is about ¾ inch (2 cm) deep in the pan.
Tip: Carry the pan to the oven carefully. Set it on the rack before you push it in so it doesn't slosh.
Bake the eggsOven 350°F / 175°C
- Bake at 350°F (175°C) for 18 to 20 minutes.
- The egg is done when the center is set and no longer jiggles, the edges pull slightly from the pan, and an instant-read thermometer in the center reads 160°F (71°C).
+ Show details− Hide details
Ready when: The surface is matte and springs back when pressed lightly, with no liquid pooling in the center.
Tip: Don't let the top brown. Browned, overbaked egg turns rubbery. Keep the oven on for the next steps.
Cool and cut eggs
- Let the eggs cool in the pan for 5 minutes so they firm up.
- Run a knife around the edges, then cut into 12 squares: 3 rows by 4 columns.
- Each should be roughly 3 inches (7.5 cm) square.
- You'll fold or trim them to fit the buns.
+ Show details− Hide details
Ready when: The egg holds clean edges when cut and lifts out in one piece.
Tip: Wipe the knife between cuts for neat squares.
Set up the buns
- Without separating the buns, slice the slab in half horizontally with a serrated knife.
- Set the bottom slab, cut side up, in the 13×9-inch baking pan.
- Set the top slab aside.
+ Show details− Hide details
Ready when: You have two even slabs, and the bottom one fills the pan.
Tip: Slice with a gentle sawing motion so the soft buns don't compress.
Layer the fillings
- Place one portion of ham on each bottom bun, followed by one egg square (fold or trim to fit), then half a slice of Swiss.
- Set the top slab over the cheese.
+ Show details− Hide details
Ready when: Each bun has ham, egg, and cheese, with fillings not hanging far past the edges.
Tip: Put the cheese against the egg so it melts into a seal and the sandwich holds together.
Make the glaze
- Stir the melted butter, Dijon, and poppy seeds, if using, in a small bowl until smooth.
- Brush the glaze evenly over the tops of the buns, including the seams between them.
+ Show details− Hide details
Ready when: The glaze looks glossy and coats every bun top.
Tip: Stir right before brushing. The mustard and butter separate as they sit.
Bake the sandwichesOven 350°F / 175°C
- Cover the pan tightly with foil.
- Bake at 350°F (175°C) for 10 minutes to warm through and melt the cheese.
- Remove the foil and bake 4 to 5 minutes more, until the tops are golden brown.
+ Show details− Hide details
Ready when: The tops are golden, the cheese edges are melted, and the center of a sandwich reads at least 165°F (74°C).
Tip: Skipping the foil first can brown and dry the buns before the cheese melts.
Rest and slice
- Rest the pan for 5 minutes.
- Cut between the buns with a serrated knife to separate them, and serve warm.
+ Show details− Hide details
Ready when: The sandwiches separate cleanly without the cheese pulling out.
Good to know
Tips
- Don't skip the milk measurement. Too much makes the eggs watery and too little makes them dense.
- Pull the eggs from the oven as soon as the center is set. They keep cooking in the hot pan and again when the sandwiches bake.
- For freezer sandwiches, cool them completely before wrapping to avoid ice crystals and soggy buns.
- Add a thin layer of mustard or hot honey to the bottom buns for extra flavor.
Make ahead
"Bake and cut the eggs and assemble the sandwiches through step 6 up to 1 day ahead. Cover and refrigerate without the glaze. Brush with glaze right before baking, and add 5 to 8 minutes to the covered baking time."
Storage & reheating
"Room temperature: up to 2 hours. Refrigerator: wrap individually or store airtight for up to 4 days. Freezer: wrap each sandwich in foil or parchment and freeze in a zip-top bag for up to 2 months. Reheat from frozen, unwrapped from the bag but still in foil, at 350°F (175°C) for 20 to 25 minutes. Or microwave a paper-towel-wrapped sandwich for 60 to 90 seconds from the refrigerator, or 2 to 3 minutes from frozen, until hot (165°F / 74°C) in the center."
Substitutions
- thinly sliced deli ham → cooked breakfast sausage patties or Canadian bacon. Use the same amount by weight. Make sure any sausage is fully cooked first.
- sliced Swiss cheese → sharp cheddar or provolone. Use the same weight in slices. Flavor changes, but the melt is just as good.
- slider buns, connected pack of 12 → 12 small dinner rolls or 6 English muffins. For English muffins, cut the egg into 6 larger squares and bake as in the recipe.
- whole milk → half-and-half or unsweetened plain oat milk. Half-and-half gives richer eggs. Oat milk works if you avoid dairy, but the eggs will be slightly less tender.
More breakfast sandwiches
See all →

Find more like this
- Meal
- Breakfast
- Cuisine
- American
- Diet
- Sugar-Free
- Quick & Easy
- EasyMake AheadFreezer Friendly