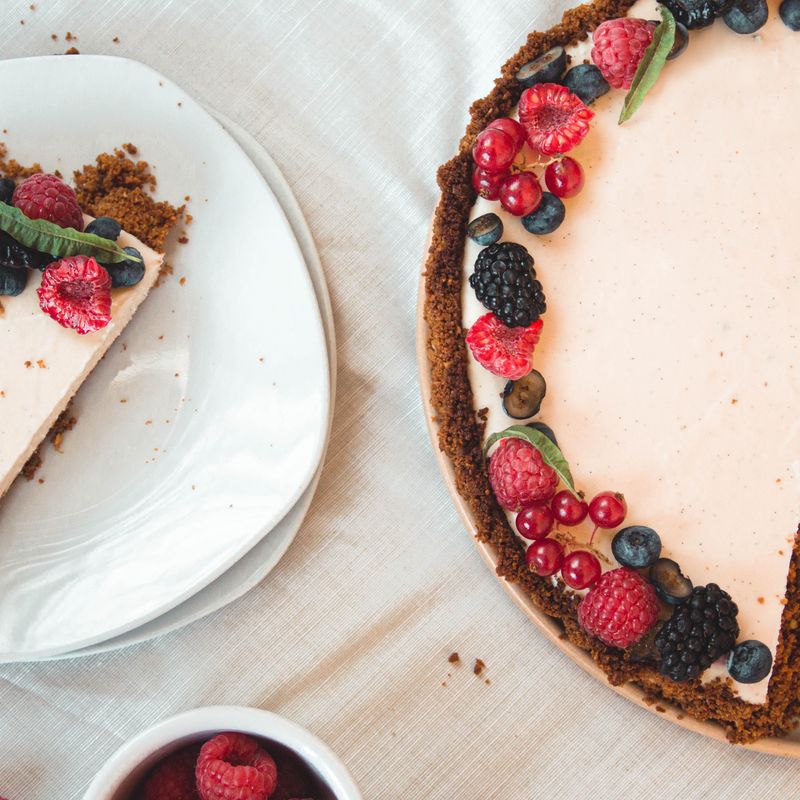
Korean Bingsu Cheesecake
A striking no-bake dessert that marries the cool, icy refreshment of bingsu with rich creamy cheesecake. A buttery graham cracker crust supports a dense cream cheese and condensed milk filling, chilled until set, then crowned with shaved ice, sweetened red beans, and a drizzle of condensed milk syrup for an elegant twist on two beloved treats.
- Prep
- 25 min
- Cook
- —
- Wait
- 8 hr
- Total
- 8 hr 25 min
- Makes
- 1 cheesecake (8 servings)
Steps
Before you start
- Chill a 9-inch springform pan in the freezer for 15 minutes before starting
- Use cream cheese straight from the refrigerator (cold, not room temperature)
- Prepare shaved ice just before serving or store it frozen in an airtight container
- Read the full recipe—the cheesecake needs 8 hours or overnight to chill
Make the crust
- Combine the finely crushed graham cracker crumbs (150 g), melted butter (85 g), and caster sugar (25 g) in a medium bowl and stir until the mixture resembles wet sand.
- Press this mixture firmly into the bottom of a chilled 9-inch (23 cm) springform pan, using the bottom of a flat cup to create an even, compact layer.
- The crust should reach about ¼ inch (0.5 cm) up the sides.
- Refrigerate while you prepare the filling.
+ Show details− Hide details
Ready when: Crust is firm and compact when pressed
Tip: Press the crust firmly so it holds together when you slice the finished cheesecake; a loose crust will crumble.
Whip the cream
- Pour the cold heavy cream (180 ml) into a large mixing bowl.
- Using an electric mixer on medium-high speed (or a whisk if mixing by hand), whip the cream until stiff peaks form—this should take 2–3 minutes with a mixer.
- Be careful not to overbeat; stop as soon as the cream holds firm peaks.
- Transfer the whipped cream to a clean bowl and set aside.
+ Show details− Hide details
Ready when: Cream holds stiff peaks when you lift the whisk or beaters
Tip: Use very cold cream and a chilled bowl for best results; warm cream won't whip properly.
Beat the cream cheese
- In the same large bowl (no need to wash it), place the cold cream cheese (450 g) and beat on medium speed for 3–4 minutes, scraping down the sides of the bowl once or twice, until the cream cheese is smooth and slightly fluffy.
- Do not overmix, as this can incorporate too much air and make the filling grainy.
+ Show details− Hide details
Ready when: Cream cheese is smooth, pale, and fluffy with no lumps
Tip: Keep the cream cheese cold (straight from the fridge) to avoid overmixing; cold cheese is easier to control.
Mix in condensed milk and flavorings
- With the mixer on low speed, add the sweetened condensed milk (180 ml) to the beaten cream cheese and mix for about 1 minute until combined and smooth.
- Then add the fresh lemon juice (22 ml), vanilla extract (2.5 ml), and a pinch of sea salt.
- Mix on low speed for another 30 seconds until everything is just incorporated.
- Do not overmix.
+ Show details− Hide details
Ready when: Mixture is smooth and pale, with no visible streaks of condensed milk
Tip: The lemon juice adds a subtle tang that balances the sweetness of the condensed milk; don't skip it.
Fold in the whipped cream
- Using a rubber spatula, gently fold the whipped cream into the cream cheese mixture in two additions.
- First, fold in half of the whipped cream until no white streaks remain, then fold in the remaining whipped cream with gentle strokes.
- The goal is to incorporate the cream without deflating it.
- The final mixture should be light, fluffy, and pale.
+ Show details− Hide details
Ready when: No white streaks of whipped cream are visible; the mixture is uniform and light
Tip: Use a gentle folding motion rather than stirring; aggressive mixing will collapse the whipped cream and make the filling dense.
Fill and chill the cheesecake
- Pour the prepared filling into the springform pan on top of the crust, using a rubber spatula to smooth the top into an even layer.
- Cover the pan with plastic wrap and refrigerate for at least 8 hours, or preferably overnight (up to 24 hours).
- The cheesecake must chill completely until firm.
+ Show details− Hide details
Ready when: Filling is firm and does not jiggle when you gently shake the pan
Tip: Do not skip the chill time; the cheesecake will not hold its shape if served warm or slightly cold.
Prepare ice and toppings
- About 30 minutes before serving, prepare your shaved ice if you haven't already.
- (If you have a snow cone machine or ice shaver, use it to create fine shavings; otherwise, use a food processor to crush ice into a fine snow-like texture.) Drain the canned sweetened red beans and chill them.
- Have the condensed milk (45 ml) ready in a small bowl or squeeze bottle.
+ Show details− Hide details
Ready when: Ice is finely shaved and red beans are chilled
Tip: Prepare the ice as close to serving time as possible so it stays frozen; if it sits too long, it will melt and become watery.
Unmold and slice the cheesecake
- Remove the cheesecake from the refrigerator.
- Using a sharp, thin knife dipped in hot water and wiped clean between slices, carefully cut the cheesecake into 8 equal wedges.
- For clean cuts, heat the knife under hot water before each slice.
- Gently ease each slice onto a serving plate by running an offset spatula or butter knife around the edge and underneath the slice.
- If using a springform pan, you can also unlock the sides and carefully transfer slices onto plates.
+ Show details− Hide details
Ready when: Each slice is clean-edged and intact on the serving plate
Tip: A hot, wet knife produces the cleanest cuts; wipe it between each slice to prevent dragging cream cheese.
Top and serve immediately
- Working quickly so the ice doesn't melt, top each slice generously with shaved ice (about ¼ cup or 37 g per slice).
- Scatter the chilled sweetened red beans (about 2 tablespoons or 30 ml per slice) over the ice.
- Drizzle each slice with condensed milk (about 1 teaspoon or 5 ml per slice) in a light zigzag pattern.
- If using them, finish with a small handful of roughly chopped roasted pistachios (about ½ teaspoon per slice).
- Serve immediately while the ice is still frozen and the cheesecake is cold.
+ Show details− Hide details
Ready when: All slices are topped and plated, with ice still visibly frozen
Tip: Assemble the bingsu topping at the very last moment; shaved ice melts quickly once exposed to room temperature.
Good to know
Tips
- Use sweetened condensed milk, not evaporated milk—they are not the same. Condensed milk adds necessary sweetness and body to the filling.
- Cream cheese must be cold from the fridge when beating; room-temperature cream cheese will overmix and become grainy.
- The lemon juice is crucial: it brightens the rich sweetness of the condensed milk and prevents the cheesecake from tasting cloying.
- For the best bingsu experience, shave the ice as finely as possible—a snow-cone machine or high-powered ice shaver works best. Coarse ice melts too quickly and tastes icy rather than smooth.
Make ahead
The cheesecake can be made up to 2 days ahead and stored in the refrigerator, covered. However, add the shaved ice, red beans, and condensed milk drizzle only just before serving. If you prepare the bingsu topping ahead, the ice will melt and the dessert will lose its signature contrast in texture.
Storage & reheating
Refrigerator: Store the whole cheesecake (or individual slices) covered with plastic wrap for up to 3 days. Freezer: Wrap the entire unmolded cheesecake (or slices) in plastic wrap and then foil; freeze for up to 2 weeks. Thaw in the refrigerator for 2 hours before serving. Do not freeze the cheesecake with shaved ice already on top. Room temperature: Do not leave the assembled dessert at room temperature for more than 15 minutes, as the ice will melt and the cheesecake will soften.
Substitutions
- graham cracker crumbs → Digestive biscuits or vanilla wafers, finely crushed (150 g). Both create a sturdy, slightly sweet crust; digestive biscuits give a subtle wheaty flavor.
- sweetened condensed milk → Crème de leche (dulce de leche), thinned slightly with 1 tablespoon heavy cream. Use about 150 ml of thinned crème de leche; it adds deeper caramel notes but makes the filling richer.
- canned sweetened red beans → Mung bean paste or sweetened azuki bean paste (adzuki beans). Both are traditional bingsu toppings; use the same quantity. Azuki is slightly earthier; mung bean is milder.
- roasted unsalted pistachios → Sliced almonds, crushed macadamia nuts, or sesame seeds. Any of these add crunch and visual appeal; sesame seeds provide a nuttier, more savory contrast.
More no-bake desserts
See all →


Find more like this
- Meal
- Dessert
- Cuisine
- Korean
- Main ingredient
- Cream Cheese
- Diet
- VegetarianHalal
- Method
- No-Cook
- Quick & Easy
- EasyMake Ahead