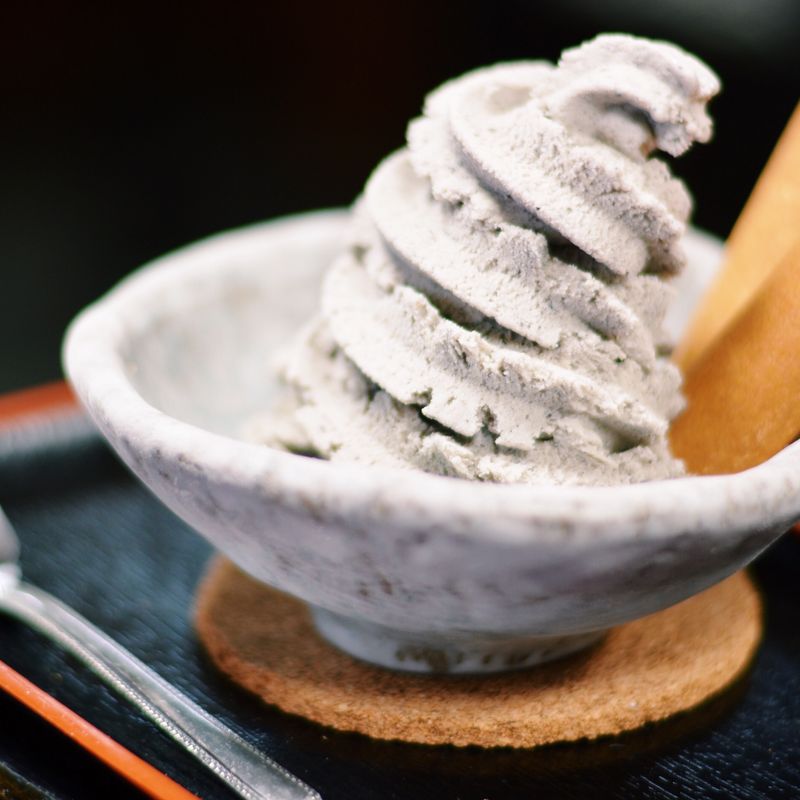
Black Sesame Icebox Cake
A no-bake icebox cake with layers of black sesame cream, vanilla wafers, and a hint of condensed milk sweetness. The wafers soften as they chill, creating a pudding-like texture within crispy outer layers. Rich, nutty, and elegant—no oven required.
- Prep
- 20 min
- Cook
- —
- Wait
- 8 hr
- Total
- 8 hr 20 min
- Makes
- One 8-inch round cake (8 slices)
Steps
Before you start
- Heavy cream must be cold; chill the bowl and beaters for 10 minutes before whipping
- Have an 8-inch round cake pan ready (springform works best for easy unmolding)
- Line the pan bottom with parchment paper
- Soften the black sesame paste to room temperature for 15 minutes so it blends smoothly
Whip the cream
- Pour the 2 cups (480 ml) cold heavy cream into a chilled medium bowl.
- Using an electric mixer on medium-high speed (or a whisk by hand), beat until soft peaks form—the cream should just hold its shape with peaks that gently fold over when the beaters are lifted.
- This takes 3–4 minutes with a mixer.
- Do not overmix or the cream will become grainy.
+ Show details− Hide details
Ready when: Soft peaks form when beaters are lifted
Tip: Overwhipped cream will turn to butter; stop as soon as soft peaks hold.
Mix in black sesame and condensed milk
- In a small bowl, gently warm the black sesame paste by stirring for about 30 seconds with a spoon.
- Add the ⅓ cup (80 ml) condensed milk and ½ teaspoon (2.5 ml) vanilla extract to the sesame paste.
- Stir until mostly smooth (a few tiny lumps are fine).
- Fold this mixture into the whipped cream with a rubber spatula using 10–12 gentle motions until the color is evenly marbled with no large swirls of white.
- The cream should be pale gray with black streaks.
+ Show details− Hide details
Ready when: Color is evenly marbled pale gray with black streaks
Tip: Fold gently to keep the cream airy; overmixing deflates it and makes the cake dense.
Layer wafers and cream
- Spread a thin layer of the black sesame cream (about ¼ inch / 6 mm thick) on the parchment-lined bottom of your 8-inch pan.
- Arrange a single layer of vanilla wafers in a circle, overlapping slightly and fitting them snugly.
- Spread another layer of cream (⅜ inch / 1 cm thick) over the wafers.
- Repeat with alternating layers of wafers and cream until you reach the top of the pan, ending with a cream layer.
- You should have 4–5 layers of wafers total.
- Gently press down with an offset spatula as you build to compact the layers slightly.
+ Show details− Hide details
Ready when: All wafers and cream are layered evenly to the top of the pan
Tip: Offset the wafers in each layer so they're not stacked directly on top of one another—this helps them soften evenly.
Chill and set
- Cover the pan loosely with plastic wrap and refrigerate for at least 8 hours, preferably overnight (up to 24 hours).
- The wafers will gradually soften as they absorb moisture from the cream, and the flavors will meld.
- The cake should feel firm when pressed gently on top.
+ Show details− Hide details
Ready when: Top feels firm to the touch; wafers are no longer crisp
Tip: Don't skip this step—the texture won't be right if the cake hasn't chilled long enough.
Unmold and garnish
- Remove the cake from the refrigerator 10 minutes before serving to take the chill off slightly for easier slicing.
- If using a springform pan, release and remove the ring.
- Run a thin knife around the edge if using a regular pan, then invert onto a serving plate and peel away the parchment.
- If you prefer, slice the cake while still in the pan and serve slices directly from the pan.
- Sprinkle the top with black sesame seeds if using.
+ Show details− Hide details
Ready when: Cake is loose from the pan and ready to plate
Tip: A warm, wet knife dipped in hot water and wiped clean between cuts creates neat slices.
Good to know
Tips
- Black sesame paste is available in Asian markets and online; it's denser and nuttier than white sesame paste. Don't substitute without tasting—the flavor is distinct.
- For a more elegant presentation, dust the top with cocoa powder in addition to the black sesame seeds for a striking contrast.
- If your pan isn't springform, line it completely with plastic wrap before building the cake—this makes unmolding much easier without a sticky mess.
- The cake's texture is the appeal: the outer wafers stay slightly crispy while the interior becomes custard-like. This develops fully in 12–24 hours, so patience rewards you.
Make ahead
Prepare up to 24 hours ahead. Build the cake in the morning and refrigerate overnight for the best texture—the wafers will be perfectly softened by the next day.
Storage & reheating
Refrigerate in an airtight container for up to 3 days. Do not freeze—the texture will become mushy when thawed. Best eaten cold, straight from the fridge.
Substitutions
- black sesame paste (unsweetened or lightly sweetened) → Tahini mixed with 1 teaspoon soy sauce and 1 teaspoon cocoa powder per ¼ cup tahini. Creates a similar nutty, earthy depth, though less authentic. Adjust soy sauce to taste.
- vanilla wafer cookies → Thin vanilla shortbread cookies or digestive biscuits. Shortbread absorbs cream more slowly; digestive biscuits are slightly more robust and less sweet.
- sweetened condensed milk → 3 tablespoons (37 g) granulated sugar mixed into the cream with the black sesame paste. Less rich and caramel-sweet, but still smooth. Use if avoiding condensed milk for dietary reasons.
- heavy whipping cream, cold → Whipped cream made from coconut cream (canned, chilled and the solid portion whipped). Dairy-free option with subtle coconut flavor. Whip the same way as heavy cream.
More no-bake desserts
See all →

Find more like this
- Meal
- Dessert
- Main ingredient
- Cream Cheese
- Diet
- VegetarianHalal
- Method
- No-Cook