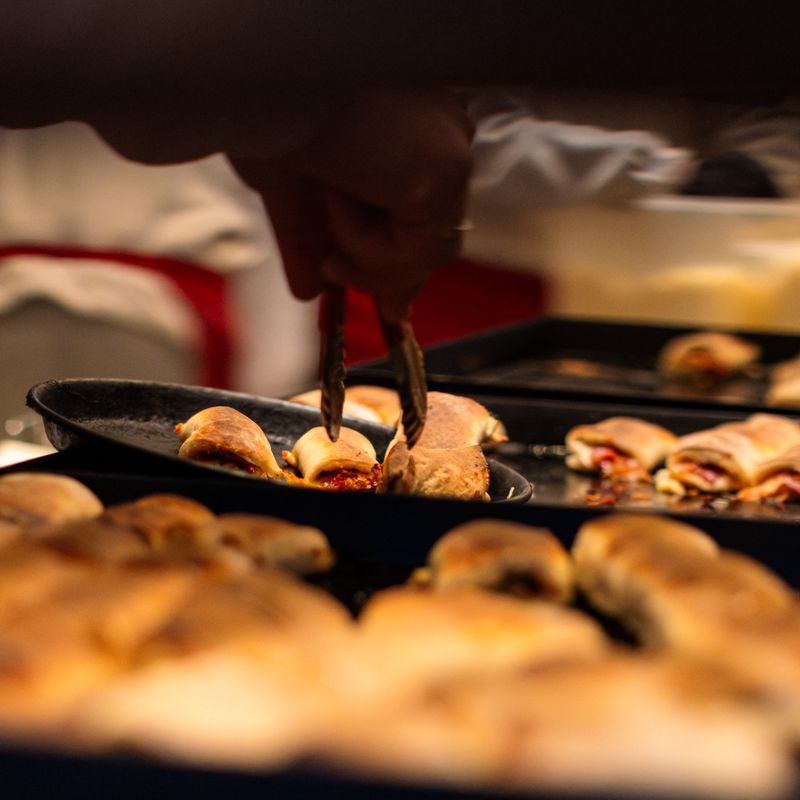
Italian Rosetta Rolls
Authentic Italian rosetta rolls (pane rosetta) are hand-shaped, crusty bread rolls with a distinctive star or wheel pattern on top. These rolls have a crispy, golden crust and a light, airy crumb. Traditionally made with just flour, water, yeast, and salt, they're perfect for sandwiches, alongside meals, or simply with good olive oil for dipping. This recipe yields beautiful rolls that rival bakery quality.
- Prep
- 20 min
- Cook
- 25 min
- Wait
- 2 hr 30 min
- Total
- 3 hr 15 min
- Makes
- 8 rolls
Steps
Before you start
- Read through the entire recipe to understand the timeline—there are two long rises
- Measure all ingredients before you start; have a scale or measuring cups ready
- Set up a warm, draft-free spot for rising (around 75°F/24°C is ideal)
- Preheat your oven to 450°F (232°C) about 15 minutes before baking
Mix the dough
- In a large mixing bowl (or stand mixer bowl), whisk together bread flour (490 g), instant yeast (2.5 g), and fine sea salt (9 g).
- Make a well in the center.
- Pour in lukewarm water (300 ml) and 1 tbsp (15 ml) olive oil.
- Mix with a wooden spoon or dough hook until a shaggy dough forms with no dry flour visible.
- The dough will be slightly sticky but workable.
+ Show details− Hide details
Ready when: No dry flour remains and all ingredients are incorporated
Tip: Do not knead hard yet; this is just the initial mixing to hydrate the flour.
Knead until smooth
- Knead the dough by hand or with a stand mixer fitted with a dough hook for 8–10 minutes until it becomes smooth, elastic, and slightly tacky but no longer sticky.
- If mixing by hand, knead on a lightly oiled or damp counter.
- The dough should feel slightly moist and spring back when poked.
+ Show details− Hide details
Ready when: Dough is smooth, elastic, and passes the windowpane test (a small piece stretches thin without tearing)
Tip: Avoid adding extra flour; the dough should feel slightly soft and moist. This hydration creates the light, airy crumb.
First rise
- Form the dough into a ball and place it in a lightly oiled large mixing bowl.
- Cover with a damp kitchen towel or plastic wrap.
- Let it rise in a warm, draft-free spot for 60 minutes until roughly doubled in size.
- You can press a floured finger into the dough; it should spring back very slowly, leaving a slight indent.
+ Show details− Hide details
Ready when: Dough has increased by about 50–75% in volume
Tip: If your kitchen is cool, place the bowl in an oven with just the light on, or use a proofing box set to 75–78°F (24–26°C).
Pre-shape and rest
- Turn the risen dough out onto a lightly oiled counter.
- Gently press out excess gas but do not deflate completely.
- Divide the dough into 8 equal pieces using a bench scraper (each piece will be roughly 110 g).
- Shape each piece into a tight ball, then cover loosely with a damp towel.
- Let rest for 10 minutes while you prepare the baking sheets.
+ Show details− Hide details
Ready when: Dough pieces are ballshaped and no longer visibly tense
Tip: Dividing evenly ensures all rolls bake at the same rate. Use a scale if possible, or cut the dough visually into equal portions.
Shape the rosetta rolls
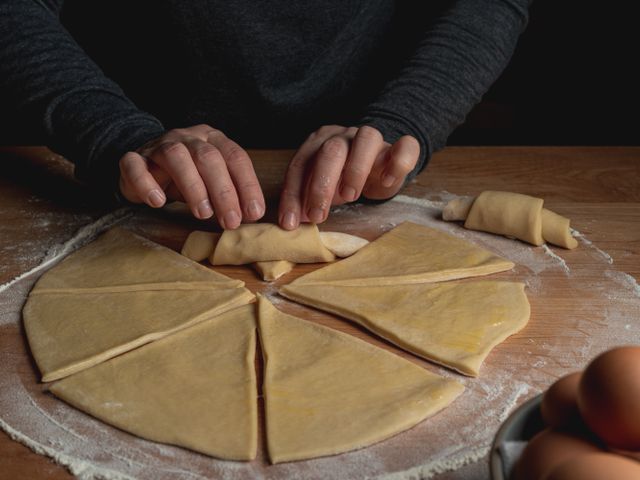
- Place a dough ball on an oiled counter.
- Using the heel of your hand, press the ball flat into a disc about 3 inches (7.5 cm) across and ½ inch (1.25 cm) thick.
- Using a sharp knife, lame, or razor blade held almost vertical, carefully cut six lines from the outer edge toward (but not all the way to) the center, creating a star or wheel pattern.
- The cuts should be about ¼ inch (6 mm) deep and spaced evenly around the disc.
- Repeat with remaining dough balls.
- As you shape each roll, place it on a parchment-lined baking sheet.
+ Show details− Hide details
Ready when: Each roll has six evenly spaced, clean cuts radiating from center to near-center
Tip: Keep your knife or blade very sharp and use a swift, confident motion. Hesitant cuts will cause the dough to drag. If you have a lame (baker's blade), this is the ideal tool.
Second rise
- Cover the shaped rolls loosely with a damp towel or plastic wrap.
- Let them rise in a warm spot for 45–50 minutes until puffy and airy.
- The rolls should increase noticeably but not quite double.
- You'll see the star cuts begin to open slightly and the dough will feel light and airy when gently pressed.
+ Show details− Hide details
Ready when: Rolls are noticeably puffier; a gentle poke leaves a slow spring-back indent
Tip: This second rise is crucial for the final texture. Avoid over-proofing or the rolls may collapse during baking.
Preheat and prepareOven 450°F / 230°C
- About 15 minutes before baking, preheat your oven to 450°F (232°C).
- If your oven has a baking stone, place it on the middle rack.
- If using baking sheets, place them in the oven to preheat as well (this helps create crispier bottoms).
- Prepare a small bowl of water for misting.
+ Show details− Hide details
Ready when: Oven beeps or reaches 450°F (232°C)
Tip: A preheated baking stone or sheet helps the rolls bake evenly with a crispy bottom crust.
Score (optional second scoring)
- Just before baking, if desired, you may make one or two shallow additional light cuts across the center of each roll for extra visual definition, or lightly brush the tops with water.
- This is optional and traditional in some regions.
+ Show details− Hide details
Ready when: Rolls look slightly dampened or have fresh shallow cuts
Tip: This step is entirely optional and does not affect the final product.
Bake with steamOven 450°F / 230°C
- Carefully transfer the rolls (still on parchment) to the preheated oven, or slide them onto the baking stone if using one.
- Immediately mist the oven walls and rolls with water 3–4 times using a spray bottle, then quickly close the door.
- Bake at 450°F (232°C) for 22–25 minutes.
- The rolls should be deep golden brown on top and the crust should feel firm and crispy.
- The bottom should also be golden and hollow-sounding when tapped.
+ Show details− Hide details
Ready when: Rolls are deep golden brown; crust is crispy; bottom is golden and hollow-sounding when tapped
Tip: Steam in the oven creates the characteristic crispy, blistered crust. Mist quickly so you don't lose oven heat.
Cool completely
- Remove the rolls from the oven and transfer them to a wire rack.
- Let them cool for at least 15–20 minutes before eating.
- The crust will continue to crisp up as they cool.
- Do not cover them while cooling, or condensation will soften the crust.
+ Show details− Hide details
Ready when: Rolls are cool to the touch and crust is completely crisp
Tip: Patience here pays off—the crust firms up significantly during cooling, and the crumb is easier to eat once fully cool.
Good to know
Tips
- The star cut pattern is more than decorative—it allows steam to escape from the interior during baking, creating a light, open crumb. Cut confidently and keep your blade sharp.
- For the signature crispy crust, steam is essential. A spray bottle works well; alternatively, you can place a pan of boiling water on the oven floor or lower rack to create steam.
- The dough hydration is relatively high (62% hydration), which is intentional for the light crumb. The dough will feel slightly tacky throughout; resist the urge to add extra flour.
- These rolls are best eaten fresh or within a few hours of baking when the crust is at its crispiest. They're wonderful with good butter, aged balsamic, or shredded mortadella or prosciutto.
Make ahead
You can refrigerate the shaped, unproofed rolls (after step 5) covered tightly with plastic wrap for up to 24 hours. Remove from the refrigerator, let them come to room temperature, and proceed with the second rise (step 6) before baking. Alternatively, freeze unbaked rolls on a tray, then transfer to a freezer bag for up to 3 months; thaw overnight in the refrigerator, then proof and bake.
Storage & reheating
Stored uncovered or in a paper bag at room temperature, the rolls keep for 2 days with a crispy crust, or wrapped in foil for up to 3 days as the crust gradually softens. Wrap cooled rolls individually in foil and freeze for up to 1 month. To refresh: wrap in foil and warm in a 350°F (175°C) oven for 8–10 minutes, or place frozen rolls directly in a 350°F (175°C) oven for 12–15 minutes, then unwrap for the last 2 minutes to re-crisp the crust.
Substitutions
- bread flour → all-purpose flour. All-purpose flour can be used, but bread flour creates a better rise and chewier crumb due to higher protein content. If using all-purpose flour, slightly reduce the water to 1 cup plus 3 tbsp (275 ml) since it absorbs less water.
- instant dry yeast → active dry yeast. Use the same weight or volume (2.5 g or ¾ tsp) active dry yeast. You may need to add an extra 5–10 minutes to the rising times since it ferments slightly more slowly.
- fine sea salt → kosher salt or table salt. If using table salt, use 1 tsp (6 g) instead, as it is denser than sea salt. Avoid iodized table salt if possible, as the iodine can interfere with fermentation.
- extra-virgin olive oil → vegetable oil or neutral oil. Neutral oils work but lack the flavor of olive oil, which is traditional. Extra-virgin olive oil imparts the best flavor.
More rolls & buns
See all →

Find more like this
- Meal
- Lunch
- Cuisine
- Italian
- Method
- Oven
- Quick & Easy
- 5 Ingredients or Less