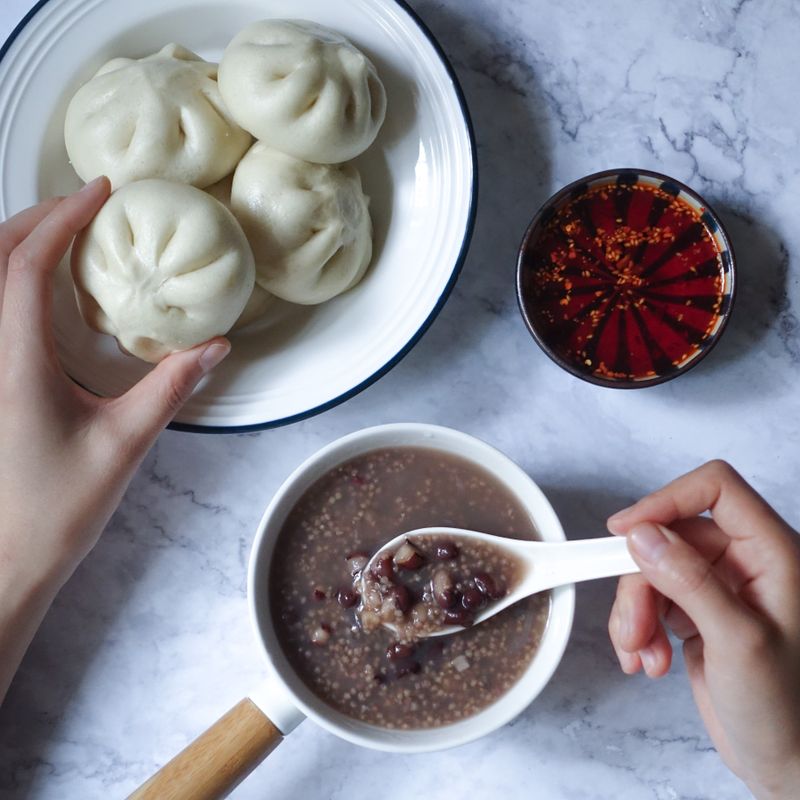
Instant Pot Steamed Custard Bun Breakfast Bread
Pillowy-soft steamed breakfast bread infused with creamy custard powder and cooked in the Instant Pot for foolproof results. These buns are tender, lightly sweet, and perfect served warm with butter or as part of a Chinese-style breakfast. The custard adds a delicate vanilla flavor and creates a moist, fine crumb that stays fresh for days.
- Prep
- 20 min
- Cook
- 25 min
- Wait
- 1 hr 30 min
- Total
- 2 hr 15 min
- Makes
- 8 buns (1 loaf pan's worth)
Steps
Before you start
- Read the entire recipe and set out all ingredients at room temperature
- Fill the Instant Pot with 1½ cups (360 ml) water and install the trivet
- Preheat the Instant Pot on Sauté mode while you prepare the batter
- Have a 7×3-inch (18×8 cm) round or 8-inch (20 cm) square silicone insert or cake pan ready
Sift dry ingredients
- In a medium bowl, whisk together the all-purpose flour (1½ cups / 180 g), custard powder (3 tablespoons / 30 g), baking powder (1½ teaspoons / 7 g), salt (¼ teaspoon / 1.5 g), and sugar (¼ cup / 50 g).
- Make sure no lumps remain in the custard powder.
- Set aside.
+ Show details− Hide details
Ready when: Mixture is uniform and lump-free
Tip: Sifting custard powder prevents clumping during baking. Don't skip this step.
Mix wet ingredients
- In a large bowl, whisk together the 2 large eggs (at room temperature) and whole milk (¾ cup / 180 ml) until well combined.
- Stir in the melted butter (3 tablespoons / 43 g) and vanilla extract (½ teaspoon / 2.5 ml).
- The mixture should be smooth and homogeneous.
+ Show details− Hide details
Ready when: Wet ingredients are fully incorporated with no visible butter streaks
Tip: Room-temperature eggs emulsify better and create a smoother batter.
Combine batter
- Pour the wet ingredient mixture into the bowl with the dry ingredients.
- Using a rubber spatula, fold gently until just combined.
- Do not overmix; small lumps are fine.
- The batter should be thick but pourable, similar to a thick pancake batter.
+ Show details− Hide details
Ready when: No visible streaks of dry flour remain; batter is smooth but slightly lumpy
Tip: Overmixing develops gluten, making the buns tough. Stop folding as soon as you don't see dry flour.
Prepare the steamer pan
- Line the bottom of your 7×3-inch (18×8 cm) round silicone cake insert or 8-inch (20 cm) square silicone pan with a piece of parchment paper.
- Lightly coat the parchment and the sides of the pan with a thin film of cooking spray or melted butter.
- Ensure the Instant Pot's trivet is already in place at the bottom with 1½ cups (360 ml) water.
+ Show details− Hide details
Ready when: Pan is evenly coated and ready to receive batter
Tip: A silicone insert conducts heat gently and makes unmolding easier than metal pans.
Pour and level batter
- Carefully pour all the batter into the prepared silicone pan.
- Gently tap the pan on the counter 2–3 times to release air bubbles and level the surface.
- The batter should reach about ¾ full.
+ Show details− Hide details
Ready when: Batter is level with no visible bubbles on the surface
Tip: Leave ¼ inch of space at the top so the bread can rise without hitting the lid.
First rise (optional but recommended)
- Cover the pan loosely with plastic wrap or a kitchen towel.
- Let it sit at room temperature for 30–40 minutes until the batter rises slightly (about ¼ to ½ inch).
- This develops flavor and creates a more tender crumb.
- If you skip this step, add 5 minutes to the cooking time in the Instant Pot.
+ Show details− Hide details
Ready when: Batter has risen noticeably and looks puffy
Tip: Skipping the rise saves time but results in a slightly denser crumb. Do this if you're in a hurry.
Prepare for steaming
- Ensure the Instant Pot is still in Sauté mode with water at a gentle simmer.
- Carefully place the silicone pan onto the metal trivet.
- It should sit evenly with at least ½ inch of clearance on all sides and below the Instant Pot's sides (so steam can circulate).
- Tear off a large piece of aluminum foil (about 12 inches / 30 cm long) and drape it loosely over the top of the batter-filled pan (don't seal it tightly; leave a small gap for steam to escape).
+ Show details− Hide details
Ready when: Pan is level on the trivet with foil loosely draped
Tip: The loose foil cap prevents water droplets from the lid dripping onto the bread while allowing steam circulation.
Lock and cook under pressure
- Close and lock the Instant Pot's lid.
- Turn the steam release valve to "Sealing" (not Venting).
- Press the "Pressure Cook" or "Manual" button and set the timer for 25 minutes at high pressure.
- The Instant Pot will take 5–7 minutes to reach pressure before cooking begins.
+ Show details− Hide details
Ready when: Timer beeps after 25 minutes; a toothpick inserted in the center comes out clean or with only a few moist crumbs
Tip: Do not open the lid during cooking. The pressure and steam are essential for the bread's texture.
Natural release and rest
- When the timer beeps, allow the Instant Pot to release pressure naturally for 10 minutes.
- Then carefully turn the steam release valve to "Venting" to vent any remaining pressure (use a long spoon or silicone valve cover to protect your hand).
- The bread will continue to set and cool as it rests.
+ Show details− Hide details
Ready when: Steam stops escaping; pressure indicator (pin) drops completely
Tip: Natural release prevents the sudden pressure drop that can cause the bread to collapse or become rubbery.
Remove and cool
- Carefully open the Instant Pot's lid and tilt it away from you to avoid steam burns.
- Using silicone tongs or a folded kitchen towel, lift the silicone pan straight out of the Instant Pot and place it on a heat-safe surface or wire rack.
- Remove the foil cap.
- Let the bread cool in the pan for 10–15 minutes so it firms up enough to unmold without breaking.
+ Show details− Hide details
Ready when: Bread pulls slightly away from the sides of the pan; a toothpick inserted in the center comes out clean
Tip: Don't cool the bread completely in the pan, or it will stick. 10–15 minutes is the sweet spot.
Unmold and serve
- Run a thin knife or offset spatula around the inside edge of the pan to loosen the bread.
- Carefully invert the pan onto a cutting board, peel away the parchment paper, and flip the bread right-side up onto a serving plate.
- If using a square pan, you can cut the bread into 8 pieces.
- For a round pan, slice into wedges or squares as desired.
- Serve warm with butter, jam, or your favorite toppings.
+ Show details− Hide details
Ready when: Bread is fully unmolded and parchment is removed cleanly
Tip: If the bread sticks, dip the pan bottom briefly in hot water, then try again. The warmth softens the outer layer just enough to release it.
Good to know
Tips
- The key to moist, tender steamed bread is not to skip the natural pressure release. Rapid pressure drops can shock the delicate crumb and cause it to become rubbery or collapse.
- For extra richness, substitute ½ cup (120 ml) of the milk with heavy cream or evaporated milk. This creates a slightly more decadent, custard-forward flavor.
- If your Instant Pot has a "Steam" button instead of "Pressure Cook," use that setting. The result will be identical.
- To make mini buns, divide the batter among 8 silicone muffin cups or a muffin tin lined with parchment, fill each ¾ full, wrap the entire muffin tin loosely in foil, and reduce cooking time to 12–15 minutes at high pressure.
Make ahead
You can prepare the batter up to 2 hours ahead and store it covered in the refrigerator. When ready to cook, let it come to room temperature (about 15 minutes), then proceed with the rise step. Alternatively, bake the bread the night before, cool completely, wrap it in plastic, and store at room temperature. Reheat gently in a steamer basket for 3–5 minutes or wrapped in foil in a 300°F (150°C) oven for 8–10 minutes.
Storage & reheating
Room temperature (wrapped in plastic or foil): 2 days. Refrigerator (in an airtight container): 4 days. Freezer (wrapped well in plastic and foil): 2 months. Reheat from refrigerator in a steamer basket (5–7 minutes) or wrapped in foil in a 300°F (150°C) oven for 10–12 minutes. Thaw frozen bread overnight in the refrigerator, then reheat as above.
Substitutions
- custard powder → 2 tablespoons (15 g) cornstarch mixed with 1 tablespoon (12 g) sugar and ¼ teaspoon vanilla powder. This mimics custard's thickening and subtle vanilla flavor, though the result will be slightly less creamy.
- whole milk → ¾ cup (180 ml) unsweetened almond milk or oat milk. Works well for dairy-free bread, though the custard flavor will be less pronounced. Use full-fat plant milk for best texture.
- unsalted butter → 3 tablespoons (45 ml) neutral oil (coconut or vegetable). Oil creates a slightly more tender crumb. Use refined coconut oil to avoid competing flavors.
- large eggs → 2 tablespoons (30 g) applesauce plus 1 tablespoon (15 ml) water. Egg-free option for allergies, though the bread will be slightly less fluffy and more cake-like.
More breakfast bakes
See all →



Find more like this
- Meal
- Breakfast
- Cuisine
- Chinese
- Diet
- VegetarianHalal
- Method
- Instant Pot
- Quick & Easy
- Easy