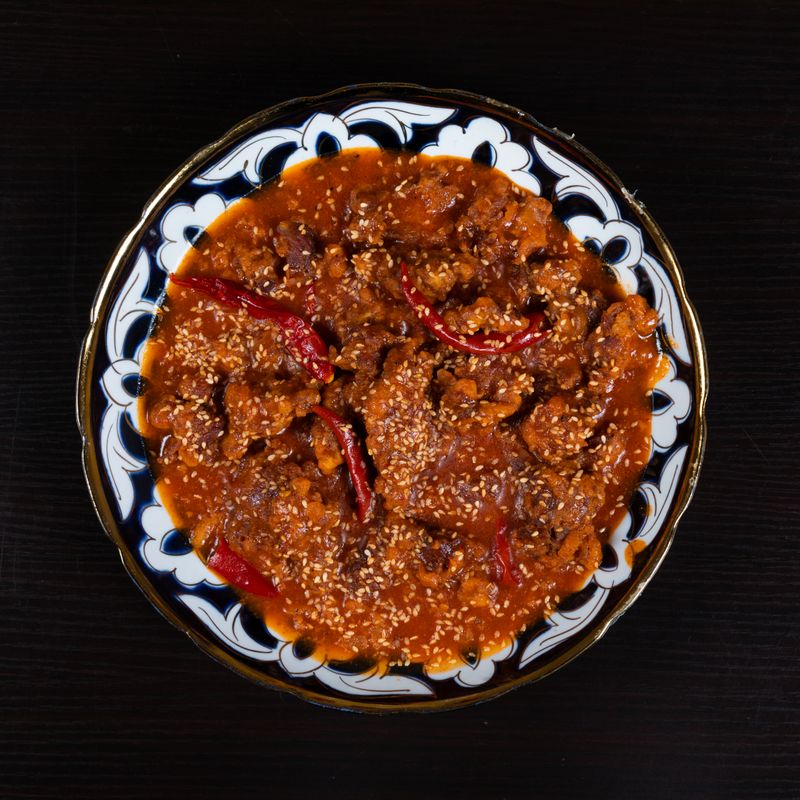
Instant Pot Ancho and Chocolate Beef Chili
A rich, deeply flavored beef chili built on a smooth ancho chile puree and deepened with dark chocolate for complexity. The Instant Pot cooks the meat and beans together in a fraction of traditional time, perfect for a weeknight dinner that tastes like it simmered for hours.
- Prep
- 20 min
- Cook
- 25 min
- Wait
- 45 min
- Total
- 1 hr 30 min
- Makes
- 6 to 8 servings
Steps
Before you start
- Have all ingredients measured and prepped before you start—this recipe moves quickly once the Instant Pot is on
- Make sure your Instant Pot lid seals properly and the gasket is clean
- Read through the soaking and pressure-cooking times so you understand the full timeline
Toast and soak ancho chiles
- Remove the stems and seeds from the ancho chiles by hand or with a knife—discard the seeds but save any loose chile flesh.
- Heat a large skillet over medium heat.
- Place the cleaned chiles in the pan and toast them for 30–45 seconds on each side, just until fragrant and pliable; do not let them burn or they'll turn bitter.
- Transfer the toasted chiles to a bowl, pour the hot water over them, and let sit for 10–15 minutes until very soft.
- Once softened, transfer the chiles and their soaking liquid to a blender and blend on high until completely smooth, about 1–2 minutes.
- Set the puree aside.
+ Show details− Hide details
Ready when: Chiles are very soft and blend into a completely smooth puree with no visible pieces
Tip: Toast the chiles only briefly—even 1 minute too long will make them taste burnt and bitter. You want them pliable and fragrant, not crispy.
Brown the ground beef
- Set the Instant Pot to sauté mode on high heat.
- Add the 1 tablespoon of oil and let it heat for about 30 seconds.
- Add the ground beef in batches so it browns rather than steams; work in two batches if needed, breaking up the meat with a wooden spoon as it cooks.
- This should take 8–10 minutes total.
- Once all the beef is browned and no longer pink, drain off most of the excess fat, leaving about 1 tablespoon in the pot.
+ Show details− Hide details
Ready when: All beef is browned with no visible pink; internal temperature reaches at least 160°F (71°C)
Tip: Don't crowd the pot—if you add all the beef at once, it will release moisture and steam instead of browning. Patience here creates a better flavor base.
Sauté onion and garlic
- Add the diced onion to the pot with the browned beef and stir well.
- Cook for 3–4 minutes, stirring occasionally, until the onion begins to soften and turn translucent.
- Add the minced garlic and cook for another 1 minute, stirring, until fragrant.
+ Show details− Hide details
Ready when: Onion is translucent and soft; garlic is fragrant and no longer raw-smelling
Stir in chile puree and tomatoes
- Pour the ancho chile puree into the pot and stir well for about 1 minute, making sure it's fully incorporated with the beef and aromatics.
- Pour in the crushed tomatoes with all their juice and stir until everything is well combined.
+ Show details− Hide details
Ready when: Mixture is evenly combined with no streaks of chile puree or isolated tomato
Add liquid, beans, and spices; pressure cook
- Pour in the 2 cups of beef broth and stir well.
- Add the drained kidney beans, cumin, and Mexican oregano.
- Stir until everything is well combined and the spices are evenly distributed.
- Press "Cancel" or "Keep Warm" to turn off sauté mode.
- Lock the lid in place, making sure the vent is set to "Sealing" (not "Venting").
- Set the Instant Pot to high pressure for 15 minutes.
- The pot will take 5–8 minutes to come to pressure before the timer starts.
- Once the cooking time is complete, the pot will beep.
- For a gentler finish that preserves the texture of the beans, allow the pressure to release naturally for 10 minutes, then carefully release any remaining steam by switching the vent to "Venting." Alternatively, you can do a quick release immediately by switching the vent to "Venting," but natural release is preferable here.
+ Show details− Hide details
Ready when: Instant Pot beeps when high pressure cook time is complete; pressure is fully released when steam no longer escapes from the vent
Tip: Natural release (letting pressure drop on its own) is gentler on the beans and produces a better texture. Quick release will work, but the beans may become slightly mushy.
Finish with chocolate and season
- Once the pressure has fully released and you can safely open the lid, stir in the finely chopped dark chocolate until it's completely melted and incorporated—the residual heat will melt it without additional cooking, taking about 1–2 minutes of stirring.
- Taste the chili and season with salt and black pepper to your liking.
- The chocolate won't taste sweet; instead, it adds depth and richness to the other flavors.
- Ladle into bowls and serve hot, garnished with fresh cilantro and a squeeze of lime juice if desired.
+ Show details− Hide details
Ready when: Chocolate is completely melted and no longer visible as pieces; chili is hot throughout
Tip: Use high-quality, high-cocoa dark chocolate (70% or higher)—cheap chocolate can taste waxy. The chocolate adds complexity, not sweetness, so don't be tempted to add more unless you genuinely want a deeper, more intense flavor.
Good to know
Tips
- Don't toast the ancho chiles too long. Even 45 seconds per side is the upper limit; burning them even slightly will make the entire chili taste bitter and acrid.
- The dark chocolate is a secret ingredient that adds depth and complexity rather than sweetness. Use 70% cacao or higher to avoid an overly sweet, cloying result.
- For a spicier chili, add 1–2 diced jalapeños with the onion, or increase the ancho chiles to 8–10. For milder, use just 4–5 chiles.
- Make-ahead note: This chili tastes even better the next day or two as the flavors develop and meld. Don't hesitate to make it ahead.
Make ahead
This chili actually improves after a day or two as the flavors meld. Make it up to 2 days ahead, store in the refrigerator in an airtight container, and reheat gently on the stove over medium heat or in the microwave until warmed through (about 8–10 minutes on the stove).
Storage & reheating
Refrigerator: Store in an airtight container for up to 5 days. Reheat on the stove over medium heat, stirring occasionally, until warmed through. Freezer: Portion into freezer-safe containers and freeze for up to 3 months. Thaw overnight in the refrigerator, then reheat on the stove or in the microwave. The chili may be slightly thinner after freezing—add a splash of broth if needed.
Substitutions
- dried ancho chiles → pasilla chiles or guajillo chiles. Pasilla chiles are slightly earthier and less spicy; guajillo chiles are fruitier and milder. Start with the same weight and adjust to taste, as each has its own level of heat.
- dark chocolate (70% cacao or higher) → unsweetened cocoa powder (1½ tablespoons), bittersweet chocolate, or Mexican mole paste. If using cocoa powder, whisk it in at the end off heat to avoid clumping. Use high-quality chocolate for best results; avoid using candy-style chocolate.
- canned kidney beans → black beans, pinto beans, or a mix. Each bean brings a slightly different flavor and texture, but all work well. Adjust cooking time slightly if using dried beans instead of canned.
- low-sodium beef broth → chicken broth or vegetable broth. Chicken broth will give a lighter flavor; vegetable broth will be slightly less rich. The chili will still taste delicious.
More chili
See all →

Find more like this
- Meal
- Dinner
- Cuisine
- Mexican
- Main ingredient
- Ground Beef
- Method
- Instant Pot
- Quick & Easy
- One-Pot