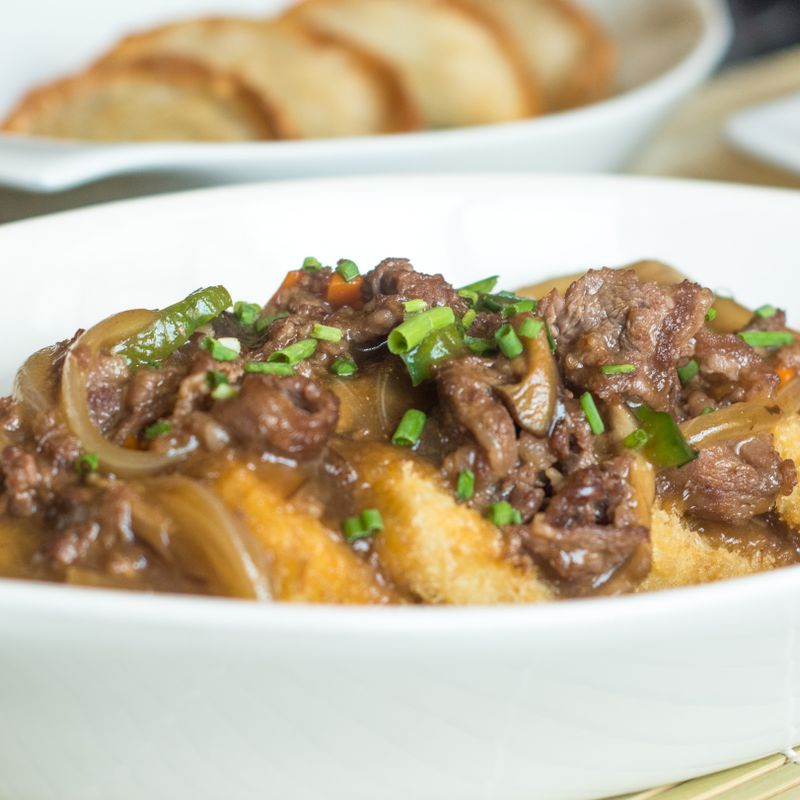
Instant Pot Beef Chili with Beer and Caramelized Onions
A rich, deeply flavorful beef chili made quick in the Instant Pot, featuring onions caramelized to golden perfection and a bottle of beer that adds subtle complexity. The pressure cooker tenderizes the beef while spices bloom and flavors meld together. Serve with your favorite toppings for a customizable, comforting meal.
- Prep
- 15 min
- Cook
- 38 min
- Wait
- 20 min
- Total
- 1 hr 15 min
- Makes
- 6 servings (about 1.5 cups each)
Steps
Before you start
- Read through the entire recipe and timing before beginning
- Gather all ingredients and prep (mise en place)
- Ensure your Instant Pot is clean and the sealing ring is in place
- Have optional toppings ready (sour cream, cheese, cilantro, jalapeños)
Prepare vegetables and spices
- Dice the yellow onions into ½-inch pieces.
- Mince the garlic cloves.
- Drain the kidney beans in a colander and rinse under cold water, shaking to remove excess moisture.
- Measure out the chili powder, cumin, and paprika into a small bowl.
- Have salt and pepper measured and ready.
- Set everything nearby before turning on the Instant Pot.
+ Show details− Hide details
Ready when: All vegetables are diced, spices are measured, and beans are rinsed
Tip: Mise en place (having everything prepped and ready) makes the cooking process smooth and ensures nothing is overlooked.
Caramelize the onions
- Turn the Instant Pot to sauté mode and select "more" for high heat.
- Add the vegetable oil and let it heat until shimmering, about 1 minute.
- Add the diced onions in a relatively even layer.
- Cook for 15-20 minutes, stirring every 3-4 minutes, until the onions are deeply golden brown and very soft.
- The edges should show deep caramelization and the onions should have reduced significantly in volume.
+ Show details− Hide details
Ready when: Onions are deep golden brown throughout, very tender, and have reduced to about one-third their original volume
Tip: Don't rush this step. Caramelized onions are essential to the chili's depth and richness. Stir every few minutes to prevent sticking. This is where the flavor foundation is built.
Brown the ground beef
- Add the ground beef to the pot with the caramelized onions.
- Break it apart thoroughly with a wooden spoon as it cooks, stirring frequently, and cook for 8-10 minutes until the beef is completely browned with no pink visible anywhere.
- If more than about 2 tablespoons of fat have accumulated in the pot, carefully tilt the pot and spoon off the excess, leaving it behind.
+ Show details− Hide details
Ready when: Beef is uniformly browned throughout with no pink remaining
Tip: Break the beef into small, even pieces as it cooks to ensure even browning. Draining excess fat prevents a greasy final chili and helps the flavors shine.
Bloom the spices
- Add the minced garlic, chili powder, cumin, and paprika to the pot.
- Stir constantly for about 1-2 minutes until the spices are very fragrant and fully incorporated with the beef and onions.
- The mixture should smell deeply aromatic, like a chili spice blend.
+ Show details− Hide details
Ready when: Spices are very aromatic and evenly distributed throughout the beef mixture
Tip: Blooming the spices in fat releases their essential oils and deepens their flavors significantly. Stir constantly to avoid burning them.
Deglaze with beer
- Reduce the Instant Pot to sauté mode "normal" for medium heat.
- Pour the entire bottle of beer into the pot.
- Use a wooden spoon to scrape the bottom of the pot thoroughly, dissolving and lifting all the browned, caramelized bits that stuck during the beef browning.
- Let the mixture simmer for about 2 minutes, stirring occasionally.
+ Show details− Hide details
Ready when: Browned bits are fully dissolved and the beer is slightly reduced, fragrant, and well incorporated
Tip: Scraping the pot well during deglazing ensures you capture all the flavorful browned bits (fond). These add tremendous depth to the final chili.
Add remaining ingredients
- Add the beef broth, crushed tomatoes, and diced tomatoes with their juice to the pot.
- Add the salt and black pepper.
- Stir well for 2-3 minutes, ensuring everything is combined and nothing is sticking to the bottom of the pot.
- Then gently fold in the drained kidney beans and stir until evenly distributed.
- Check the pot bottom one more time – it must be completely clear with nothing stuck.
+ Show details− Hide details
Ready when: All ingredients are combined, the mixture is uniform, and the pot bottom is completely clear with no stuck food
Tip: It is critical to ensure nothing is stuck to the pot bottom before pressure cooking. Stuck food can prevent the pot from building proper pressure and can affect cooking.
Pressure cook the chili
- Press the cancel button to turn off sauté mode.
- Close and lock the lid of the Instant Pot.
- Set the pot to high pressure for 15 minutes.
- The pot will take about 5 minutes to come to pressure (you'll see the float valve rise as pressure builds), then cook at pressure for 15 minutes.
- Once the 15-minute cooking time ends, the Instant Pot will beep.
+ Show details− Hide details
Ready when: Instant Pot beeps to signal the cooking cycle is complete
Release pressure and finish
- Once the Instant Pot signals completion, allow the pressure to release naturally for 5 minutes – you should not see steam escaping during this time.
- After 5 minutes, carefully turn the steam release valve to "venting" to quick release any remaining pressure.
- Wait a few seconds, then remove the lid carefully, tilting it away from your face.
- Taste the chili and adjust the salt and pepper as needed.
- If you prefer a thicker consistency, turn the Instant Pot back to sauté mode and simmer for 5-10 minutes to reduce.
+ Show details− Hide details
Ready when: Pressure is fully released, lid comes off easily, and chili has reached your desired thickness
Tip: Allow the full 5-minute natural release before quick releasing. This gentle release keeps the beef tender and prevents splattering.
Serve with toppings
- Ladle the hot chili into serving bowls.
- Top each serving generously with a dollop of sour cream, a sprinkle of shredded cheddar cheese, and fresh cilantro as desired.
- Add sliced jalapeños for extra heat if preferred.
- Serve immediately while hot.
+ Show details− Hide details
Ready when: Chili is portioned into bowls and topped as desired
Good to know
Tips
- The caramelized onions are essential to this recipe's depth and complexity. Don't skip or rush this step – spend the full 15-20 minutes getting them golden brown and soft. This is where the magic happens.
- This chili tastes significantly better the next day after the flavors have melded together. Make it ahead if possible and you'll be rewarded with an even more delicious result.
- For a thicker chili, after pressure cooking, switch to sauté mode and simmer for 5-10 minutes uncovered to reduce the liquid to your preferred consistency.
- For a spicier chili, add cayenne pepper, fresh minced jalapeños, or a dash of hot sauce after cooking. Start with a little and adjust to taste.
Make ahead
Yes. The chili can be made up to 2 days in advance. Cool completely, then store in an airtight container in the refrigerator. The flavors actually deepen after a day or two. Reheat on the stovetop over medium heat, stirring occasionally, or use the Instant Pot sauté mode.
Storage & reheating
Refrigerate in an airtight container for up to 4 days. Freeze in airtight containers or freezer bags for up to 3 months. To reheat from frozen, thaw overnight in the refrigerator, then warm on the stovetop over medium heat or in the Instant Pot sauté mode. You can also reheat from frozen directly: place in the Instant Pot with ¼ cup water, seal the lid, cook on high pressure for 5 minutes, then quick release.
Substitutions
- Ground beef → Ground pork or ground lamb. Use 1:1 ratio. The cooking time remains the same, and the chili will have a different but equally delicious flavor profile.
- Beer (light lager or pilsner, 12 oz bottle) → Beef broth or chicken broth. Use 12 oz (355 ml) of broth as a 1:1 replacement. The chili will be less complex but still rich and satisfying.
- Kidney beans, canned → Black beans, pinto beans, or a combination. Use the same amount of canned beans. Any combination works well.
- Chili powder → 2 tablespoons paprika + 1 tablespoon cumin + 1 teaspoon cayenne pepper. Adjust cayenne to your desired spice level. This blend mimics chili powder's warmth and depth.
More chili
See all →

Find more like this
- Meal
- Dinner
- Cuisine
- American
- Main ingredient
- Ground BeefKidney Beans
- Diet
- Sugar-Free
- Method
- Instant Pot
- Quick & Easy
- One-Pot