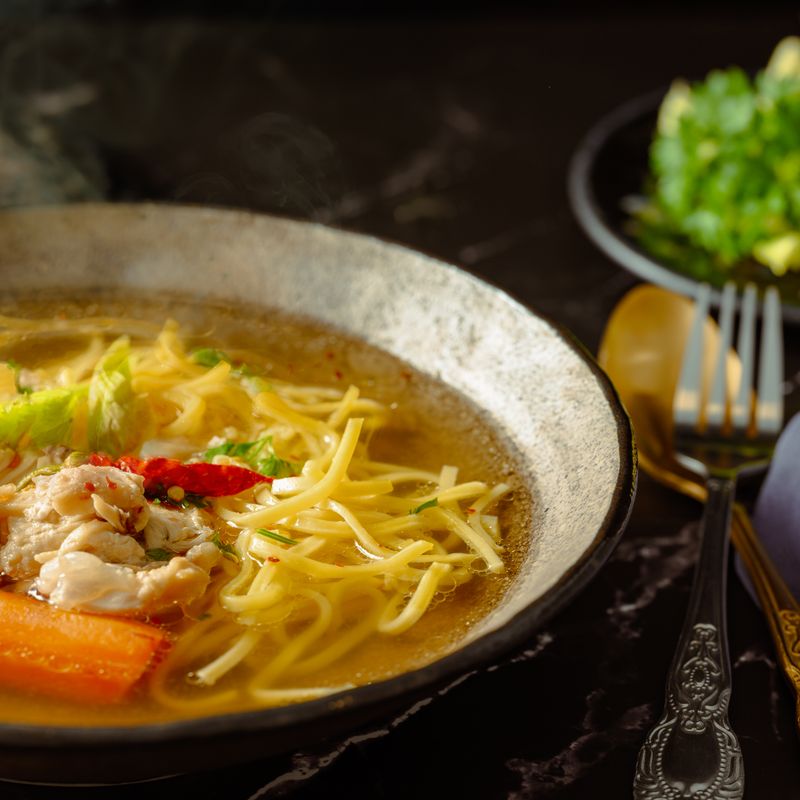
Homemade Chicken Broth
A clear, golden, deeply savory chicken broth made with bone-in chicken parts and a simple mirepoix. Gentle simmering and a good skim give a clean flavor that works for soup, sauces, rice, and sipping.
- Prep
- 20 min
- Cook
- 3 hr
- Wait
- 2 hr 30 min
- Total
- 5 hr 50 min
- Makes
- About 2.5 quarts (2.4 liters), 8 cups of 10 fl oz each
Steps
Before you start
- Use a pot of at least 8 quarts (7.5 liters); the chicken and vegetables must be covered by about 1 inch (2.5 cm) of water.
- Keep the skin on the chicken for flavor and body, but expect a fat layer on top that you will chill and remove.
- Plan on about 6 hours total, mostly hands-off: 3 hours simmering plus cooling and chilling time.
- Do not salt the broth heavily; season it later according to how you use it.
Prep the ingredients
- Rinse the chicken parts under cold running water and pat off any loose bits.
- Quarter the unpeeled onions through the root end, cut the carrots and celery into 2-inch (5 cm) pieces, and halve the head of garlic crosswise.
- Leave all skins on; onion skins add golden color.
+ Show details− Hide details
Ready when: Everything is cut into large chunks that will not dissolve during a long simmer.
Tip: Large pieces keep the broth clear; small pieces break down and cloud it.
Start in cold water
- Place the chicken in an 8-quart (7.5 L) stockpot and add the 4 quarts (3.8 L) cold water.
- The chicken should be covered by about 1 inch (2.5 cm).
- Set the pot over medium-high heat, uncovered, and bring slowly to a bare simmer, which takes about 25 to 30 minutes.
+ Show details− Hide details
Ready when: Small bubbles break the surface here and there and gray foam collects on top; the water is not at a full rolling boil.
Tip: Starting with cold water draws out more flavor and makes impurities easier to skim.
Skim the foam
- As soon as the foam rises, use a slotted spoon or skimmer to remove the gray-white scum from the surface and discard it.
- Keep skimming for about 5 minutes, until little new foam forms.
- Reduce the heat to low so the liquid barely trembles.
+ Show details− Hide details
Ready when: The surface looks mostly clear with only a few specks of foam and fat.
Tip: Never let the broth boil hard; boiling emulsifies fat and foam into the liquid and makes it cloudy.
Add vegetables and aromatics
- Add the onions, carrots, celery, garlic, bay leaves, peppercorns, parsley stems if using, and the kosher salt.
- Nudge the ingredients down so they are submerged.
- Add a little hot water if anything pokes above the surface.
+ Show details− Hide details
Ready when: All solids are submerged and the liquid returns to a gentle simmer within a few minutes.
Tip: If you plan to reduce the broth later, use the lesser amount of salt or skip it.
Simmer gently
- Partially cover the pot, leaving a 1-inch (2.5 cm) gap for steam.
- Keep the heat low so only a bubble or two breaks the surface every second or two.
- Simmer for 3 hours, skimming any fat or foam once or twice.
- Stir as little as possible.
+ Show details− Hide details
Ready when: The liquid is golden and fragrant, the chicken meat is falling off the bones, and the volume has reduced by about one-quarter.
Tip: If the liquid drops below the solids, top up with hot water.
Check the chicken
- Near the end of simmering, lift a thigh or drumstick with tongs and check that the meat is completely tender and pulls easily from the bone.
- An instant-read thermometer in the thickest part should read well above 165°F (74°C).
+ Show details− Hide details
Ready when: Meat shreds easily with no resistance and the bones feel loose in their joints.
Tip: The cooked meat will be pale and flavorless after this long; save it for pet food or discard rather than for chicken salad, or shred it early (see tips).
Strain the broth
- Set a fine-mesh strainer over a large heatproof bowl or second pot.
- Use tongs to remove the large pieces of chicken and vegetables first and discard them, then carefully ladle or pour the broth through the strainer.
- Do not press on the solids.
+ Show details− Hide details
Ready when: The strained broth is clear and golden with no bits of vegetable or bone.
Tip: Pressing on the solids pushes cloudy particles through. Let gravity do the work.
Cool quickly
- Set the bowl or pot of broth in a sink filled with ice water, stirring occasionally, until it is lukewarm, about 30 minutes.
- Do not leave hot broth at room temperature for more than 2 hours.
+ Show details− Hide details
Ready when: The broth is lukewarm or cooler to the touch, below about 90°F (32°C).
Tip: Divide into shallow containers to cool even faster.
Chill and defat
- Transfer the broth to airtight containers, cover, and refrigerate for at least 4 hours or overnight.
- The fat will rise and solidify into a white layer.
- Lift or scrape it off with a spoon and discard or save it.
- The broth below may be jelly-like, which is a sign of good collagen.
+ Show details− Hide details
Ready when: A solid fat cap sits on top and lifts off in sheets or pieces.
Tip: The jelly melts as soon as the broth is warmed.
Taste and store
- Warm a small amount of broth and taste.
- Add more salt only if needed for your use.
- Portion into containers or jars, leaving 1 inch (2.5 cm) of headspace if freezing, and refrigerate or freeze as directed.
+ Show details− Hide details
Ready when: The broth tastes rich and savory, with a clean chicken flavor and gentle sweetness.
Tip: Freeze in 1-cup and 2-cup portions so you can thaw only what you need.
Good to know
Tips
- For a richer, gelatin-heavy broth, include 1 lb (450 g) of wings or feet in place of an equal weight of other parts.
- To use the chicken meat, remove the thighs or drumsticks after 45 minutes, pull off the meat, and return the bones to the pot to finish simmering.
- For deeper color and flavor, roast the chicken parts and vegetables at 425°F (220°C) for 35 to 40 minutes before adding to the pot.
- Keep the simmer gentle at all times; a hard boil is the most common cause of cloudy, greasy broth.
Make ahead
"Make the broth up to 4 days ahead and keep it refrigerated, or freeze for up to 3 months. The overnight chill is part of the recipe, so it is ideal to make a day in advance."
Storage & reheating
Refrigerator: up to 4 days in airtight containers. Freezer: up to 3 months in freezer-safe containers with 1 inch (2.5 cm) headspace; thaw overnight in the fridge. Reheat on the stovetop over medium heat until steaming and bubbling at the edges, at least 165°F (74°C). Do not store at room temperature for more than 2 hours.
Substitutions
- bone-in, skin-on chicken parts (wings, backs, thighs, or drumsticks) → 1 leftover roasted chicken carcass plus 1 lb (450 g) wings. Gives a darker, roastier broth; reduce simmer time to 2 to 2.5 hours.
- yellow onions → 2 leeks, white and green parts, well washed. Gives a slightly sweeter, milder flavor.
- fresh flat-leaf parsley stems → 4 sprigs fresh thyme. Adds a more earthy, herbal note.
- kosher salt → Omit entirely. Produces an unsalted broth that is more flexible for sauces and reductions; salt the finished dish instead.
More broths
See all →
Find more like this
- Meal
- Lunch
- Main ingredient
- Chicken
- Method
- Stovetop
- Quick & Easy
- EasyMake AheadFreezer Friendly