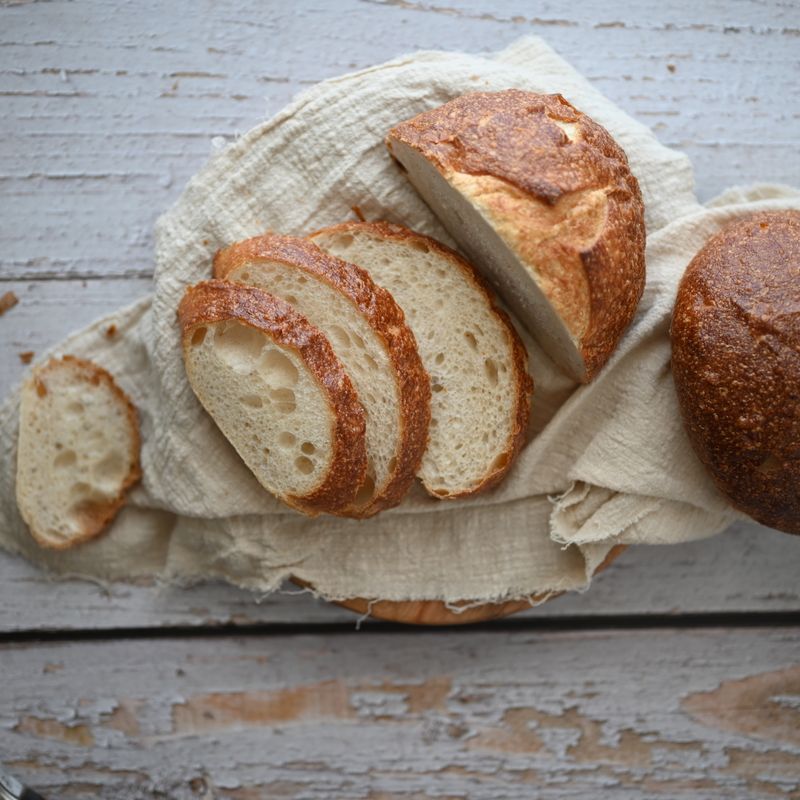
Classic Sourdough Bread
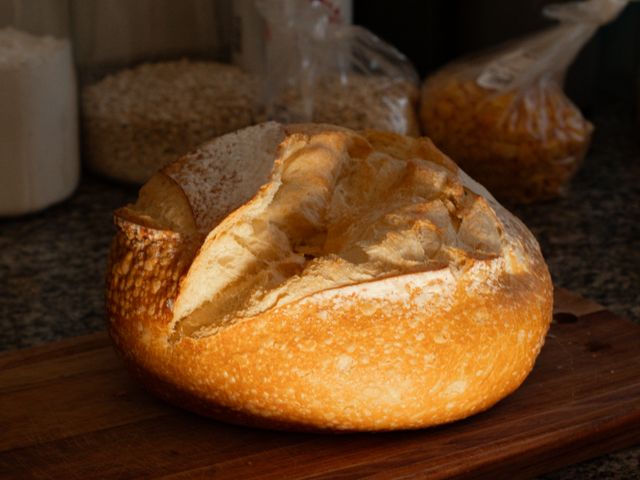
A crackly-crusted, open-crumbed country loaf made with just bread flour, water, active starter and salt, shaped by hand, proofed overnight in the fridge and baked in a screaming-hot Dutch oven.
- Prep
- 43 min
- Cook
- 45 min
- Wait
- 19 hr 25 min
- Total
- 20 hr 53 min
- Makes
- 1 round loaf (about 10 slices)
Steps
Before you start
- Feed your starter 4–8 hours before mixing (equal weights starter, flour, water). It should be bubbly, domed and at least doubled in volume; a spoonful should float in water.
- Plan the schedule: mixing to a fully proofed loaf takes about 8 hours, then 10–14 hours in the fridge. Mix in the morning, shape in the late afternoon, and bake the next morning.
- Weigh ingredients with a digital scale; sourdough is much more reliable by weight than by cup.
- Aim for a dough temperature of about 76°F (24°C). In a cool kitchen, use warmer water and expect longer rising times; in a hot kitchen, expect shorter times.
- Have a 5- to 6-quart (4.7–5.7 L) Dutch oven with a lid ready that can handle 500°F (260°C).
Mix and rest dough
- In a large bowl, combine the bread flour and lukewarm water.
- Squeeze and mix with wet hands until no dry flour remains and the dough looks shaggy.
- Cover the bowl with a damp towel or plate and let it rest for 45 minutes at room temperature (this rest, called an autolyse, lets the flour hydrate and makes the dough easier to handle).
+ Show details− Hide details
Ready when: No dry flour remains and the dough looks shaggy but cohesive
Tip: Use water around 85°F (29°C); cold water slows fermentation noticeably.
Add starter and salt
- Spoon the starter over the rested dough and sprinkle the salt on top.
- Wet your hand and pinch and squeeze the dough about 20 times, then fold it over itself repeatedly in the bowl for 2–3 minutes to fully incorporate both.
- The dough will feel sticky and slightly slack at this point.
- Cover and note the time: this is the start of bulk fermentation.
- If you like, mark the dough's level on the bowl with a rubber band or tape.
+ Show details− Hide details
Ready when: Starter and salt are fully worked in with no visible streaks or gritty salt
Tip: Starter that hasn't peaked or doubled will give a dense loaf, so check it before you begin.
Stretch and fold
- Over the next 2 hours, do 4 sets of stretch and folds, 30 minutes apart.
- For each set, wet your hand, grab one edge of the dough, stretch it up until it resists, and fold it over the center.
- Turn the bowl a quarter turn and repeat 3 more times (4 folds per set).
- Cover the bowl again after each set.
- The dough will become smoother, stronger and more elastic with each set.
+ Show details− Hide details
Ready when: Dough holds a rounded shape, feels smooth and springs back slightly when poked
Tip: Stop stretching if the dough tears; just fold it gently and move on.
Finish bulk rise
- Leave the dough undisturbed, covered, at about 76°F (24°C) for another 2 to 3 hours.
- The bulk fermentation is done when the dough has grown about 50–75% in volume, the surface is domed and jiggly, you can see bubbles around the edges and along the glass of the bowl, and the edges pull cleanly from the sides.
- Total bulk time is usually 4½–5 hours from adding the starter.
+ Show details− Hide details
Ready when: Dough has grown 50–75%, has a domed, bubbly top and jiggles like set gelatin when the bowl is shaken
Tip: Judge by the dough, not the clock. Under-fermented dough bakes up dense and gummy; over-fermented dough turns slack and sticky.
Preshape and rest
- Lightly flour a work surface and scrape the dough out, letting it release on its own.
- Using a bench scraper, fold the edges toward the center, then flip the dough seam-side down.
- Drag it toward you on the counter, rotating it, until it forms a taut round ball.
- Let it rest uncovered for 25 minutes; it will relax and spread slightly.
+ Show details− Hide details
Ready when: Dough forms a loose round with a smooth top that holds its shape
Tip: Use as little flour as you can on the counter; some friction helps create surface tension.
Shape final loaf
- Generously dust a 9-inch (23 cm) banneton, or a towel-lined bowl, with rice flour.
- Lightly flour the top of the dough, flip it over so the floured side is down, and gently stretch the left and right sides to the center, then the bottom up and the top down, like folding an envelope.
- Flip it seam-side down and drag it toward you to tighten into a round.
- Flip it over once more so the seam side faces up and lower it into the banneton, seam up.
- Pinch the seam closed if it's open.
+ Show details− Hide details
Ready when: Surface of the dough is taut and smooth with no loose folds
Tip: Rice flour doesn't absorb moisture and prevents sticking far better than wheat flour.
Proof in refrigerator
- Cover the banneton with a plastic bag or shower cap and refrigerate for 10–14 hours (12 is ideal).
- The cold slows fermentation, develops tangy flavor and firms up the dough so it's easy to score.
- It's ready when it springs back slowly when you press a floured fingertip in about ½ inch (1 cm); a fast, full spring back means it needs a bit more time.
+ Show details− Hide details
Ready when: A floured finger poke springs back slowly and leaves a slight dent
Tip: Bake straight from the fridge; warm dough is floppy and hard to score.
Preheat Dutch ovenOven 500°F / 260°C
- Place the empty lidded Dutch oven on the center rack and preheat the oven to 500°F (260°C) for a full 45 minutes, so the pot is extremely hot.
- The dough stays in the fridge while this happens.
+ Show details− Hide details
Ready when: Oven has reached 500°F (260°C) and the pot has heated for at least 45 minutes
Tip: Check that the Dutch oven's lid knob is rated for 500°F (260°C); swap a plastic knob for a metal one if needed.
Score and loadOven 450°F / 230°C
- Lay the parchment sheet over the banneton and invert the dough onto it, so the smooth bottom is now on top.
- Brush off excess rice flour.
- With a razor blade held at a 30-degree angle, score one confident curved slash about ½ inch (1 cm) deep along one side of the loaf.
- Wearing oven mitts, lift the hot lid off the pot, lower the dough on the parchment into the pot, cover, and put it in the oven.
- Immediately reduce the oven temperature to 450°F (230°C).
+ Show details− Hide details
Ready when: Score is open and clean, and the dough is safely in the covered pot
Tip: The pot is extremely hot, so work quickly and carefully, and never touch the sides. Trim excess parchment so it doesn't hang out of the pot.
Bake coveredOven 450°F / 230°C
- Bake covered at 450°F (230°C) for 20 minutes.
- The trapped steam keeps the crust soft so the loaf can expand fully.
+ Show details− Hide details
Ready when: Loaf has risen high and the score has opened, but the crust is still pale
Tip: Resist lifting the lid early; the steam is what creates the oven spring and blistered crust.
Bake uncoveredOven 450°F / 230°C
- Carefully remove the lid (steam will escape, so keep your face back).
- Continue baking, uncovered, at 450°F (230°C) for 22–25 minutes, until the crust is deep mahogany brown.
- Lift the loaf out of the pot using the parchment and check the internal temperature with an instant-read thermometer.
+ Show details− Hide details
Ready when: Crust is deep golden-brown to mahogany and the center registers 205–210°F (96–99°C)
Tip: If the bottom is browning too fast, move the pot to a higher rack for the last 10 minutes.
Cool completely
- Transfer the loaf to a wire rack and cool for at least 1 hour before slicing.
- You may hear the crust crackle as it cools.
- The crumb continues to set as it cools, and cutting too early gives a gummy interior.
+ Show details− Hide details
Ready when: Loaf feels barely warm on the bottom and sounds hollow when tapped
Tip: Slice with a serrated bread knife using a gentle sawing motion.
Good to know
Tips
- Use the "float test" and the rise of the starter, not the calendar, to decide if it's ready; a sluggish starter is the most common cause of flat loaves.
- A warmer kitchen speeds up bulk fermentation substantially; at 80°F (27°C) it may be done in 3½ hours, while at 68°F (20°C) it can take 7 or more.
- For an extra-crisp crust, leave the loaf in the turned-off oven with the door cracked for 5 minutes after baking.
- Keep a log of times and temperatures; adjusting for your own kitchen is the quickest way to consistently great bread.
Make ahead
"The shaped dough can stay in the fridge for up to 18 hours before baking; for a more sour flavor, go for the longer end. You can also bake the loaf a day ahead and re-crisp it before serving."
Storage & reheating
"Room temperature: keep cut side down on a cutting board or in a paper bag or bread box for up to 3 days. Refrigerator: not recommended, as it makes bread stale faster. Freezer: slice, wrap airtight and freeze up to 3 months; toast slices straight from frozen. To refresh a whole loaf, bake at 350°F (175°C) for 8–10 minutes."
Substitutions
- bread flour → all-purpose flour. The loaf will be a little less chewy and the dough slightly slacker; reduce the water to 300 ml (1¼ cups) to compensate.
- bread flour → up to 100 g whole wheat flour replacing part of the bread flour. Adds nuttier flavor; add 1–2 tablespoons extra water since whole wheat absorbs more.
- rice flour (or extra bread flour) → bread flour mixed half-and-half with cornmeal or semolina. Use for dusting the banneton; wheat flour alone tends to stick more.
- fine sea salt → kosher salt (Diamond Crystal), 2½ tsp (12 g). Flakes are less dense than fine sea salt, so more by volume is needed; weigh it when possible.
More sourdough
See all →

Find more like this
- Meal
- Breakfast
- Method
- Oven
- Quick & Easy
- 5 Ingredients or LessMake Ahead