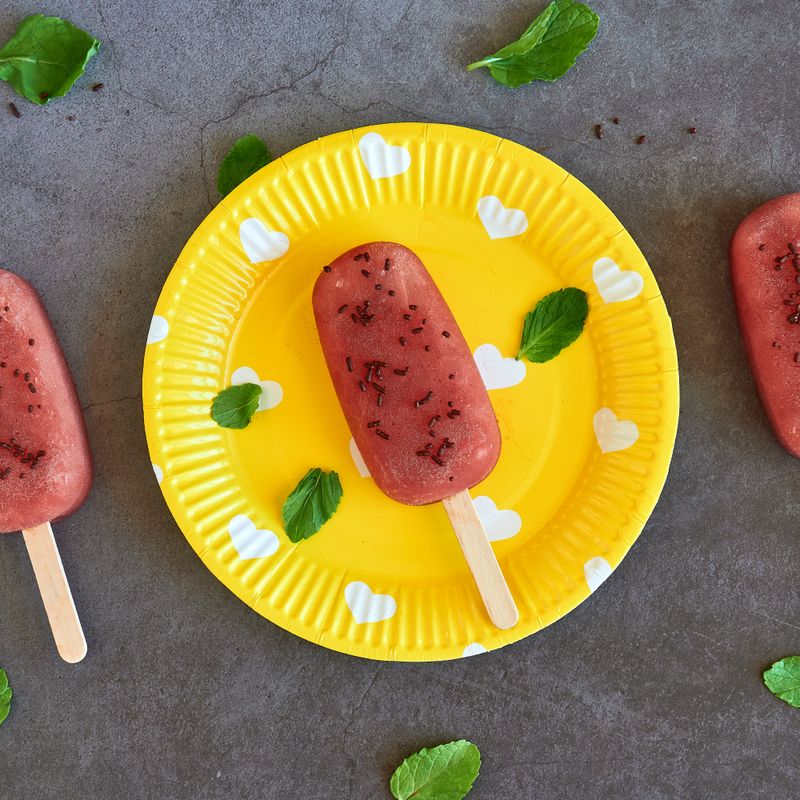
Budget Strawberry Shortcake Popsicles
Creamy, fruity popsicles layered with strawberry puree and a sweet cake-infused cream base—a budget-friendly spin on strawberry shortcake. Store-bought pound cake and fresh berries create an indulgent treat that costs just pennies per pop.
Steps
Before you start
- Chill all dairy products in the fridge for at least 1 hour before starting
- Place popsicle molds and sticks in the freezer so they're cold when you fill them
- If your strawberries are watery, drain them on paper towels for 10 minutes before pureeing
Puree the strawberries
- Add the hulled strawberries and 1 tablespoon (12 g) of the sugar to a blender.
- Blend on high speed for 1–2 minutes until completely smooth.
- If the puree is very watery, strain it through a fine mesh sieve into a bowl, pressing gently on the solids to extract juice; discard the pulp.
- This yields about ¾ cup (180 ml) of puree.
+ Show details− Hide details
Ready when: Puree is uniformly smooth with no visible berry chunks
Tip: Straining removes excess water and prevents icy popsicles; skip this step if your berries are naturally firm and not juicy.
Make the cream base
- In a clean blender, combine the cold milk, heavy cream, pound cake cubes, remaining 2 tablespoons (25 g) sugar, and vanilla extract.
- Blend on high speed for 2–3 minutes, pausing once to scrape down the sides, until the mixture is smooth and pale.
- The cake will break down completely and create a sweet, vanilla-tinged cream base with cake flavor throughout.
+ Show details− Hide details
Ready when: Mixture is completely smooth with no visible cake chunks and a light beige color
Tip: Do not overblend once smooth or the cream base may become too thin; stop as soon as you reach a uniform texture.
Layer into molds
- Pour about 2 tablespoons (30 ml) of the cream base into the bottom of each of the 8 popsicle molds.
- Spoon about 1½ tablespoons (22 ml) of strawberry puree over the cream layer in each mold.
- Top with another 2 tablespoons (30 ml) of cream base.
- Repeat layers if your molds are deep: another 1½ tablespoons (22 ml) strawberry puree, then a final 2 tablespoons (30 ml) cream.
- The goal is 3–4 visible layers of pink and cream.
+ Show details− Hide details
Ready when: Each mold is filled to just below the rim with visible layers of cream and strawberry pink
Tip: Fill slowly and use a small spoon to pour; layering prevents the ingredients from mixing too much and keeps the flavors distinct.
Insert sticks and freeze
- Insert a popsicle stick into the center of each mold, pushing it down so the stick stands upright and stable.
- Cover the molds (if they have a cover) or loosely tent with plastic wrap to prevent ice crystals from forming on the surface.
- Place in the freezer for 6–8 hours or overnight until completely frozen and solid.
+ Show details− Hide details
Ready when: Popsicles are hard to the touch and do not move when you gently tug the stick
Tip: Do not insert the stick until the first layer has set for 30 minutes; otherwise it may tilt. If your molds do not have a built-in cover, plastic wrap prevents frost.
Unmold and serve
- Remove the popsicles from the freezer.
- If the molds do not eject easily, run warm water over the outside of the molds for 10–15 seconds to loosen them.
- Gently pull each stick to slide the popsicle out.
- Serve immediately and enjoy.
+ Show details− Hide details
Ready when: Popsicles slide out of the molds easily and are fully hardened
Tip: Warm water on the outside mold works better than warm water inside; do not use hot water, which may crack rigid plastic molds.
Good to know
Tips
- Blend the cream base and strawberry puree separately (not together) so they remain distinct and create visible layers; mixing them together yields a uniform pink popsicle with less visual appeal.
- If you have no blender, crush the pound cake by hand and whisk it with the milk, cream, sugar, and vanilla until smooth; you will have some small crumbs, which is fine.
- For a lower-fat version, replace the heavy cream with 1 cup (240 ml) whole milk for a thinner but still tasty popsicle.
- Fresh strawberries in season are cheapest; frozen strawberries are the next best budget option and often yield better results because they are less watery.
Make ahead
Store frozen popsicles in the molds for up to 2 weeks before unmolding, or unmold and transfer to a freezer-safe container or zip-top bag for up to 1 month. To speed up freezing slightly, insert sticks after 2 hours instead of waiting longer.
Storage & reheating
Room temperature: not applicable (popsicles melt quickly at room temperature). Freezer (in molds): up to 2 weeks. Freezer (unmolded, in a bag or container): up to 1 month. These popsicles are best eaten straight from the freezer; do not refreeze after thawing.
Substitutions
- fresh strawberries, hulled → 1 cup (300 g) frozen strawberries, thawed and drained. Frozen berries work well and are often cheaper. Thaw and drain them thoroughly to remove excess liquid, or your popsicles may be too icy.
- store-bought pound cake → 4 oz (115 g) yellow cake mix prepared according to package directions, cooled and crumbled, or 4 oz (115 g) store-bought vanilla or yellow cake. Any mild vanilla or yellow cake works; avoid chocolate or strongly flavored cakes that would overpower the strawberry.
- heavy whipping cream → 1 cup (240 ml) half-and-half or evaporated milk. These give a thinner, less creamy base but still produce good popsicles. Use half-and-half for a middle ground between whole milk and heavy cream.
- vanilla extract → omit or replace with ¼ teaspoon almond extract or a pinch of salt. A tiny pinch of salt heightens the strawberry flavor if vanilla is omitted.
More frozen desserts
See all →
Find more like this
- Meal
- Dessert
- Diet
- VegetarianHalal
- Method
- No-Cook