Budget Sourdough Discard Crispy Potato and Herb Cakes
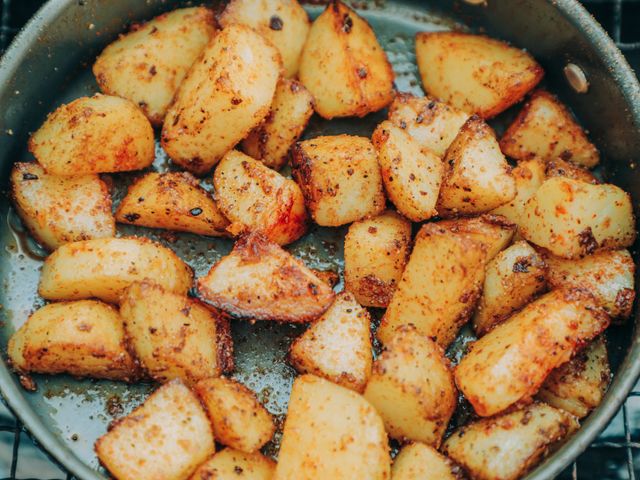
Golden, crispy-bottomed potato and herb cakes made with sourdough discard, pan-fried until the edges are lacy and caramelized. The sourdough starter adds tang and helps the cakes stay moist inside while crisping beautifully outside. Perfect for breakfast, lunch, or as a side dish, and a smart way to use discard from your sourdough starter maintenance.
- Prep
- 20 min
- Cook
- 20 min
- Wait
- 10 min
- Total
- 50 min
- Makes
- 8 cakes (2 per serving)
Steps
Before you start
- Peel and grate potatoes just before mixing to prevent browning
- Have sourdough discard at room temperature
- Line a plate with paper towels for draining the finished cakes
Prepare and drain potatoes
- Peel the potatoes and grate them coarsely using a box grater or food processor.
- Place the grated potatoes in a clean kitchen towel or cheesecloth and squeeze firmly over the sink to remove as much liquid as possible.
- This step is crucial—the drier the potatoes, the crispier your cakes will be.
- Squeeze multiple times if needed.
+ Show details− Hide details
Ready when: Potatoes are as dry as you can make them
Tip: Grate potatoes last, just before mixing, to prevent oxidation and browning
Mix the batter
- In a large bowl, combine the room-temperature sourdough discard with the lightly beaten egg and mix until smooth.
- Add the drained potatoes, flour, minced garlic, sliced chives, salt, and black pepper.
- Stir until all ingredients are evenly combined and the mixture is thick.
- Do not overmix; a slightly shaggy texture is fine.
+ Show details− Hide details
Ready when: All ingredients are combined and mixture has rested
Tip: The resting time allows the sourdough to hydrate and helps the cakes hold together better
Heat skillet and fat
- Place a 10-inch nonstick or cast-iron skillet over medium-high heat.
- Add 1.5 tablespoons (21 g) of the butter and 1 tablespoon (15 ml) of oil to the skillet.
- Once the butter is melted and the mixture begins to foam and shimmer (about 2 minutes), the pan is ready.
+ Show details− Hide details
Ready when: Butter froths and oil shimmers across the pan
Tip: A properly heated pan is essential for crispy, golden cakes; cold pans will produce soggy results
Form and fry first batch
- Using your hands or two spoons, form 4 cakes from the batter, each about 3 inches (7.5 cm) in diameter and ½ inch (1.25 cm) thick.
- Gently slide them into the hot skillet—they should sizzle immediately.
- Fry for 4–5 minutes on the first side without moving them, until the bottom is deep golden brown and crispy-looking.
- The edges should pull away slightly from the pan.
+ Show details− Hide details
Ready when: Bottom is deep golden brown and crispy, edges appear dry
Tip: Resist the urge to move the cakes; undisturbed contact with the hot pan creates the crispy crust
Flip and finish first batch
- Using a flexible spatula or fish turner, carefully flip each cake.
- Fry for 3–4 minutes on the second side until that side is also golden brown and crispy.
- The cakes are done when both sides are deep golden and the edges are lacy and caramelized.
- Transfer to a paper-towel-lined plate.
+ Show details− Hide details
Ready when: Both sides are golden brown and edges are crispy and lacy
Tip: The second side cooks faster than the first, so watch closely to avoid burning
Fry remaining cakes
- Wipe any stuck bits from the skillet if needed.
- Add the remaining 1.5 tablespoons (21 g) butter and 1 tablespoon (15 ml) oil.
- Once foamy, form and fry the remaining 4 cakes, following the same process: 4–5 minutes on the first side, 3–4 minutes on the second side, until golden and crispy.
- Transfer to the paper-towel-lined plate.
+ Show details− Hide details
Ready when: All cakes are golden brown and crispy on both sides
Tip: Keep the first batch warm (loosely cover with foil) while frying the second batch
Good to know
Tips
- Sourdough discard does not need to be fed or active to work here—use unfed discard straight from the fridge. The flour and egg provide the structure; the discard adds moisture, tang, and helps bind the potatoes.
- For extra crispiness, chill the formed mixture for 30 minutes before frying. The cold mixture contracts less and creates a crisper exterior.
- Serve immediately with sour cream, crème fraîche, smoked salmon, or a simple green salad for a light lunch.
- If cakes break apart while frying, the mixture is too wet or the heat is too high. Add 1–2 tablespoons more flour, let the mixture rest 5 minutes, and try again at a slightly lower heat.
Storage & reheating
Store cooled cakes in an airtight container in the refrigerator for up to 3 days. To reheat, warm in a 375°F (190°C) oven for 8–10 minutes until crispy again, or pan-fry in a lightly buttered skillet over medium heat for 2–3 minutes per side. Do not microwave, as it will soften the crust. Not recommended for freezing, as the texture deteriorates.
Substitutions
- fresh chives → Fresh dill, scallion greens, or parsley. Any mild, fresh herb works here. Dill is particularly good with potatoes; use the same amount
- russet potatoes → Yukon Gold or Maris Piper potatoes. Waxy potatoes hold together well but are slightly less fluffy inside; squeeze extra moisture before cooking
- all-purpose flour → Whole wheat flour or spelt flour. Use the same amount; cakes will be heartier. Whole wheat may absorb slightly more moisture
- unsalted butter → Ghee or additional oil. Ghee creates an even richer, more nutty flavor. Use the same amount by volume