Beet and Cheese Manakish
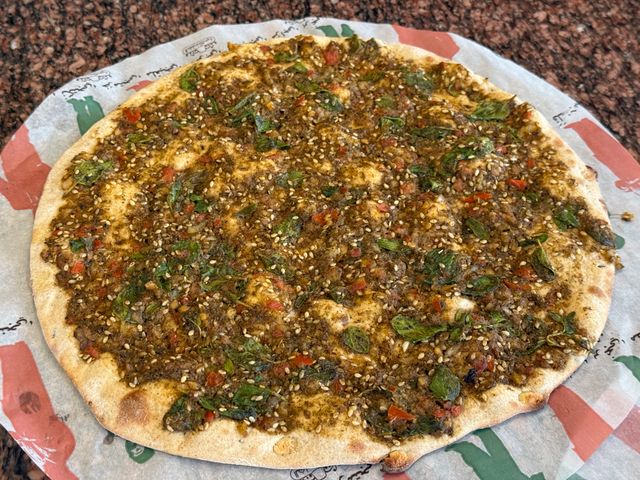
A vibrant Lebanese flatbread topped with roasted beets, creamy white cheese, and fresh dill. The dough is tender and slightly chewy, brushed with olive oil and baked until the edges are golden and crispy. Earthy beets pair beautifully with the tang of cheese and aromatic herbs.
- Prep
- 45 min
- Cook
- 35 min
- Wait
- 1 hr 30 min
- Total
- 2 hr 50 min
- Makes
- 6 manakish (about 8 inches each)
Steps
Before you start
- Roast the beets ahead of time (up to 2 days prior) and refrigerate to save time on the day
- Bring all dough ingredients to room temperature for even mixing
- Preheat the oven to 450°F (230°C) 15 minutes before baking
- Line your baking sheet with parchment paper to prevent sticking
Roast the beetsOven 400°F / 205°C
- Preheat your oven to 400°F (200°C).
- Wrap each unpeeled beet in foil and place on a baking sheet.
- Roast for 45–60 minutes, until a fork pierces the center with minimal resistance.
- Remove and cool until you can handle them, then peel away the skin under cold running water (the skin slips off easily).
- Slice the beets into thin rounds or half-moons, about ¼ inch (6 mm) thick.
- Refrigerate until ready to use.
+ Show details− Hide details
Ready when: Fork slides through the center easily; flesh is tender throughout
Tip: Roast beets 1–2 days ahead to save time on the day and for easier peeling when fully cooled
Mix the dough
- In a large mixing bowl (or the bowl of a stand mixer), combine the flour, instant yeast, salt, and sugar.
- Pour the warm water and olive oil into the dry ingredients.
- Using a stand mixer with the dough hook attachment, mix on medium-low speed for 8–10 minutes until the dough comes together and is smooth and slightly sticky (it should not be wet).
- If kneading by hand, bring the dough together in the bowl, then knead on a lightly floured surface for 10 minutes.
- The dough should be soft enough to stick slightly to your finger when you press it, but not so wet that it tears easily.
+ Show details− Hide details
Ready when: Dough is smooth, cohesive, and slightly sticky; it springs back slowly when poked
Tip: Use warm water (100–110°F) to activate the yeast properly; water that is too hot will kill the yeast
First rise
- Shape the dough into a ball and place it in a lightly oiled bowl.
- Cover with plastic wrap or a clean kitchen towel.
- Let it rise at room temperature (68–72°F / 20–22°C) for 45–60 minutes, until the dough has grown by about half its original size and has a dimpled, puffy appearance when gently prodded.
+ Show details− Hide details
Ready when: Dough has increased by about 50%; a gentle poke leaves a slight indentation
Tip: Avoid a warm spot (above 75°F) or the dough may rise too quickly and become overproofed, resulting in flat manakish
Portion the dough
- Turn the dough out onto a lightly floured surface.
- Divide it into 6 equal pieces (about 100 g each).
- Shape each piece into a smooth ball by gently pulling the edges underneath.
- Place the balls on the prepared baking sheet, spacing them 3 inches (8 cm) apart.
- Cover loosely with plastic wrap.
+ Show details− Hide details
Ready when: Six evenly sized balls with taut, smooth surfaces
Tip: Use a kitchen scale if you have one to divide the dough evenly; this ensures even baking
Second rise and shape
- Let the dough balls rest uncovered for 15 minutes at room temperature to relax the gluten.
- Then gently flatten each ball into a disk about ¼ inch (6 mm) thick and 7–8 inches (18–20 cm) in diameter.
- Use your fingertips to dimple and stretch the dough outward; avoid pressing down the edges too hard so they rise slightly during baking.
- Arrange the shaped disks on the baking sheet.
+ Show details− Hide details
Ready when: Six evenly flattened rounds with dimpled surfaces and slightly raised edges
Tip: Don't use a rolling pin; gentle finger-stretching gives the dough a better texture and allows the center to stay thicker than the edges
Brush with olive oil
- Using a pastry brush, lightly coat the entire surface of each flattened dough disk with about 1 teaspoon (5 ml) of the olive oil.
- This prevents the toppings from making the dough soggy and helps the edges brown.
+ Show details− Hide details
Ready when: All surfaces are evenly coated with a light sheen of olive oil
Tip: Don't oversaturate; a thin, even layer is all you need
Add toppings
- Working with one manakish at a time, arrange a thin layer of sliced roasted beets over the oiled surface, leaving a ½-inch (1 cm) border around the edges.
- Sprinkle roughly 1 tablespoon (15 g) of crumbled white cheese over the beets on each manakish.
- Finish with about 1 teaspoon (3 g) of chopped fresh dill.
- Repeat with the remaining manakish.
- If using sumac, set it aside for after baking.
+ Show details− Hide details
Ready when: All six manakish are evenly topped with beets, cheese, and dill
Tip: Don't overload the toppings or the bread will be soggy; less is more for authenticity
Bake the manakishOven 450°F / 230°C
- Preheat your oven to 450°F (230°C) if not already done.
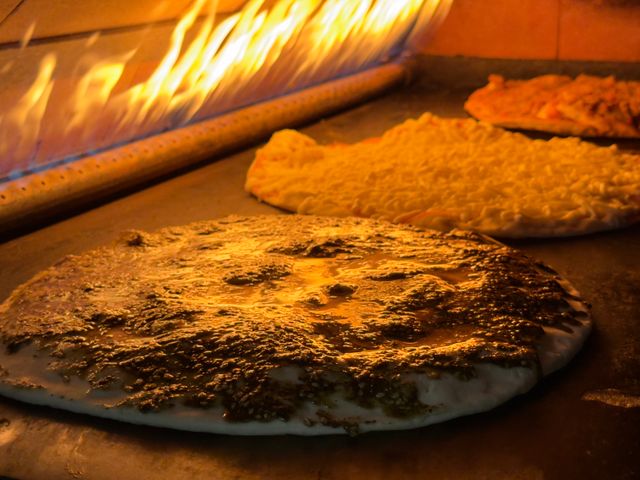
- Bake the topped manakish on the center rack for 12–15 minutes, until the edges and underside are golden brown and the cheese is warm and slightly softened.
- The dough should sound hollow when you tap the underside.
- Rotate the baking sheet halfway through if your oven has hot spots.
+ Show details− Hide details
Ready when: Edges are deep golden brown; the bottom sounds hollow when tapped; cheese is warm
Tip: Check at 12 minutes; oven temperatures vary, and overbaking will dry out the bread
Cool and garnish
- Transfer the baking sheet to a cooling rack or set it on the stovetop to cool for 3–5 minutes.
- This allows the bread to firm up slightly so it's easier to handle.
- If using sumac, sprinkle a pinch (about ⅛ teaspoon per manakish) over each warm manakish for a bright, tangy finish.
- Serve warm or at room temperature.
+ Show details− Hide details
Ready when: Bread has set but is still warm to the touch
Tip: Manakish are best eaten within 2 hours of baking while the crust is still crispy; sumac is optional but adds a traditional tangy accent
Good to know
Tips
- For a deeper beet flavor, toss the roasted, sliced beets in a pinch of salt and let them sit for 15 minutes; pat dry before topping to avoid excess moisture.
- Manakish are traditionally eaten fresh and warm. If you have leftovers, wrap them loosely in foil and warm gently in a 300°F (150°C) oven for 10 minutes to restore a crispy crust.
- The dough is forgiving; if you can't bake immediately after shaping, cover and refrigerate for up to 8 hours. The cold retardation actually improves flavor and makes the dough easier to stretch.
- For a crunchier crust, brush the edges (not the center) with a second light coat of olive oil just before baking.
Make ahead
Beets can be roasted and refrigerated up to 2 days ahead. Dough can be mixed and refrigerated for up to 8 hours (shape and bake straight from the fridge, adding 2–3 minutes to baking time). For best results, assemble and bake on the day of serving.
Storage & reheating
Store cooled manakish in an airtight container at room temperature for up to 24 hours. Reheat gently in a 350°F (175°C) oven for 5–7 minutes until warm. Freeze unbaked, topped manakish for up to 2 months; bake straight from frozen, adding 3–5 minutes to baking time. Do not freeze baked manakish; they become dry upon thawing.
Substitutions
- white cheese (feta, akkawi, or ricotta salata) → labneh (thick strained yogurt), Halloumi, or fresh ricotta. Use an equal weight. Labneh will add a tangier flavor; Halloumi holds its shape and won't melt as much.
- fresh dill → fresh mint, parsley, or a mix of both. Use the same weight. Mint adds a cooler, more aromatic note; parsley is milder.
- medium red or golden beets → roasted golden beets or a mix of red and golden beets. Golden beets are slightly sweeter and milder; the visual effect is stunning with both colors.
- bread flour → all-purpose flour. Use the same weight. All-purpose flour will yield a slightly softer, less chewy crust.