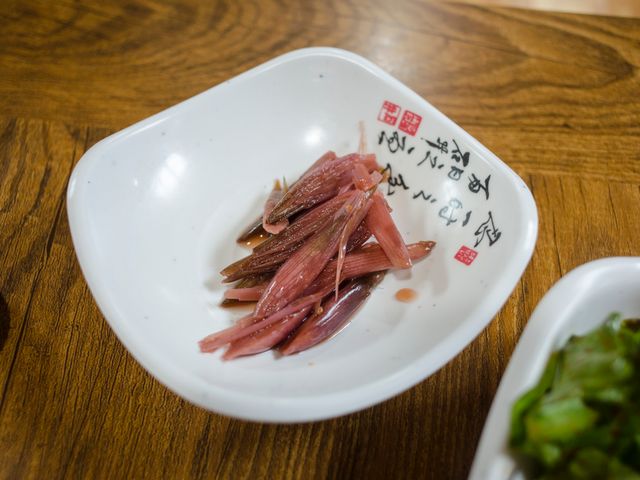
30-Minute Pickled Brussels Sprout Leaves with Smoked Paprika
Crispy, tangy pickled brussels sprout leaves infused with smoky paprika, garlic, and bay leaf. This quick-pickle method yields tender-crisp leaves in just 30 minutes, ready to serve as a Spanish-inspired condiment or side dish. The smoked paprika adds a subtle warmth and depth that pairs beautifully with the vinegar's brightness.
- Prep
- 12 min
- Cook
- 3 min
- Wait
- 15 min
- Total
- 30 min
- Makes
- About 3 cups (packed) pickled leaves
Steps
Before you start
- Have a clean 1-quart (946 ml) glass jar ready
- Read the pickling liquid timing—quick pickles improve in flavor as they cool
- Peel and separate brussels sprout leaves just before pickling so they stay crisp
Prepare the brussels sprout leaves
- Place the brussels sprouts on a cutting board.
- Using a paring knife, peel away the outer leaves layer by layer, discarding any yellowed or damaged outer leaves.
- Once you reach the dense core, cut it in half lengthwise and peel the remaining tender leaves.
- Discard the core.
- Halve any very large leaves so all pieces are roughly 1½ to 2 inches (4–5 cm) long.
- You should have about 4 cups (lightly packed) of leaves.
- Rinse briefly and pat dry with a clean kitchen towel.
+ Show details− Hide details
Ready when: All leaves are separated and halved; excess moisture is patted away
Tip: Dry the leaves well so the pickling brine coats them evenly and absorbs into the jar without diluting.
Build the pickling liquid
- In a small saucepan (1½ to 2 quart / 1.4 to 1.9 L), combine the red wine vinegar, water, smoked paprika, kosher salt, and black peppercorns.
- Stir well to dissolve the salt and distribute the paprika evenly.
- Do not heat yet; you're mixing the dry and liquid components.
+ Show details− Hide details
Ready when: Salt dissolves and paprika color is evenly distributed
Tip: Stir the paprika in thoroughly at this stage so it doesn't settle to the bottom of the jar and leave the top leaves unpickled.
Warm the brine
- Place the saucepan over medium heat and bring the mixture to a gentle simmer, stirring occasionally.
- Once small bubbles break the surface, remove from heat.
- The liquid should be hot but not violently boiling; a gentle simmer takes about 1–2 minutes.
+ Show details− Hide details
Ready when: Small bubbles rise gently from the bottom and surface
Tip: A gentle simmer extracts flavor from the paprika without boiling off the vinegar's acidity.
Layer the jar
- While the brine heats, place the crushed garlic cloves and bay leaves on the bottom of the clean 1-quart (946 ml) glass jar.
- Add the red pepper flakes if using.
- Pack the brussels sprout leaves into the jar, pressing them down gently so they fit snugly but are not compressed so hard that they bruise.
- Leave about ½ inch (1 cm) of headspace at the top.
+ Show details− Hide details
Ready when: Leaves are evenly packed; garlic and bay leaves rest on the bottom
Tip: Pack the jar firmly enough so the leaves stay submerged once you pour the hot brine, but gently enough to preserve their delicate texture.
Pour the hot brine
- Carefully pour the hot pickling liquid directly over the brussels sprout leaves, ensuring they are fully covered.
- The hot liquid will help set the color and flavor.
- Pour until the leaves are covered by about ¼ inch (6 mm) of brine.
- If any paprika has settled to the bottom of the saucepan, pour that in first to ensure even distribution.
+ Show details− Hide details
Ready when: All leaves are submerged under brine
Tip: Keep the brine hot so it penetrates the leaves quickly; if it cools, reheat gently before pouring.
Cool and pickle
- Cover the jar loosely with its lid (do not seal tightly while hot, as steam needs to escape).
- Allow the pickled leaves to cool at room temperature for 15 minutes.
- As they cool, they will absorb the brine and develop flavor.
- After 15 minutes, seal the jar tightly and refrigerate.
- The pickles will continue to develop flavor and become more tender-crisp as they cool.
+ Show details− Hide details
Ready when: Leaves are cooled to room temperature and have absorbed brine flavor
Tip: Do not seal the hot jar tightly; allow steam to escape to prevent the lid from sealing in a vacuum, which can make it difficult to open.
Good to know
Tips
- For the crispest leaves, work with fresh, firm brussels sprouts. Older, looser sprouts will yield softer pickles.
- This quick-pickle method works at room temperature because the hot brine and high vinegar content create an immediate acid environment. No water bath canning is needed.
- Serve these as a tapa alongside cured ham, cheese, and olives, or use them as a bright, tangy side to roasted meats.
- If you prefer a spicier pickle, add ½ teaspoon of red pepper flakes or one small dried chili.
Make ahead
Prepare up to 3 days ahead. The pickles improve in flavor as they sit. Serve cold or at room temperature.
Storage & reheating
Store in the sealed jar in the refrigerator for up to 3 weeks. The brine may turn cloudy over time, but the pickles remain safe and flavorful. Do not freeze; freezing softens the leaves. Serve cold or bring to room temperature.
Substitutions
- red wine vinegar → White wine vinegar or sherry vinegar. Both are slightly less tannic; use the same quantity. Sherry vinegar adds subtle sweetness.
- smoked paprika (pimentón) → Sweet (unsmoked) paprika or hot paprika. Sweet paprika loses the smoky depth; hot paprika adds heat without smoke. Use the same quantity.
- fresh or dried bay leaves → Fresh thyme or oregano sprigs. Use 1 teaspoon of dried herbs or 1 fresh sprig per bay leaf. These add herbaceous notes instead of the subtle woodiness of bay.
- red pepper flakes → Whole dried red chilies or a pinch of cayenne pepper. One small dried chili replaces ¼ teaspoon flakes. Cayenne is hotter, so use half as much.