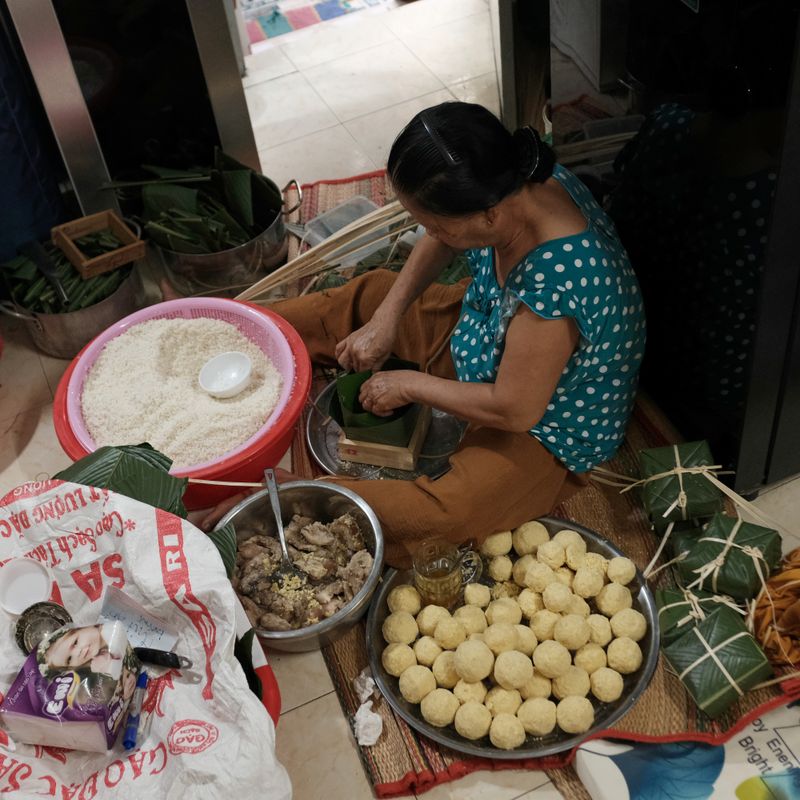
Vietnamese Sticky Rice and Mung Bean Morning Cake
A tender, subtly sweet breakfast cake with a sticky rice flour base infused with coconut cream and topped with a rich mung bean center. Palm sugar caramelizes at the edges while sesame seeds add nutty crunch. Serve warm or at room temperature with tea for an authentic Vietnamese morning treat.
- Prep
- 25 min
- Cook
- 40 min
- Wait
- 45 min
- Total
- 1 hr 50 min
- Makes
- One 8-inch (20 cm) square cake, cut into 8 pieces
Steps
Before you start
- Soak mung beans for at least 2 hours or overnight if possible
- Preheat oven to 350°F (175°C) and line an 8×8-inch (20×20 cm) square baking pan with parchment paper
- Have all ingredients at room temperature
Cook mung bean filling
- In a medium saucepan, combine drained soaked mung beans with 1 cup (240 ml) of water.
- Bring to a boil over medium-high heat, then reduce to medium-low and simmer for 15–18 minutes, stirring occasionally, until the beans are very soft and start to break down.
- Add 0.25 cup (50 g) palm sugar and 0.125 tsp (0.75 g) salt, stirring constantly for 2–3 minutes until the sugar dissolves and the mixture becomes creamy and paste-like.
- If it seems too wet, cook for another 1–2 minutes to reduce excess liquid.
- The filling should be thick enough to hold its shape on a spoon.
- Let it cool slightly while you prepare the cake batter.
+ Show details− Hide details
Ready when: Beans are falling apart, mixture is thick and paste-like
Tip: Break the beans down as they cook by stirring; this helps them mash and thicken naturally without needing a blender.
Mix cake batter base
- In a large mixing bowl, whisk together 1.5 cups (180 g) sticky rice flour, 0.75 cup (150 g) palm sugar, 1.5 tsp (7 g) baking powder, 0.25 tsp (1.5 g) salt, and 0.5 tsp (2.5 ml) vanilla extract until evenly combined.
- Create a well in the center.
+ Show details− Hide details
Ready when: Dry ingredients are evenly combined with no lumps
Tip: Sifting the sticky rice flour and baking powder separately prevents lumps in this delicate batter.
Add wet ingredients
- Pour 0.75 cup (180 ml) coconut cream and 3 room-temperature eggs into the well.
- Whisk gently but thoroughly for about 1–2 minutes, starting at the center and slowly incorporating the dry ingredients from the sides, until you have a smooth, thick batter with no flour streaks.
- Do not overmix; a few small lumps are fine.
+ Show details− Hide details
Ready when: Batter is smooth, creamy, and lump-free
Tip: Cold eggs will seize the warm coconut cream; room-temperature ingredients blend smoothly and evenly.
Prepare baking pan
- Pour half of the cake batter (about 1.5 cups or 360 ml) into the prepared 8×8-inch (20×20 cm) baking pan lined with parchment paper.
- Spread it into an even layer with a spatula, making sure to reach the corners.
+ Show details− Hide details
Ready when: Batter is level and smooth across the entire pan
Tip: Use parchment paper to make removal easier and prevent sticking.
Spread mung bean filling
- Drop spoonfuls of the cooled mung bean paste over the batter layer, leaving a 0.5-inch (1.25 cm) border around the edges.
- Use a spatula or the back of the spoon to spread it gently into an even layer, then smooth the surface.
- Don't press down hard; the filling should rest on top of the batter.
+ Show details− Hide details
Ready when: Filling is evenly spread, leaving a thin border of batter visible at the edges
Tip: Keeping a border of batter around the edges helps contain the filling and creates a finished edge.
Top with remaining batter
- Pour the remaining half of the cake batter over the mung bean filling.
- Using a spatula, gently spread it to cover the filling completely, pushing it into the corners and edges.
- The batter should seal the filling inside.
+ Show details− Hide details
Ready when: Top layer of batter evenly covers the filling with no gaps
Tip: Use gentle, even strokes to avoid disrupting the filling below.
Add sesame seed topping
- Sprinkle 0.25 cup (40 g) white sesame seeds evenly over the top of the batter.
- If using sesame oil, drizzle 1 tbsp (15 ml) in a thin zigzag pattern across the surface for extra flavor and to help the seeds adhere.
- Gently press the seeds down with your fingertips so they stick slightly.
+ Show details− Hide details
Ready when: Sesame seeds are evenly distributed and lightly pressed in
Tip: Toasted sesame oil is optional but adds authentic Vietnamese flavor; avoid using regular sesame oil, which is less flavorful.
Bake the cakeOven 350°F / 175°C
- Place the pan in a preheated 350°F (175°C) oven and bake for 35–40 minutes.
- The cake is done when a toothpick inserted into the center (through the batter, not the filling) comes out with just a few moist crumbs, and the sesame seeds are golden and fragrant.
- The edges should pull slightly away from the pan, and the top should be set but still slightly springy to the touch.
+ Show details− Hide details
Ready when: Toothpick comes out with just moist crumbs, top is set and springy, sesame seeds are golden
Tip: Every oven bakes differently; start checking at 35 minutes to avoid overbaking, which will dry out the delicate sticky rice crumb.
Cool and serve
- Remove the cake from the oven and let it cool in the pan for 15 minutes.
- Then run a thin knife around the edges and turn the cake out onto a wire rack or serving plate.
- Let it cool for another 10–15 minutes until lukewarm.
- Cut into 8 squares and serve warm or at room temperature with hot tea.
+ Show details− Hide details
Ready when: Cake is firm enough to turn out without breaking, top is cool enough to touch
Tip: Sticky rice cakes are best served slightly warm or at room temperature; they firm up as they cool but stay tender and moist.
Good to know
Tips
- Sticky rice flour absorbs moisture differently than wheat flour, so batter will be thicker than typical cake batter—this is normal and gives the cake its characteristic tender, slightly glutinous crumb.
- If mung beans are old or very hard after soaking, they may take 20–25 minutes to cook. Test for softness before adding the palm sugar; undercooked beans will ruin the filling's texture.
- Palm sugar's caramel notes complement the earthy mung beans beautifully; if you must substitute, choose a sugar that has a hint of molasses rather than pure white sugar.
- This cake is best served with hot tea or coffee and is sometimes eaten with a savory soup or broth for breakfast, following Vietnamese tradition. It is not overly sweet and balances salt and coconut flavors.
Make ahead
Mung bean filling can be made up to 2 days ahead and stored in an airtight container in the fridge. The fully baked cake keeps well for 3–4 days and can be made the day before serving.
Storage & reheating
Room temperature (covered): 3–4 days. Refrigerator (in an airtight container): up to 5 days. Freezer (wrapped well in plastic wrap and foil): up to 1 month. To reheat: place a slice on a plate, cover with a damp paper towel, and microwave for 30–45 seconds until warm and soft.
Substitutions
- sweet (sticky) rice flour → Sweet rice flour or mochiko flour. These are the same product, just different brand names. Glutinous rice flour also works but may make the cake slightly denser.
- palm sugar, lightly packed → Brown sugar or light muscovado sugar, measured by weight. Brown sugar lacks palm sugar's subtle caramel complexity, but will work in a pinch. Use the same weight for best results.
- yellow split mung beans, soaked and drained → Canned or frozen cooked yellow mung beans, drained. Skip the soaking and cooking step; use 1.25 cups (250 ml) canned beans. Cook only with the palm sugar and salt for 3–5 minutes to make a paste.
- white sesame seeds → Peanuts, crushed, or roasted sunflower seeds. Both add crunch and nuttiness, though sesame is traditional. Use the same amount by weight.
More breakfast bakes
See all →



Find more like this
- Meal
- Breakfast
- Cuisine
- Vietnamese
- Method
- Oven