
Texas Chili con Carne Without Beans
A true Texas "bowl of red": tender cubes of beef chuck simmered in a deep, brick-red sauce made from toasted dried ancho and guajillo chiles, cumin, and garlic. No beans, no tomato chunks, just rich, smoky, meaty chili.
- Prep
- 28 min
- Cook
- 3 hr 1 min
- Wait
- 50 min
- Total
- 4 hr 19 min
- Makes
- About 2½ quarts (8 generous 1-cup servings)
Steps
Before you start
- Buy a whole chuck roast and cube it yourself; pre-cut stew meat is uneven and often lean, so it dries out.
- Dried chiles vary in heat. Wear gloves if you have sensitive skin, and ventilate the kitchen while toasting.
- Plan about 4½ hours from start to bowl; most of that is unattended simmering. This recipe is made entirely on the stovetop; no oven is needed.
- Use a 6- to 8-quart heavy lidded pot so the beef browns rather than steams.
Prep beef and aromatics
- Trim hard fat and silver skin from the chuck and cut into ¾-inch cubes.
- Pat very dry with paper towels, place in a large bowl, and toss with the salt and black pepper.
- Dice the onions and mince the garlic, keeping them in separate piles.
- Let the beef sit at room temperature while you prepare the chiles.
+ Show details− Hide details
Ready when: Beef cubes are uniform, dry on the surface, and no longer cold to the touch
Tip: Dry meat browns; wet meat steams and turns gray.
Toast and soak chiles
- Heat a dry 10-inch skillet over medium heat.
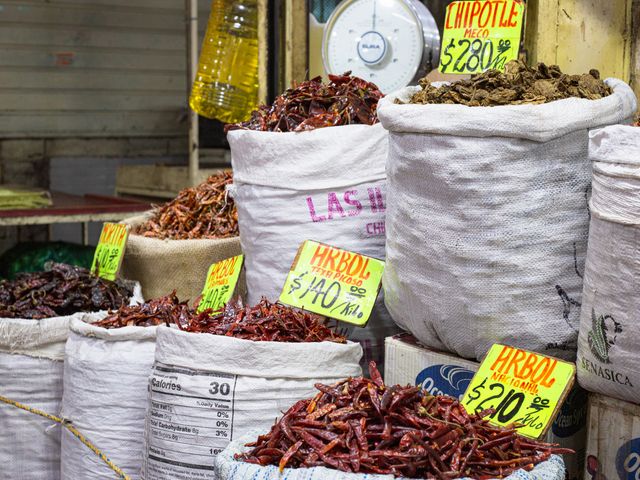
- Toast the ancho, guajillo, and árbol chiles in batches, pressing flat with a spatula for 20–30 seconds per side.
- Move them to a heatproof bowl.
- Pour 1½ cups (355 ml) steaming-hot beef broth over them, weigh them down with a small plate so they stay submerged, and soak 20 minutes.
+ Show details− Hide details
Ready when: Chiles are fragrant and slightly puffed (not blackened) after toasting, and fully pliable after soaking
Tip: Scorched chiles turn the whole pot bitter. If any smell acrid or look black, discard and toast a new one.
Blend the chile sauce
- Transfer the soaked chiles and all of their soaking broth to a blender.
- Blend on high for 1–2 minutes until completely smooth, adding a splash of water only if the blades won't catch.
- Press the purée through a fine-mesh sieve into a bowl, scraping the underside of the sieve, and discard the tough skins.
+ Show details− Hide details
Ready when: Purée is deep brick red and pourable like thick tomato sauce, with no flecks of skin
Tip: Vent the blender lid with a towel over it when blending hot liquid.
Brown the beef
- Heat 1 tablespoon (15 ml) of the oil in the heavy pot over medium-high heat until shimmering.
- Add about one-third of the beef in a single layer with space between pieces.
- Sear without moving for 3 minutes, then turn and brown the other sides for another 4–5 minutes.
- Transfer to a clean bowl.
- Repeat with two more batches, adding 1 tablespoon (15 ml) oil before the third batch if the pot looks dry.
+ Show details− Hide details
Ready when: Cubes are deeply browned on most sides and release easily from the pot
Tip: Crowding drops the pot temperature and the meat will boil in its own juices instead of browning.
Soften the onions
- Reduce heat to medium.
- Add the diced onions to the pot with a pinch of salt, scraping up the browned bits with a wooden spoon as the onions release moisture.
- Cook, stirring often, for 8–10 minutes.
+ Show details− Hide details
Ready when: Onions are soft, translucent, and lightly golden at the edges, and the pot bottom is mostly clean
Tip: If the fond starts to blacken, add 2 tablespoons water and scrape immediately.
Bloom spices and paste
- Add the garlic, cumin, oregano, smoked paprika, and tomato paste.
- Stir constantly for 1½–2 minutes.
+ Show details− Hide details
Ready when: Mixture smells toasty and the tomato paste darkens to brick red
Tip: Lower the heat if the garlic starts to brown; it should not take on color.
Simmer low and slow
- Return the beef and any juices in the bowl to the pot.
- Pour in the strained chile purée and the remaining 1½ cups (355 ml) room-temperature beef broth.
- Stir well and bring to a bare simmer over medium heat.
- Reduce heat to low, cover with the lid slightly ajar, and cook on the stovetop for 2 hours, stirring every 30 minutes and scraping the bottom.
- The surface should show only a few lazy bubbles.
+ Show details− Hide details
Ready when: A cube of beef crumbles easily when pressed with a spoon (internal temperature around 200°F / 93°C)
Tip: A hard boil makes chuck tough and stringy. Keep it at a gentle simmer; add ¼ cup water if it gets too thick.
Thicken with masa
- Whisk the masa harina with the ¼ cup (60 ml) cold water until no lumps remain.
- Stir it into the chili in a slow stream, increase heat to medium-low, and simmer uncovered for 12–15 minutes, stirring occasionally.
+ Show details− Hide details
Ready when: Chili coats the back of a spoon and a line drawn through it with a spoon holds for a second
Tip: Add the masa slurry in a slow stream while stirring to prevent lumps.
Season and balance
- Remove from the heat.
- Stir in the cider vinegar.
- Taste and adjust: add more salt, 1 teaspoon at a time, for flavor; add the brown sugar if the chili tastes slightly bitter.
- Skim any pooled orange fat from the surface if you prefer a leaner bowl.
+ Show details− Hide details
Ready when: Flavor is rounded and savory with a bright finish and no sharp bitterness
Tip: Season at the end; the chili reduces and concentrates as it cooks.
Rest before serving
- Cover the pot and let the chili rest off the heat for 15 minutes.
- Stir and ladle into warm bowls.
+ Show details− Hide details
Ready when: Chili is thick, glossy, and deep red-brown
Tip: The chili tastes even better the next day.
Good to know
Tips
- Cut the beef into cubes rather than grinding it for the classic Texas texture; the pieces should stay distinct yet tender.
- Do not skip the sieve; chile skins can leave a gritty, bitter texture.
- For more heat, leave seeds in the árbol chiles or add a third; for a milder chili, omit them.
- Serve with warm tortillas, saltines, chopped raw onion, or pickled jalapeños, but skip the beans to keep it authentic.
Make ahead
Chili tastes better after a night in the fridge. Make through step 9, cool, and refrigerate up to 3 days. Reheat gently, adding a splash of broth or water if thick.
Storage & reheating
Room temperature: no more than 2 hours. Refrigerator: airtight container up to 4 days. Freezer: up to 3 months in freezer-safe containers; thaw overnight in the fridge. Reheat in a pot over low heat, stirring often, until steaming hot (165°F / 74°C), adding broth or water to loosen.
Substitutions
- dried guajillo chiles → Additional dried ancho chiles (2 more) or dried New Mexico chiles. Flavor will be slightly sweeter and less tangy.
- masa harina → 1 tablespoon cornstarch whisked with 2 tablespoons cold water, or simply simmer longer uncovered. You lose the subtle toasted corn flavor.
- dried Mexican oregano → Regular dried oregano. Use 1½ tsp; Mexican oregano is more citrusy and earthy.
- boneless beef chuck roast → Boneless beef short rib or brisket point. Both are well-marbled and work with the same timing; brisket may need an extra 20–30 minutes.
More chili
See all →
Find more like this
- Meal
- Dinner
- Cuisine
- Tex-Mex
- Main ingredient
- Beef Roast
- Method
- Stovetop
- Quick & Easy
- Make AheadFreezer Friendly
- Season
- Winter Comfort Food