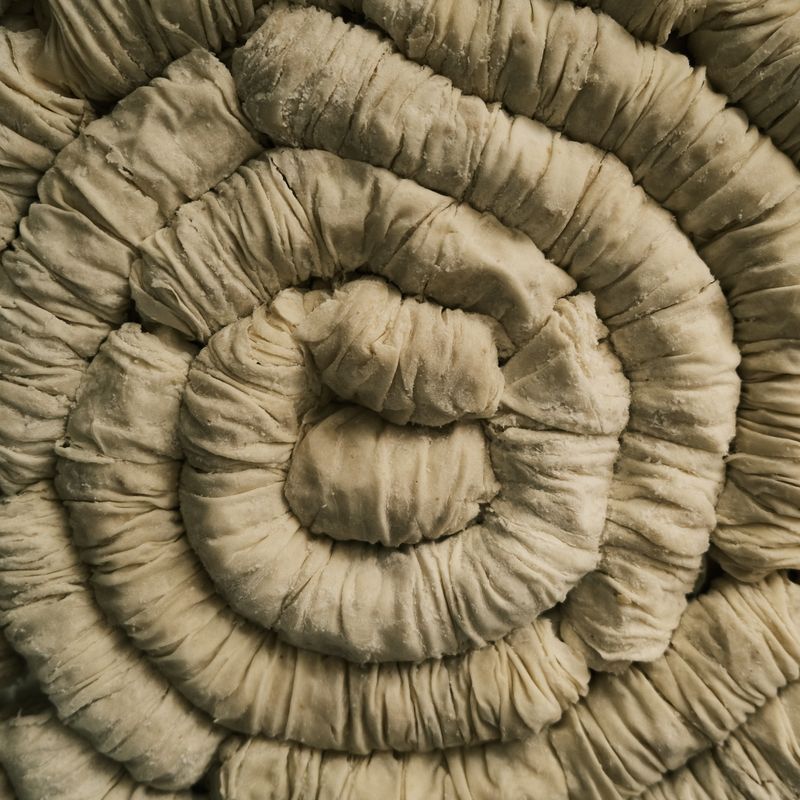
Spanish Ensaimada Spiral Pastry with Lard
A traditional Spanish spiral pastry from Mallorca with a delicate laminated dough enriched with lard, shaped into an elegant coil, and finished with a dusting of powdered sugar. The result is buttery, flaky layers that practically melt on your tongue. This recipe yields tender pastries with a tender crumb and crispy exterior—best enjoyed warm or at room temperature with coffee or hot chocolate.
Steps
Before you start
- Chill the lard in the freezer for 30 minutes before using
- Use room-temperature water (around 75°F/24°C) for optimal dough hydration
- Ensure your work surface and rolling pin are cool
- Preheat your oven to 400°F (200°C) 15 minutes before baking
Mix the dough
- In the bowl of a stand mixer, combine 325 g bread flour, 3 g salt, 3 g instant yeast, and 12 g sugar.
- Add 180 ml room-temperature water.
- Mix on low speed with the dough hook for 3 minutes until a shaggy mass forms, then increase to medium speed and knead for 6 minutes until the dough is smooth and elastic (it should pull away from the bowl sides but still be slightly tacky).
- The dough temperature should be around 75°F (24°C).
+ Show details− Hide details
Ready when: Dough is smooth, elastic, and only slightly tacky when touched
Tip: Avoid warm water; it speeds fermentation unevenly and makes lamination harder to control.
First rise
- Transfer the dough to a lightly oiled bowl, cover with plastic wrap, and let it rise at room temperature (68–72°F / 20–22°C) for 60 minutes until puffy but not fully doubled.
+ Show details− Hide details
Ready when: Dough has increased in volume by about 50%, feels airy but still holds its shape
Tip: A cooler room temperature gives you more control; avoid warm kitchens that speed fermentation.
Chill the dough
- After the first rise, turn the dough onto a lightly floured work surface and gently flatten it into a 7×5-inch (18×13 cm) rectangle.
- Wrap in plastic wrap and refrigerate for 30 minutes until cool to the touch but not hard.
+ Show details− Hide details
Ready when: Dough is cool and slightly firm but still pliable when pressed
Tip: A cold dough prevents the lard from melting during the lamination folds.
Laminate with lard
- Remove the chilled dough from the refrigerator.
- On a cool work surface, roll it into a 12×8-inch (30×20 cm) rectangle.
- Scatter 115 g cold lard pieces evenly over the entire surface, leaving a ½-inch (1.25 cm) border on all sides.
- Fold the dough in thirds like a letter: fold the short edge closest to you up and over the middle third, then fold the far edge down and over to enclose the lard.
- Rotate the dough 90 degrees so the seams run horizontally.
- Roll gently to a 12×8-inch rectangle again, wrap in plastic, and refrigerate for 20 minutes.
- Repeat this fold-and-rest cycle two more times (3 folds total), always rotating 90 degrees and chilling 20 minutes between folds.
+ Show details− Hide details
Ready when: Dough shows visible thin layers when you look at the cut edge; lard is still solid, not melted into the dough
Tip: Keep the work surface and rolling pin cool; dust lightly with flour to prevent sticking. If lard begins to leak through, stop and refrigerate for 10 minutes.
Final chill and shape
- After the third fold, wrap the laminated dough in plastic wrap and refrigerate for at least 30 minutes (or up to 4 hours).
- Remove the dough and roll it into a 16×12-inch (40×30 cm) rectangle about ⅛ inch thick.
- Using a pastry scraper, cut the dough into 6 strips, each measuring 16×2 inches (40×5 cm).
- Starting at one short end, roll each strip tightly into a coil, tucking the end underneath.
- Place seam-side down on a parchment-lined baking sheet, spacing them 3 inches (7.5 cm) apart.
+ Show details− Hide details
Ready when: Each coil is tightly rolled with no gaps, seam tucked securely underneath
Tip: Work quickly so the dough doesn't warm too much; warm dough loses its layer structure. If it becomes soft, refrigerate for 10 minutes and continue.
Proof the pastries
- Cover the shaped ensaimadas loosely with plastic wrap and let them proof at room temperature for 60–90 minutes until they increase in height by about 50% and feel pillowy when gently poked.
- They should not fully double (this prevents them from becoming too puffy and losing their defined spiral shape).
+ Show details− Hide details
Ready when: Pastries are visibly larger, feel light and airy, and spring back slowly when poked (not instantly)
Tip: If your kitchen is very warm (above 75°F / 24°C), proof in a cooler spot or on a lower oven shelf with the door cracked; overproofing makes them collapse during baking.
Preheat and bakeOven 400°F / 205°C
- About 15 minutes before baking, preheat your oven to 400°F (200°C) with a rack in the middle.
- Once proofed, carefully place the baking sheet in the oven (do not jolt them or they may deflate).
- Bake for 18–22 minutes until the pastries are deep golden brown on top and the bottoms are firm and lightly browned.
- The edges should be crispy.
+ Show details− Hide details
Ready when: Pastries are deep golden brown, feel light, and sound hollow when tapped on the bottom
Tip: Do not open the oven door in the first 15 minutes; this can cause the pastries to collapse. If they are browning too quickly, cover loosely with foil for the last 5 minutes.
Cool and finish
- Remove the baking sheet from the oven and let the ensaimadas cool on the sheet for 5 minutes, then transfer to a wire rack to cool for at least 10 minutes (they will continue to set as they cool).
- Once cool enough to handle, dust generously with 30 g powdered sugar.
- For a traditional finish, sprinkle lightly with coarse sea salt if desired.
+ Show details− Hide details
Ready when: Pastries are cool enough to handle; powdered sugar adheres lightly to the surface
Tip: Dust with powdered sugar while still warm (but not hot) so it adheres; too hot and it melts, too cool and it won't stick. The salt is optional but adds a traditional touch that balances the sweetness.
Good to know
Tips
- Lard is key to authentic ensaimadas; it has a higher melting point than butter and creates superior layering and a tender, melt-in-your-mouth crumb. If using butter, chill it extra well.
- Temperature control is critical. Work in a cool kitchen (around 68–70°F / 20–21°C) or in an air-conditioned environment. Warm kitchens cause the lard to melt, ruining the lamination. If your kitchen is warm, refrigerate dough more frequently and for longer.
- Do not overproof. Ensaimadas are best when slightly underproofed—they should feel airy and rise in the oven but still hold a defined spiral shape. Overproofing causes them to collapse and become dense.
- A traditional Spanish ensaimada is sometimes made with a small amount of candied fruit (orange peel or aniseed) mixed into the dough or layered between the laminations for sweetness and aroma. Experiment once you master the basic recipe.
Make ahead
You can prepare the laminated dough through step 4 (final chill) and freeze it for up to 2 weeks. Thaw overnight in the refrigerator before shaping and proofing. Shaped ensaimadas can also be frozen on a baking sheet for 2 hours, then transferred to a freezer bag and frozen for up to 1 month; bake directly from frozen, adding 2–3 minutes to the bake time.
Storage & reheating
Room temperature (covered): 2 days. Refrigerator (in an airtight container): 4 days. Freezer (wrapped individually in plastic wrap, then in a freezer bag): 1 month. Reheat frozen or chilled pastries in a 325°F (163°C) oven for 5–8 minutes until warm and crispy; do not microwave as it makes them soggy.
Substitutions
- lard, cold → cold unsalted butter. Butter creates a richer, slightly flakier pastry, though it lacks the traditional savory note of lard. Use the same weight and follow the same lamination process.
- bread flour → all-purpose flour. All-purpose flour (11–12% protein) will work but produces slightly less structure and chew; the pastry will be a bit more tender but less crispy. Use the same weight.
- instant yeast → active dry yeast. Use the same weight (3 g, or about ¾ teaspoon). Active dry yeast may require 5–10 minutes longer to fully activate; proof until the dough is puffy and shows the same visual cues.
- powdered sugar → pearl sugar or sanding sugar. Pearl sugar (Swedish pearl sugar) creates a crunchy, sparkling finish instead of a fine powder; use the same weight. Sanding sugar gives a similar effect with a slightly coarser texture.
More Spanish recipes
See all →
Find more like this
- Meal
- Dessert
- Cuisine
- Spanish
- Diet
- Dairy-Free
- Method
- Oven