
Sourdough Pizza Crust
A tangy, chewy pizza crust made with active sourdough starter and developed through a cold overnight fermentation. The long, cool rise builds deep flavor and creates a crispy exterior with an open crumb interior. This dough is forgiving to shape and bakes into restaurant-quality pizzas.
- Prep
- 15 min
- Cook
- 18 min
- Wait
- 8 hr
- Total
- 8 hr 33 min
- Makes
- 2 pizza crusts (14 inches each)
Steps
Before you start
- Make sure your sourdough starter is fed and bubbly (peak activity is 4–6 hours after feeding)
- Use bread flour for structure and chew; all-purpose flour will work but gives a softer crust
- Plan ahead: this dough needs 8 hours of cold fermentation plus 1–2 hours at room temperature before shaping
Mix dough
- In a large bowl, whisk together the lukewarm water and active sourdough starter until mostly combined.
- Add the bread flour and mix with a bench scraper or your hands until all flour is hydrated and you have a shaggy dough with no dry bits.
- The mixture will be sticky and rough.
- Cover the bowl with a damp kitchen towel and let rest at room temperature for 30 minutes (this rest is called autolyse and helps the flour fully absorb water).
+ Show details− Hide details
Ready when: All flour is incorporated and dough is shaggy
Tip: Autolyse makes the dough easier to work with and develops better texture; don't skip it.
Add salt and oil
- After the 30-minute rest, sprinkle the salt and olive oil over the dough.
- Wet your hand and pinch and fold the dough over itself 4–5 times, working the salt and oil in.
- The dough will be very sticky at first.
- Pinch and fold is better than kneading here: wet your hand, grab the edge of the dough, stretch it up and fold it over the center, rotate the bowl a quarter turn, and repeat.
- Do this for 2–3 minutes until the salt and oil are incorporated and the dough feels slightly more cohesive.
+ Show details− Hide details
Ready when: Salt and oil are fully incorporated into the dough
Tip: Wet your hand frequently during pinch-and-fold to prevent sticking; the dough will still be quite sticky and that's correct.
Bulk fermentation (room temperature)
- Cover the bowl again and let the dough sit at room temperature (68–72°F / 20–22°C) for 3–4 hours.
- During the first 2 hours, perform 2–3 sets of "stretch and folds" at 30-minute intervals: wet your hand, grab one side of the dough, stretch it up and fold it over the top, rotate the bowl 90°, and repeat 4 times per set.
- These gentle folds build structure without intense kneading.
- By the end of bulk fermentation, the dough should be noticeably puffy, about 50% larger, and feel airy when gently poked.
+ Show details− Hide details
Ready when: Dough is about 50% larger and wobbles gently when poked
Tip: Temperature matters: too warm (>75°F) and fermentation will be fast and the dough may become sour; too cool and it takes longer. Aim for 68–72°F.
Shape and cold ferment
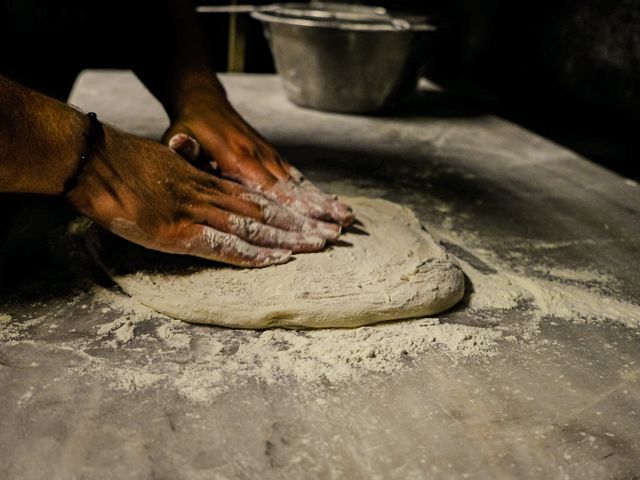
- Gently turn the dough out onto a lightly floured work surface.
- With a bench scraper, divide it into two equal pieces (about 360 g / 12.7 oz each).
- Shape each piece into a loose round by gently pulling the edges toward the center and flipping it seam-side down.
- You don't need perfect tension; this is a pre-shape.
- Place each round on a pizza pan or a parchment-lined baking sheet, seam-side down.
- Cover loosely with plastic wrap or a damp towel and place in the refrigerator for at least 8 hours, or up to 18 hours.
- The cold overnight fermentation develops flavor and makes the dough easier to stretch without shrinking back.
+ Show details− Hide details
Ready when: Dough is cold and slightly puffy
Tip: Don't overwork the dough during shaping; gentle handling preserves the gas bubbles you've built during fermentation.
Remove from cold storage
- Take the dough out of the refrigerator and let it sit, still covered, at room temperature for 1–2 hours.
- This tempering period allows the dough to relax and reach a temperature that's easier to shape and will bake evenly.
- You'll notice the dough will puff up a bit more and feel less dense.
- A gentle poke should leave an indent that doesn't immediately spring back.
+ Show details− Hide details
Ready when: Dough is at room temperature and gently puffy; poke mark slowly springs back halfway
Tip: Skipping this step will give you a dense, tough crust. The dough needs time to warm and relax before its final stretch.
Stretch and top pizzaOven 475°F / 245°C
- Preheat your oven to 475°F (246°C).
- If using a pizza stone or steel, place it in the oven now so it heats.
- Lightly flour the top of one dough round and transfer it to a lightly floured work surface.
- Gently stretch it by lifting the edges and letting gravity help, then lay it back down and gently press it into a 14-inch circle, working from the center outward.
- If the dough springs back, let it rest for 5 minutes and try again.
- Transfer the stretched dough back to the pizza pan (or parchment on a pizza peel if using a stone).
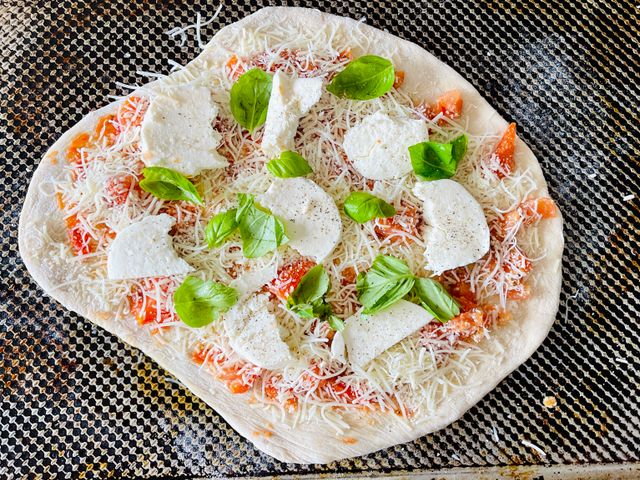
- Drizzle lightly with olive oil, sprinkle with salt, and top with your desired sauce, cheese, and toppings.
- Keep the edges clear so they can puff and crisp.
- Repeat with the second dough round.
+ Show details− Hide details
Ready when: Dough is stretched to 14 inches and topped evenly
Tip: If the dough shrinks back when you stretch it, let it rest 5–10 minutes and try again; this is normal and means the gluten needs to relax.
Bake pizzaOven 475°F / 245°C
- Bake the pizzas at 475°F (246°C) for 15–18 minutes.
- If using a pizza stone, carefully slide the parchment and dough directly onto the preheated stone.
- The crust is done when the edges are golden brown and the bottom is crispy and light brown when you peek underneath (use a pizza peel or offset spatula to lift).
- If the top is browning too fast but the bottom is still pale, lower the oven rack position and bake another minute or two.
- The internal temperature of the crust (away from toppings) should reach 205–210°F (96–99°C) if you want to check.
+ Show details− Hide details
Ready when: Edges are golden brown, bottom is crispy and light brown, interior is set
Tip: Ovens vary: check your pizzas at 15 minutes. If you don't have a pizza stone, a preheated baking sheet works fine—just bake a minute or two longer for a crispier bottom.
Cool and serve
- Remove the pizzas from the oven and slide onto a cutting board or cooling rack.
- Let rest for 2–3 minutes before slicing; this allows the cheese to set and makes slicing cleaner.
- Slice and serve hot.
+ Show details− Hide details
Ready when: Crust is crispy, toppings are hot, cheese is melted
Tip: A few minutes of rest makes slicing much easier and prevents the toppings from sliding around.
Good to know
Tips
- Active starter matters: use sourdough starter that's fed and at peak (bubbly, doubled) 4–6 hours after feeding. Sluggish or weak starter will give slow fermentation and a less flavorful crust.
- Cold fermentation is your friend: the overnight chill not only adds flavor but also makes the dough more relaxed and less prone to shrinking back when you stretch it. It also makes it more forgiving if you have to wait between stretching and baking.
- The stretch-and-fold technique during bulk fermentation builds strength without harsh kneading, which is perfect for an open crumb. If you skip it, the dough will still work but may be a bit more fragile.
- This dough is wetter than a typical pizza dough (higher hydration) to create an open crumb and better oven spring. It will be sticky—that's correct. Use damp hands and a bench scraper, not lots of flour, to prevent a dry, dense crust.
Make ahead
Yes. The dough can be cold-fermented for up to 18 hours in the refrigerator. You can also freeze the shaped, cold dough on the pan (uncovered for 4 hours until hard, then wrapped tightly in plastic) for up to 3 weeks; thaw in the refrigerator overnight, then let it come to room temperature for 1–2 hours before topping and baking.
Storage & reheating
Room temperature: once cooled completely, store in an airtight container for up to 2 days. Reheat in a 350°F (175°C) oven for 5 minutes. Freezer: wrap cooled pizza tightly in plastic wrap and freeze for up to 1 month; reheat from frozen at 375°F (190°C) for 8–10 minutes.
Substitutions
- bread flour → All-purpose flour. Use the same weight; the crust will be slightly softer and less chewy but still delicious. Pizza flour (very high protein) will give an even chewier result but isn't essential.
- active sourdough starter (fed and bubbly) → ½ teaspoon instant yeast mixed with ¼ cup (60 g) lukewarm water, added with the flour. This removes the sourdough tang and cuts fermentation time. Use only 1–2 hours of bulk fermentation and 4–6 hours of cold fermentation instead.
- extra-virgin olive oil → Neutral oil (vegetable, canola, or grapeseed). Use the same amount; the crust will lack the fruity, peppery note of olive oil but will still bake well.
- kosher salt → Sea salt or table salt. Use the same weight for sea salt; for table salt use 1 teaspoon (6 g) as it's denser. Avoid iodized table salt if possible—it can give a metallic taste.
More pizza
See all →



.jpg)
Find more like this
- Meal
- Dinner
- Cuisine
- Italian
- Method
- Oven
- Quick & Easy
- 5 Ingredients or LessMake Ahead