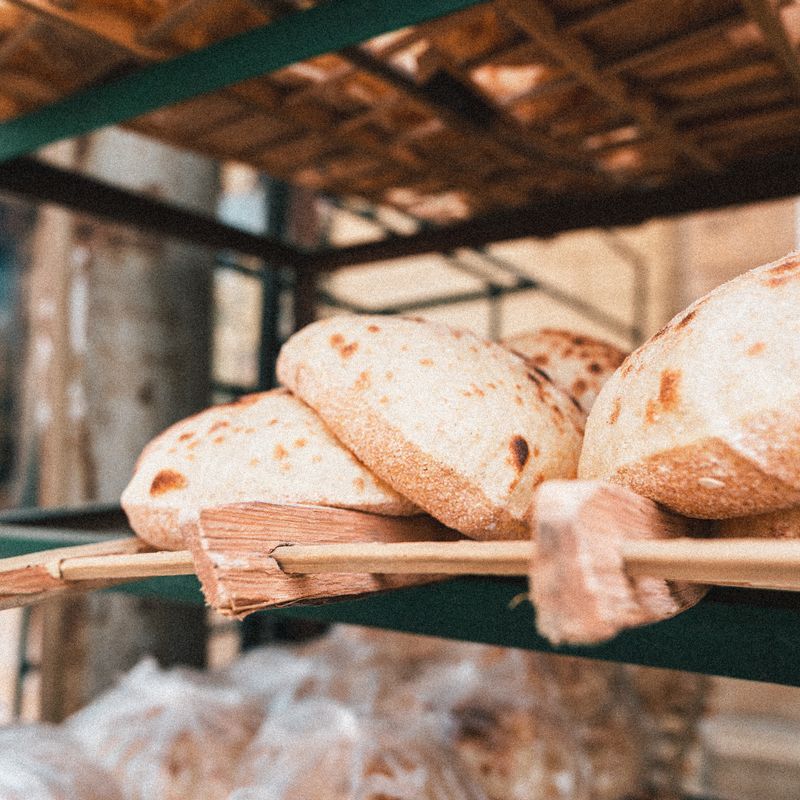
Sourdough Party Mini Whipped Feta Pita Pockets
Tiny, pillowy sourdough pita pockets filled with creamy whipped feta brightened by lemon juice and fresh dill. The naturally leavened dough develops a subtle tang during a long fermentation, creating pockets that puff perfectly in a hot oven. Ideal for entertaining—prepare the dough and filling ahead, then bake and fill just before serving for maximum crispness.
- Prep
- 30 min
- Cook
- 30 min
- Wait
- 6 hr
- Total
- 7 hr
- Makes
- 24 mini pita pockets (8–12 servings as an appetizer)
Steps
Before you start
- Have an active, bubbly sourdough starter ready, fed 4–6 hours before you begin
- Measure all ingredients and lay them out (mise en place)
- Use a kitchen scale for accuracy—sourdough baking is precise
- Plan for a long bulk fermentation (4–6 hours at room temp, or overnight in the fridge for deeper flavor)
Mix the dough
- In a large bowl, combine the active sourdough starter, room-temperature water, bread flour, fine sea salt, olive oil, and honey.
- Stir with a wooden spoon or wet fingers until all flour is fully hydrated and you have a cohesive, slightly shaggy dough.
- No dry flour should remain in the bowl.
+ Show details− Hide details
Ready when: All flour is incorporated; dough is cohesive and slightly sticky
Tip: Wet your fingers to prevent sticking when stirring—the dough should feel tacky, not dry
Rest dough (autolyse)
- Cover the bowl with a damp kitchen towel or plastic wrap.
- Let the dough rest for 30 minutes at room temperature (68–72°F / 20–22°C).
- This resting period allows the flour to fully absorb water and enables the gluten network to develop without kneading.
+ Show details− Hide details
Ready when: Dough looks smoother and more cohesive; it jiggles slightly when the bowl is tapped
Knead with stretch-and-fold
- Wet your hand with cool water.
- Grab one side of the dough, stretch it up and fold it over the center.
- Rotate the bowl 90° and repeat.
- Continue this stretch-and-fold motion 8–10 times.
- The dough should feel supple, slightly sticky, and noticeably stronger than before.
+ Show details− Hide details
Ready when: Dough feels cohesive and shows visible tightening as you fold; it no longer falls apart
Tip: Wet hands prevent sticking better than flour. Sourdough doughs are wetter than typical bread doughs, so don't worry if it feels tacky.
Bulk fermentation
- Cover the bowl and let the dough ferment at room temperature (68–72°F / 20–22°C) for 4–6 hours.
- For deeper flavor, refrigerate overnight (8–12 hours) instead.
- During the last hour at room temperature, perform two more stretch-and-fold rounds: 5 minutes of active work, spaced 1 hour apart.
- You'll notice the dough becoming airier, bubbles forming on the surface, and the bowl feeling fuller.
+ Show details− Hide details
Ready when: Dough volume has increased 50–75%; visible bubbles on the surface; bowl jiggles when gently tapped; dough passes the poke test (gentle poke leaves a small indentation that slowly springs back halfway)
Tip: Fermentation time varies with temperature. Cold kitchens may need 6+ hours; warm kitchens might finish in 3–4 hours. Cold overnight fermentation improves flavor complexity.
Make the whipped feta filling
- In a medium bowl, add the crumbled feta cheese, Greek yogurt, fresh lemon juice, minced garlic, fresh chopped dill, and dried oregano.
- Using an electric mixer on medium speed (or a vigorous hand whisk), beat for 3–5 minutes until the mixture becomes creamy and noticeably lighter in texture.
- Slowly drizzle in the extra-virgin olive oil while mixing to emulsify.
- Add salt and freshly ground black pepper to taste, but taste first before adding salt—feta is already quite salty.
+ Show details− Hide details
Ready when: Mixture is smooth, creamy, and light; color has brightened; texture is fully emulsified
Tip: Add salt cautiously—taste before seasoning, as feta is already salty. If made ahead, cover and refrigerate; it will keep for up to 2 days.
Divide and shape into balls
- Turn the fermented dough onto a lightly oiled work surface.
- Using a bench scraper or dough knife, divide the dough into 24 equal pieces, each weighing approximately 20g (use a kitchen scale for consistency).
- Roll each piece into a tight ball by tucking the edges toward the center and rolling it on the surface away from you until it feels snug and smooth.
- Place the shaped balls on two parchment-lined baking sheets, 12 per sheet, spacing them about 1½ inches apart.
+ Show details− Hide details
Ready when: All dough is divided into 24 round, tight balls; they hold their shape
Tip: Using a kitchen scale ensures equal-sized pitas that bake evenly. Tight shaping helps the dough puff rather than spread.
Proof the shaped pitas
- Cover both baking sheets with a damp kitchen towel or plastic wrap.
- Let the shaped dough balls proof at room temperature (68–72°F / 20–22°C) for 1–1.5 hours.
- You'll see them become visibly puffed, airier, and slightly jiggly.
- The surface should look soft and billowy.
+ Show details− Hide details
Ready when: Pitas are noticeably puffed and feel airy; a gentle poke leaves a small indentation that slowly springs back most of the way
Preheat the ovenOven 450°F / 230°C
- Position oven racks in the upper-middle and lower-middle positions.
- Preheat the oven to 450°F (230°C) for 15 minutes.
- The oven must be fully heated to create the steam and high heat needed for pitas to puff properly.
+ Show details− Hide details
Ready when: Oven reaches 450°F (230°C)
Tip: Use an oven thermometer to verify temperature accuracy; some ovens run cold or hot, which affects pita puffing.
Bake the pitasOven 450°F / 230°C
- Carefully place one baking sheet in the oven on the lower-middle rack.
- Bake for 12–15 minutes until the pitas are golden brown on top and bottom and feel light and hollow when gently squeezed.
- If baking both sheets simultaneously, stagger them on different racks and rotate them halfway through for even browning.
- Remove the first batch and let cool on the baking sheet for 5 minutes, then transfer to a wire rack.
- Repeat with the second sheet if needed.
+ Show details− Hide details
Ready when: Golden-brown color on top and bottom; pitas are hollow and light when gently squeezed; they sound hollow when tapped
Tip: If pitas don't puff, the dough may have been underproofed or the oven temperature too low. Check with an oven thermometer next time. Some flat or partially puffed pitas still work—they'll be soft and delicious, just easier to slice.
Cool and open pockets
- Once pitas have cooled completely (or are still slightly warm, which makes them easier to work with), carefully slice a small opening (about ½ inch / 1 cm) at one edge to create a pocket.
- You don't need to cut all the way across—just enough to create an opening through which you can spoon filling.
+ Show details− Hide details
Ready when: Each pita has a small opening ready for filling
Tip: A small, precise opening keeps the pita structure intact and prevents filling from falling out during serving.
Fill with whipped feta and serve
- Spoon or pipe approximately 1–1.5 tablespoons of whipped feta filling into each pita pocket.
- Top with roasted red peppers, chopped Kalamata olives, and fresh mint or additional dill if desired.
- Serve immediately at room temperature or while the pitas are still slightly warm.
+ Show details− Hide details
Ready when: Pitas are filled and garnished, ready to serve
Tip: For the crispiest pitas, fill them just before serving. If you must assemble them earlier, store filled pitas in an airtight container in the refrigerator and gently rewarm at 300°F (150°C) for 5 minutes before serving.
Good to know
Tips
- **Sourdough timing is flexible.** Bulk fermentation can take 4–8 hours depending on your kitchen temperature. What matters is the dough's appearance (50–75% volume increase, visible bubbles, jiggles when tapped) and the poke test, not the clock. Cold kitchens need more time; warm kitchens need less.
- **Mini pita perfection.** These pitas puff during baking if your dough is properly fermented and the oven is hot enough. If they don't puff significantly, the oven may not be hot enough (use an oven thermometer) or the dough was underproofed. Underproofed pitas will still be soft and delicious, just flatter.
- **Make it a spread.** If your pitas are very small or difficult to pocket, you can skip opening them and serve the whipped feta as a dip alongside warm pita chips or sliced pitas instead.
- **Flavor variations.** Add sun-dried tomatoes, crumbled pistachios, pomegranate seeds, crispy bacon, or crumbled goat cheese to the whipped feta base for color and textural contrast. Fresh herbs like basil, oregano, or cilantro also work beautifully.
Make ahead
Mix and bulk-ferment the dough in the refrigerator overnight (8–12 hours) for superior flavor. In the morning, shape the pitas and let them proof at room temperature for 1–1.5 hours, then bake. Make the whipped feta filling up to 2 days ahead; cover and refrigerate. Bake the pitas on the day of the party, fill, and serve immediately for maximum crispness.
Storage & reheating
Unbaked dough balls: refrigerate in an airtight container for up to 24 hours; bring to room temperature for 30–45 minutes before baking. Baked unfilled pitas: store in an airtight container at room temperature for 2 days; freeze in an airtight freezer bag for up to 2 months (thaw and warm at 350°F / 175°C for 5 minutes). Whipped feta filling: cover and refrigerate for up to 3 days. Filled pitas: best served immediately; store in an airtight container in the refrigerator for up to 24 hours and gently rewarm before serving.
Substitutions
- Active sourdough starter → ½ tsp instant yeast combined with 150g whole wheat flour (replacing 150g of the bread flour). This gives a tangy flavor closer to sourdough, though not identical. Reduce bulk fermentation to 2–3 hours and skip overnight fermentation.
- Crumbled feta cheese → Crumbled fresh goat cheese (200g) blended with ¼ cup extra Greek yogurt. Goat cheese is milder and creamier; adjust lemon juice and salt to taste. The filling will be lighter in texture.
- Fresh dill → 15g fresh mint or fresh parsley, or a combination of both. Mint creates a fresher, slightly sweet note; parsley is more neutral. Avoid dried dill for this filling—fresh herbs brighten the whipped feta.
- Plain full-fat Greek yogurt → Sour cream or crème fraîche (100 ml). Sour cream is tangier and slightly thinner; crème fraîche is richer. Both work beautifully; adjust salt to taste.
More finger food
See all →

Find more like this
- Meal
- Snack
- Cuisine
- Mediterranean
- Main ingredient
- Feta
- Diet
- VegetarianHalal
- Method
- Oven
- Occasion
- Parties