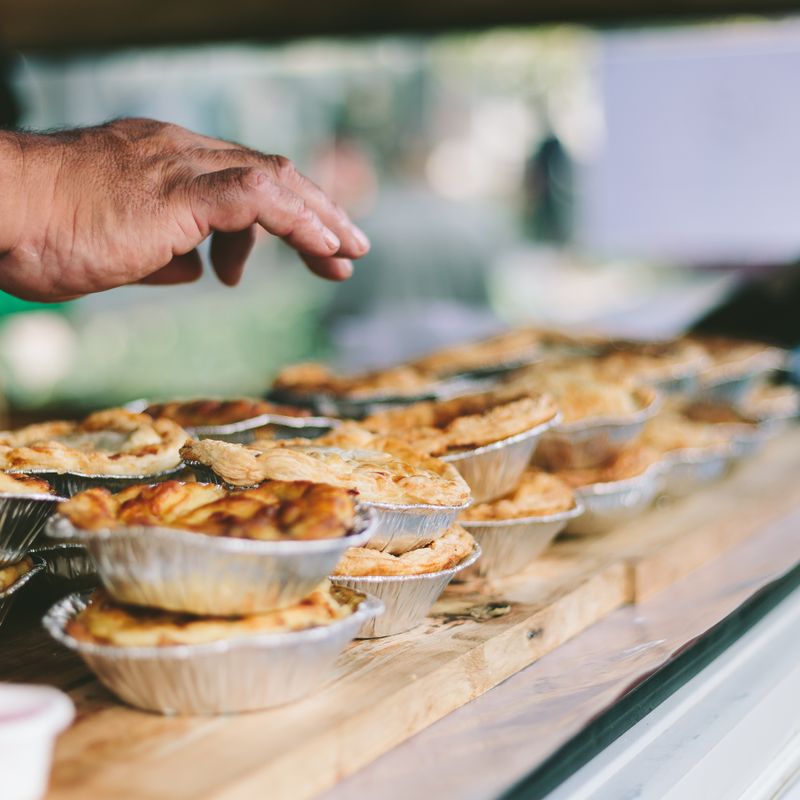
Sourdough Holiday Sage and Roasted Butternut Squash Hand Pies
Golden, hand-held sourdough pastries filled with roasted butternut squash, nutty Gruyère, and aromatic sage. The filling is deep and caramelized from the oven, while the sourdough crust develops a perfect crisp exterior and tender crumb. Perfect as a holiday appetizer, lunch, or side dish. Makes 8 substantial hand pies with rustic edges and a beautiful golden-brown finish.
- Prep
- 45 min
- Cook
- 1 hr 5 min
- Wait
- 1 hr 30 min
- Total
- 3 hr 20 min
- Makes
- 8 hand pies (about 5 ounces each)
Steps
Before you start
- Have your sourdough starter at peak activity (fed 4–6 hours prior, doubled, with a dome shape)
- Cube and roast the butternut squash ahead if convenient, then cool completely before filling
- Pull sourdough dough from the fridge 30 minutes before shaping so it's easier to handle
- Set up a small bowl of water and a pastry brush for sealing edges
Roast the squashOven 425°F / 220°C
- Preheat your oven to 425°F (220°C).
- Toss the cubed butternut squash with 3 tablespoons olive oil, kosher salt, and black pepper on a rimmed baking sheet.
- Spread in an even layer and roast for 35–40 minutes, stirring halfway through, until the squash is deeply caramelized on the edges and tender when pierced with a fork.
- The cubes should have collapsed slightly and the edges should be golden-brown.
- Remove from the oven and let cool completely (about 15 minutes).
+ Show details− Hide details
Ready when: Squash is deeply caramelized and easily pierced with a fork; edges are golden-brown
Tip: Cut the squash into even-sized cubes so they roast uniformly. Don't skip the caramelization—it develops the filling's depth of flavor.
Make the filling
- In a medium bowl, combine the cooled roasted squash, chopped fresh sage, grated Gruyère, softened butter, and thyme leaves (if using).
- Fold gently with a wooden spoon until just combined.
- Season lightly with kosher salt and black pepper, remembering that the cheese and butter already add salt.
- The filling should hold together but remain soft.
- Set aside.
+ Show details− Hide details
Ready when: Filling is evenly mixed with no streaks of cheese or squash clusters; smells herbaceous and rich
Tip: Fold gently—you want the squash pieces to stay intact and visible in the finished hand pies.
Divide dough into 8 pieces
- Remove your cold sourdough dough from the refrigerator.
- Using a bench scraper or sharp knife, divide it into 8 equal pieces (about 70 g each).
- If the dough is sticky, dust lightly with flour.
- Let the pieces rest at room temperature for 10 minutes so they become slightly easier to shape without tearing.
+ Show details− Hide details
Ready when: Dough pieces feel relaxed and slightly soft; no longer cold and stiff
Tip: Cold dough is easier to divide cleanly and resists tearing. The 10-minute rest allows the gluten to relax without the dough over-proofing.
Shape each dough round
- Working with one piece of dough at a time, gently cup it in your hands and pull the edges toward the bottom, creating tension across the top surface.
- Rotate it as you work, creating a smooth, taut top.
- Place seam-side down on a lightly floured work surface.
- Using your palm or a rolling pin, gently flatten each round into a thin oval about 5 inches long and 3.5 inches wide (13×9 cm), with slightly thicker edges than the center.
- The dough should be about ¼ inch (6 mm) thick.
+ Show details− Hide details
Ready when: Each oval is flat, thin, and slightly thicker at the edges; no tears or thin spots
Tip: Don't use a rolling pin with too much pressure—you want to gently thin the dough, not compress it. Keep the work surface lightly floured to prevent sticking.
Fill and seal the hand pies
- Place about 2.5 tablespoons (35 g) of filling slightly off-center on the bottom half of each dough oval, leaving a ½-inch (1.3 cm) border around the edge.
- Dip a pastry brush in water and wet the edges of the dough.
- Fold the top half over the filling, pressing gently but firmly to seal.
- Use a fork to crimp the edges all around, ensuring a tight seal.
- The hand pie should be crescent-shaped.
- Transfer each finished pie to a parchment-lined baking sheet.
+ Show details− Hide details
Ready when: Edges are crimped and sealed; no gaps or openings visible
Tip: Wetting the edges with water helps the dough seal tightly. Don't over-stuff—too much filling will burst out during baking and prevent a good seal.
Final proof
- Arrange all 8 hand pies on the parchment-lined baking sheet, leaving about 2 inches (5 cm) between each.
- Cover loosely with a clean kitchen towel or plastic wrap.
- Let them proof at room temperature for 30–40 minutes.
- They should look puffy and slightly risen, but not so puffy that they're about to split.
- When gently poked, the dough should spring back slowly and leave a faint indent.
+ Show details− Hide details
Ready when: Pies are visibly puffy; a gentle poke leaves a slow-springing indent
Tip: The exact proofing time depends on your kitchen temperature. Cooler kitchens may need 40 minutes; warmer ones may only need 30. Watch for the visual cue rather than the clock.
Prepare oven and brush egg washOven 400°F / 205°C
- About 15 minutes before baking, preheat your oven to 400°F (200°C).
- Just before baking, brush each hand pie lightly with the beaten egg wash, covering the entire surface evenly.
- Sprinkle a tiny pinch of fleur de sel on each pie if desired for a finishing touch.
+ Show details− Hide details
Ready when: Egg wash coats all surfaces evenly; pies are still soft and pillowy
Tip: Brush the egg wash just before baking so it stays tacky and helps create a shiny, golden crust. Don't over-brush—a light coat is all you need.
Bake the hand piesOven 400°F / 205°C
- Bake on the middle rack of your preheated 400°F (200°C) oven for 22–25 minutes, until the crust is deep golden-brown and the hand pies sound hollow when tapped underneath (if you can do this safely with a spatula).
- The edges should be darker than the center, showing good caramelization.
- If the pies are browning too fast, tent loosely with foil for the last 5 minutes.
+ Show details− Hide details
Ready when: Crust is deep golden-brown; pies sound hollow when tapped; filling may bubble slightly at the edges
Tip: Every oven is different. Check at 20 minutes; if the crust is already deeply browned, they may be done. Don't open the oven door repeatedly—just check once at the 20-minute mark.
Cool and serve
- Transfer the baking sheet to a cooling rack or set it on a heat-safe surface.
- Let the hand pies rest for 10 minutes on the sheet (the filling will continue to set slightly), then carefully slide them onto a cooling rack or serving platter.
- They can be served warm, at room temperature, or even cold.
- The sourdough crust will be crispest while still warm.
+ Show details− Hide details
Ready when: Crust has set and is no longer steaming; hand pies hold together when moved
Tip: Resist the urge to bite into them immediately—the filling is very hot inside and the crust is still setting. A 10-minute rest ensures the filling doesn't pour out when you cut into a pie.
Good to know
Tips
- Use your sourdough starter at peak activity—fed and doubled, bubbly and doming. Weak starter = dough that won't rise properly and pies that won't be fluffy inside.
- Don't skip the full caramelization of the squash. The deep golden color and slightly collapsed edges signal flavor concentration. Pale roasted squash will taste wan and watery by comparison.
- If your kitchen is very warm (above 75°F / 24°C), reduce the final proof time to 25–30 minutes to avoid over-proofing, which leads to dough that spreads during baking instead of puffing.
- For a rustic, irregular edge, gently press and seal with your fingers instead of a fork; it's less formal but very attractive and lets the crust show more character.
Make ahead
Roast the butternut squash up to 2 days ahead and store in an airtight container in the refrigerator. Make the filling up to 1 day ahead and keep refrigerated. Shape the hand pies up to 8 hours ahead, cover with plastic wrap, and refrigerate; add 5–10 minutes to the final proof time if baking straight from the fridge.
Storage & reheating
Store cooled hand pies in an airtight container at room temperature for up to 2 days, or in the refrigerator for up to 4 days. Freeze unbaked, fully proofed hand pies on a tray for 2 hours, then transfer to a freezer bag for up to 1 month; bake from frozen, adding 5–7 minutes to the baking time. Reheat cooled pies wrapped in foil at 350°F (175°C) for 12–15 minutes until the crust is warm and crispy again.
Substitutions
- Gruyère cheese → aged Comté, Emmental, or sharp white cheddar. Use a cheese with similar nuttiness and melting ability. Avoid soft cheeses, which will make the filling greasy.
- fresh sage leaves → fresh rosemary or a mix of thyme and sage. Sage is traditional for autumn squash, but rosemary adds a different herbal note. Use the same quantity chopped.
- butternut squash → kabocha squash or delicata squash. Other winter squashes work well; roasting times may vary slightly depending on size and moisture content. Aim for caramelized, tender cubes.
- active sourdough dough (fed starter, mixed bulk fermentation complete) → quality all-purpose or bread dough (enriched with 1 tbsp olive oil and 0.5 tsp salt per 280g dough). Sourdough adds distinctive tang and structure; a basic dough will work but won't have the same depth of flavor or fermented crust quality.
More stuffed bites
See all →



Find more like this
- Meal
- Lunch
- Cuisine
- Mediterranean
- Method
- Oven
- Occasion
- Christmas