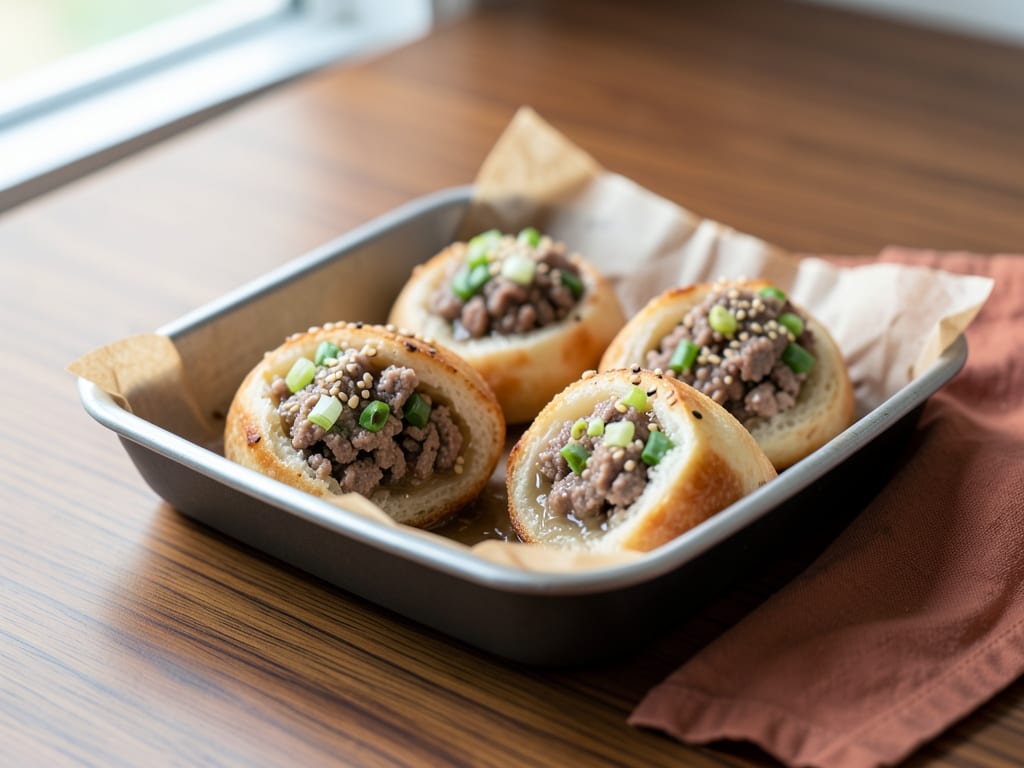
Sheng Jian Bao (Pan-Fried Pork Buns)
Sheng jian bao are crispy-bottomed, pan-fried buns filled with seasoned ground pork and a delicate aspic that melts into flavorful broth during cooking. These Shanghai dim sum favorites showcase contrasts: a tender, fluffy dough exterior encase a savory pork filling with a surprise pocket of hot, savory broth inside. The signature three-stage cooking process—pan-frying, steaming, and re-crisping—creates a golden, crispy bottom and tender top. While pleating takes practice, the results are absolutely worth the effort.
- Prep
- 1 hr
- Cook
- 25 min
- Wait
- 1 hr
- Total
- 2 hr 25 min
- Makes
- 16 buns (4 servings)
Steps
Before you start
- Make the aspic at least 2 hours ahead (ideally 1 day ahead); it must be fully set and chilled before using
- Measure all ingredients and mince scallions, ginger, and garlic before starting the dough, so you can focus on shaping
- Watch a short video of the pleating technique if unfamiliar; the key is steady, overlapping pleats drawn inward
- Ensure your skillet is at least 10 inches in diameter with a tight-fitting lid
Make the aspic (ahead)
- Heat 1/2 cup pork or chicken broth in a small saucepan over medium-low heat until steaming (do not boil).
- Sprinkle 1 tsp unflavored gelatin over the surface and let sit for 1 minute to hydrate.
- Stir constantly until the gelatin dissolves completely (about 1–2 minutes).
- Pour the clear liquid into a small shallow dish (a 4-inch bowl works well) and place in the refrigerator uncovered.
- Chill until fully set and firm to the touch, at least 2–4 hours or preferably overnight.
- Once set, use a small sharp knife to cut the aspic into tiny dice, about 1/4 inch cubes.
- Store covered in the refrigerator until ready to use (can be made up to 2 days ahead).
+ Show details− Hide details
Ready when: Aspic is completely firm and jiggles slightly when the dish is shaken; it should be fully opaque and set throughout
Tip: Make this at least 1 day ahead so it's fully set before assembly. A shallow, wide dish helps the aspic set evenly and makes it easier to dice later.
Mix hot-water dough
- Combine 2 cups (250g) all-purpose flour and 1/4 tsp salt in a large mixing bowl.
- Slowly pour 3/4 cup boiling water into the flour while stirring vigorously with chopsticks or a wooden spoon.
- Continue stirring for 2–3 minutes until the mixture cools slightly and most of the flour is moistened; the mixture will steam as you stir.
- Once it's cool enough to handle without burning your hands, gradually add 2 tbsp cold water while stirring, adding just a little at a time, until a shaggy, uneven dough forms.
- The dough will look rough and lumpy at this stage—this is correct.
+ Show details− Hide details
Ready when: All flour is moistened, no dry pockets remain, and the dough has started to come together
Tip: Boiling water will steam—work quickly but carefully to avoid burns. Use chopsticks for the initial mixing to keep your hands safe. The hot water creates the tender, fluffy texture characteristic of sheng jian bao dough.
Knead and rest dough
- Dust a clean work surface very lightly with all-purpose flour.
- Turn the shaggy dough out onto it and begin kneading: push the dough away from you with the heel of your hand, fold it back toward you, give it a quarter turn, and repeat.
- Knead for 8–10 minutes, adding only a tiny pinch of flour if it sticks badly (it should remain soft and slightly tacky).
- The dough will gradually become smoother, more elastic, and easier to handle.
- Once smooth and no longer shaggy, shape it into a ball.
- Cover the dough with a damp kitchen towel and let rest at room temperature for 1 hour.
- The dough will soften and become easier to shape.
+ Show details− Hide details
Ready when: Dough is smooth, springs back gently when poked, and feels soft and supple without cracks
Tip: Avoid adding too much extra flour during kneading or the dough will become dry and tough. A slightly sticky dough is better than a dry one. If your hands are very sticky, wet them slightly instead of flouring.
Prepare the filling
- In a medium bowl, combine 8 oz ground pork, 3–4 minced scallions, 1 tbsp soy sauce, 1 tsp sesame oil, 1 tbsp minced fresh ginger, 2 minced garlic cloves, 1/4 tsp white pepper, and 1/4 tsp sugar.
- Using a spoon or chopsticks, stir gently and carefully—just until all the ingredients are evenly distributed.
- The filling should look loose and crumbly, like wet sand.
- Do not overmix; if you stir too much, the filling becomes dense and pasty.
- The filling is ready to use, but do not add the diced aspic yet; fold the aspic in just before filling the buns (Step 7) so it doesn't break apart further.
+ Show details− Hide details
Ready when: Filling is evenly combined but still looks loose and crumbly
Tip: Overmixing develops gluten in the pork and creates a dense, tough filling. Stir just until you don't see unmixed pork or seasonings. Fatty pork (like shoulder or belly) yields a more flavorful, tender filling than lean cuts.
Divide dough into pieces
- Turn the rested dough out onto a clean, unfloured work surface.
- Using a bench scraper or knife, divide the dough into 16 equal pieces; each should be roughly the size of a walnut, about 1 oz (28g).
- Roll each piece between your palms, using gentle pressure, until it forms a smooth ball.
- If the dough is slightly sticky, dampen your palms with water rather than using flour.
- This step takes about 3 minutes.
+ Show details− Hide details
Ready when: 16 smooth, evenly sized balls are arranged on the work surface
Tip: Try to make the balls as uniform as possible so they cook evenly. Keep the dough pieces covered with a damp towel if you're not working quickly.
Roll dough into circles
- Working with one dough ball at a time, place it on a lightly floured work surface.
- Flatten it slightly with your fingers or palm, then use a rolling pin (or the heel of your hand) to roll it into a thin circle about 3 inches in diameter and 1/8 inch thick.
- The center should be slightly thicker than the edges, which makes pleating easier.
- Keep finished wrappers under a damp towel to prevent them from drying out and cracking as you work.
- Roll all 16 wrappers; this takes about 15 minutes total.
+ Show details− Hide details
Ready when: 16 thin, even circles, each about 3 inches wide, are stacked under a damp towel
Tip: If a wrapper begins to dry and crack, cover it with a damp towel for a moment, then try rolling again. Slightly thinner, more delicate dough is easier to pleat than thick dough.
Fill and pleat buns
- Just before filling, gently fold the diced aspic into the prepared pork filling—use a folding motion rather than stirring to avoid breaking the aspic further.
- Place one rolled wrapper on a dry, clean surface.
- Put 1–1.5 tbsp of filling (aspic included) in the center of the wrapper.
- With one hand, pinch the edge of the wrapper and bring it upward toward the center, creating a small pleat.
- Continue around the circle, creating 5–7 overlapping pleats as you move counterclockwise and drawing the dough inward and upward.
- Once you've gone all the way around, twist the very top of the dough to seal it closed.
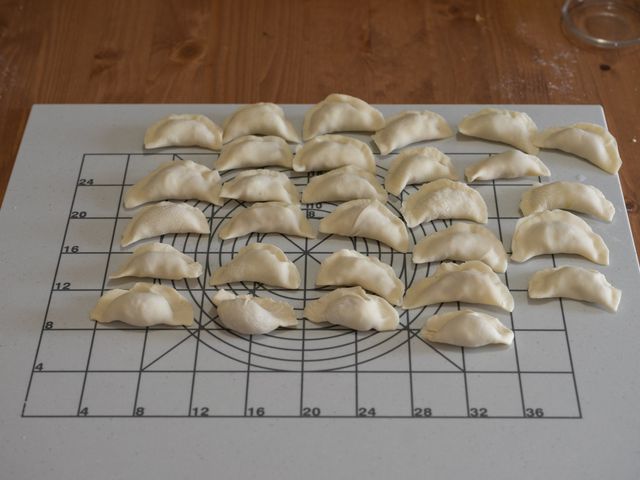
- The finished bun should be about 2 inches wide at the base and 1.5 inches tall, with pleats visible around the sides and a sealed, twisted top.
- Place each finished bun, seam-side up, on a small square of parchment paper.
- Repeat with the remaining wrappers and filling.
- This step takes about 20 minutes.
+ Show details− Hide details
Ready when: 16 pleated buns are arranged on parchment squares, all sealed at the top
Tip: If pleating feels unfamiliar, watch a short video tutorial first; the key is using steady, overlapping pleats that draw the wrapper inward and upward. Keep the wrapper under gentle tension as you pleat. Your pleats don't need to be perfect—they'll cook the same either way.
Cook first batch
- Heat 1 tbsp vegetable oil in a large non-stick skillet (10–12 inch diameter) over medium-high heat for about 1 minute until the oil shimmers.
- Carefully place 8 pleated buns flat-side down (pleated side facing up) in the pan, spacing them so they don't touch each other.
- Fry for 2–3 minutes, gently shaking the pan every 30 seconds or so to prevent sticking.
- Listen for a gentle sizzle and watch for the bottom to turn golden brown and crispy.
- Pour 1/4 cup water or broth around the buns (be careful—the liquid will sizzle and steam).
- Immediately cover the skillet with a tight-fitting lid.
- Reduce the heat to medium and steam for 8–10 minutes.
- The liquid will gradually evaporate, and the buns will cook through; they should look slightly matte and feel firm when pressed gently.
- Uncover the pan, increase the heat to medium-high, and cook for 1–2 minutes more, occasionally shaking the pan, until the bottom re-crisps and any remaining moisture evaporates.
- Transfer all 8 buns to a serving platter using a slotted spatula.
- While still hot, sprinkle 1/2 tbsp white sesame seeds over the tops.
+ Show details− Hide details
Ready when: Bottoms are deep golden brown and crispy; dough is opaque and firm; liquid mostly evaporated
Tip: If the buns stick during frying, the pan isn't hot enough—increase the heat slightly. Don't open the lid too often while steaming or steam escapes and cooking takes longer. If liquid remains after 10 minutes, increase heat to medium-high for 1–2 minutes to evaporate it fully.
Cook second batch
- Repeat the previous step with the remaining 8 buns, using 1 tbsp fresh vegetable oil (the first batch will have absorbed most of the initial oil).
- Heat the oil until shimmering, fry the buns for 2–3 minutes flat-side down until golden, add 1/4 cup water or broth, cover and steam for 8–10 minutes over medium heat, then uncover and crisp for 1–2 minutes over medium-high heat.
- Transfer to the serving platter and sprinkle with 1/2 tbsp sesame seeds.
+ Show details− Hide details
Ready when: Golden, crispy bottoms; fully cooked, opaque dough; liquid evaporated
Tip: Check that the pan is fully heated before adding the second batch of buns. If the pan seems dry, add the oil and let it heat for a moment. Serve immediately so the broth inside is still warm and liquid.
Serve immediately
- Arrange all 16 buns on a serving platter.
- Serve immediately while the aspic inside is still warm and liquid; as the buns cool, the aspic will firm up again.
- The buns are at their best enjoyed within a few minutes of cooking, when the contrasts of crispy bottom, tender top, and hot, savory broth are most pronounced.
+ Show details− Hide details
Tip: If guests arrive after cooking, the buns can be held loosely covered with foil for up to 10 minutes. To reheat leftover buns, place them in a skillet with a splash of water, cover, and heat over medium for 3–4 minutes until warmed through.
Good to know
Tips
- The aspic is what makes sheng jian bao special. As the buns cook, the aspic melts into a delicious, savory broth inside the filling. Make it at least 1 day ahead and ensure it's fully set; you should see clear liquid at the bottom if you didn't strain it, which will transform into jelly.
- Hot-water dough creates the signature soft, fluffy texture of these buns. The boiling water partially cooks the flour, which makes the dough more tender and less elastic than traditional dough. Don't skip this step or use cold water instead.
- Overmixing the filling makes it dense and tough. Stir just until the ingredients are combined, and add the aspic at the very last moment by gently folding (not stirring) to minimize breakage.
- The three-stage cooking process is essential: pan-frying creates the golden, crispy bottom; steaming cooks the filling through and melts the aspic into broth; and re-crisping restores the texture of the bottom after steaming. Skipping any step will change the final result.
Make ahead
The aspic can be made 1–2 days ahead and stored covered in the refrigerator. Shaped buns can be frozen on a tray for 1 hour, then transferred to a freezer bag and stored for up to 3 months; cook directly from frozen without thawing, adding 2–3 minutes to the steaming time. Cooked buns are best served fresh but can be reheated (see Storage).
Storage & reheating
Room temperature (up to 4 hours): Place in an airtight container; reheat in a non-stick skillet with a splash of water, covered, over medium heat for 3–4 minutes until warmed through. Refrigerator (up to 4 days): Cover and refrigerate; reheat as above. Freezer: Raw buns freeze well for up to 3 months; cooked buns are not recommended for freezing as they become tough when reheated. Do NOT microwave, as this will make the buns rubbery and tough.
Substitutions
- ground pork → ground chicken or ground turkey. Chicken is leaner and slightly less flavorful. Use the same amount and weight. Cooking time is identical.
- ground pork → ground shrimp. Creates a lighter, more delicate filling. Use the same weight. Reduce soy sauce to 2 tsp to avoid overpowering the shrimp. Follow all cooking steps identically.
- pork or chicken broth → chicken broth or vegetable broth. Chicken broth works well and is more accessible. Vegetable broth is lighter but still acceptable. The aspic will be less rich but still functional. Use the same amount.
- sesame oil → additional soy sauce (1/2 tsp) or omit. If substituting with extra soy sauce, reduce the original soy sauce amount to 2.5 tsp total. The filling will be less aromatic but still delicious. You can also omit it entirely.
More stuffed bites
See all →

Find more like this
- Meal
- Brunch
- Cuisine
- Chinese
- Main ingredient
- Ground Pork
- Diet
- Dairy-Free
- Method
- Stovetop