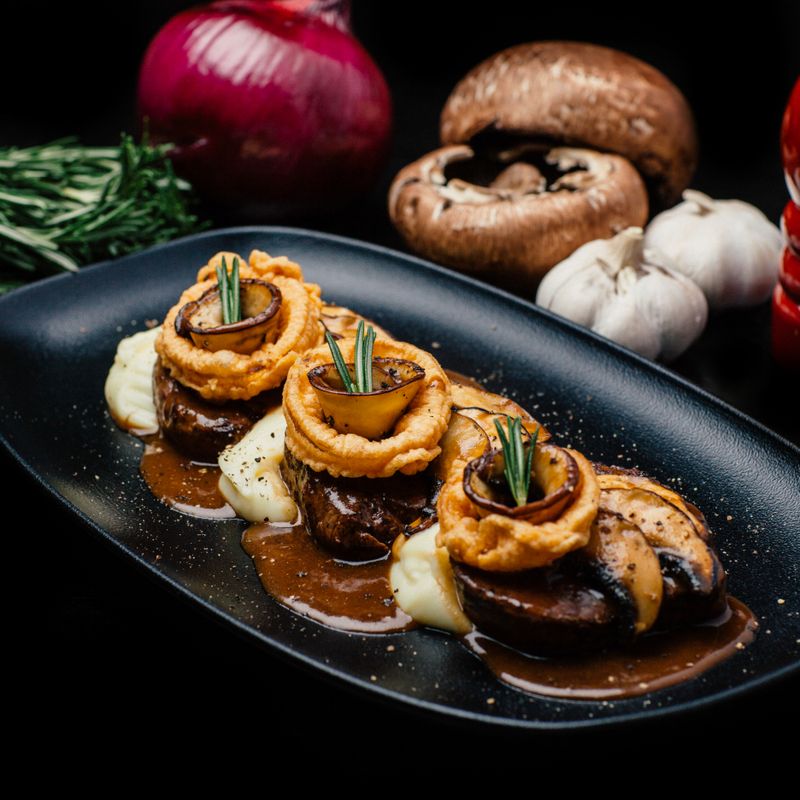
Rich Beef Gravy
A deeply savory, silky brown gravy built on beef pan drippings, a nutty butter-and-flour roux, and good beef broth. It's perfect over roast beef, mashed potatoes, or biscuits.
- Prep
- 10 min
- Cook
- 20 min
- Total
- 30 min
- Makes
- About 3 cups (720 ml) gravy, enough for 8 servings of ⅓ cup (80 ml)
Steps
Before you start
- Pour the drippings from your roasting pan into a heatproof glass measuring cup and let the fat rise to the top for a few minutes. You need 3 tablespoons of fat and the dark juices underneath.
- Warm the beef broth in a saucepan or the microwave until steaming. Hot broth blends into the roux more smoothly and is less likely to make lumps.
- If you don't have enough drippings, make up the difference with extra butter. The recipe already accounts for this.
- Use low-sodium broth if you can. Drippings and Worcestershire are salty, so you season at the end.
Separate the drippings
- Let the roasting juices settle in a glass measuring cup for 5 minutes.
- Spoon off the clear fat from the top into a small bowl.
- Measure out 3 tablespoons of fat and return any extra to the juices.
- If you have less than 3 tablespoons, add enough of the butter's weight later to make up the difference.
- Keep the dark juices underneath for step 4.
+ Show details− Hide details
Ready when: Two clear layers: golden fat on top, dark brown juices below
Tip: A fat separator works well here too if you have one.
Heat the fat
- Set a 3-quart (2.8 L) saucepan over medium heat.
- Add the 3 tablespoons of skimmed drippings fat and the 2 tablespoons butter.
- Stir until the butter has fully melted and the mixture is bubbling gently, about 1 minute.
+ Show details− Hide details
Ready when: Butter is melted and the fat shimmers with small bubbles
Soften the onion
- Add the minced onion and cook, stirring often, for 2 to 3 minutes until it is soft and translucent but not browned.
+ Show details− Hide details
Ready when: Onion looks translucent and smells sweet
Tip: Mince the onion very finely so it melts into the gravy. Or strain it out at the end.
Cook the roux
- Sprinkle the flour evenly over the fat and onion.
- Whisk constantly for 3 to 4 minutes, scraping the bottom of the pan, until the paste turns the color of peanut butter to light caramel and smells nutty.
- Cooking it longer gives a deeper color and flavor.
- Don't let it burn.
+ Show details− Hide details
Ready when: Roux is golden-tan, smooth and smells toasty, not raw or scorched
Tip: If you see dark specks or smell burning, start over. Burnt roux makes bitter gravy.
Whisk in the liquid
- Reduce the heat to medium-low.
- Pour in the reserved dark juices from the drippings and about ½ cup (120 ml) of the hot broth, whisking hard to form a thick, smooth paste.
- Slowly add the remaining broth in 3 or 4 additions, whisking until smooth after each.
+ Show details− Hide details
Ready when: Mixture is smooth with no flour lumps
Tip: Adding the first splash of broth gradually is what prevents lumps. If lumps form, whisk vigorously or strain at the end.
Simmer and reduce
- Add the Worcestershire, pepper and thyme sprigs if using.
- Raise the heat to medium and bring to a gentle simmer.
- Cook, stirring every minute or so, for 10 to 12 minutes until the gravy has thickened and reduced slightly.
+ Show details− Hide details
Ready when: Gravy coats the back of a spoon and a finger drawn across leaves a clear line
Tip: It will thicken a little more as it cools, so stop when it is slightly looser than you want.
Season and serve
- Remove the thyme sprigs.
- Taste, then stir in salt and more pepper as needed.
- If you like, pour through a fine-mesh strainer for a silky texture.
- If too thick, whisk in a splash of hot broth or water.
- Serve hot.
+ Show details− Hide details
Ready when: Gravy tastes deeply savory and balanced, with a glossy, pourable texture
Tip: Always taste before salting. Drippings and broth vary widely in saltiness.
Good to know
Tips
- Whisk constantly when the liquid goes in. A flat-bottomed or balloon whisk reaches the corners of the pan where lumps form.
- For a darker, richer gravy, cook the roux an extra minute or two, until deep golden brown, and add 1 teaspoon of tomato paste with the onion.
- Salt last. Reducing the gravy concentrates the saltiness of the broth and drippings.
- If the gravy gets too thick while waiting, whisk in hot broth a tablespoon at a time.
Make ahead
"Make the gravy up to 3 days ahead and refrigerate. Reheat slowly, whisking in broth or water to loosen it."
Storage & reheating
Room temperature: no more than 2 hours. Fridge: up to 4 days in an airtight container. Freezer: up to 3 months in freezer-safe containers; thaw overnight in the fridge. Reheat in a saucepan over medium-low heat, whisking often and adding a splash of broth or water until smooth and steaming hot.
Substitutions
- beef pan drippings → Additional unsalted butter plus 1 tablespoon soy sauce. Use 3 extra tablespoons butter and add the soy sauce with the broth. The flavor will be less beefy but still rich.
- all-purpose flour → 2 tablespoons cornstarch mixed with 3 tablespoons cold water. Skip the roux. Simmer the broth and drippings, whisk in the slurry and cook 2 minutes. The result is glossier and lighter in flavor.
- Worcestershire sauce → Soy sauce. Use 1 teaspoon, then taste before adding any salt.
- low-sodium beef broth → Beef stock or 3 cups water with 1 tablespoon beef base. Stock gives the richest body. Adjust salt to taste.
More sauces
See all →




Find more like this
- Meal
- Dinner
- Cuisine
- American
- Main ingredient
- Beef Roast
- Diet
- HalalSugar-Free
- Method
- Stovetop