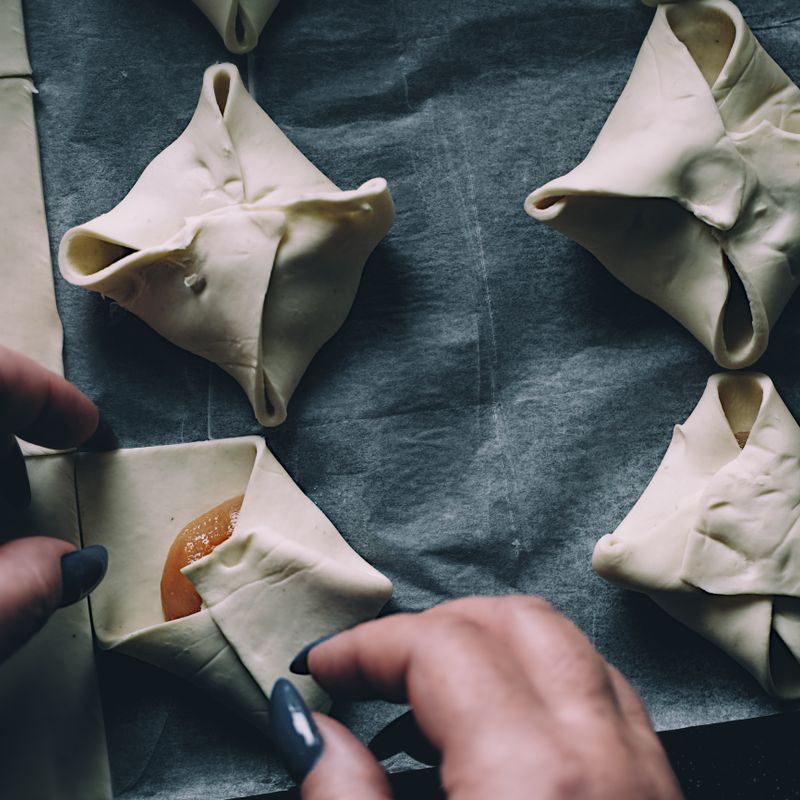
No-Roll Jam Thumbprint Sheets
Golden, butter-rich sheet pastry dough pressed directly into a pan, studded with homemade or jarred jam thumbprints, and baked until the edges are crisp and caramel-colored while the centers stay tender. This simple method skips rolling, cutting, and shaping—just mix, press, indent, and bake. The result is a rustic, slice-and-serve pastry perfect for brunch, dessert, or afternoon tea.
- Prep
- 15 min
- Cook
- 25 min
- Total
- 40 min
- Makes
- 1 sheet (12 pastries, each about 2½×3 inches)
Steps
Before you start
- Use cold butter straight from the fridge for the flakiest texture
- Preheat your oven to 375°F (190°C)
- Line a 9×13-inch (23×33 cm) baking sheet with parchment paper
Make the dough
- In a large bowl, combine 2 cups (240 g) all-purpose flour, ⅓ cup (65 g) granulated sugar, and ½ tsp (3 g) kosher salt.
- Add the cold, cubed butter and use a pastry cutter, two forks, or your fingertips to rub the butter into the flour until the mixture looks like coarse breadcrumbs with pea-sized pieces of butter still visible.
- In a small bowl, whisk together 1 room-temperature egg yolk and ½ tsp (2.5 ml) vanilla extract.
- Pour the egg mixture into the flour mixture and stir gently with a fork until the dough just comes together.
- Do not overwork.
+ Show details− Hide details
Ready when: Dough is shaggy but holds together when squeezed
Tip: Keep butter cold and do not overmix; overworking develops gluten and makes the pastry tough instead of tender and flaky.
Press dough into pan
- Tip the dough onto the parchment-lined 9×13-inch (23×33 cm) baking sheet.
- Use your fingers to press the dough evenly across the entire surface, working it gently into the corners and edges.
- Aim for a thickness of about ¼ inch (6 mm) and an even surface.
+ Show details− Hide details
Ready when: Dough covers the sheet evenly with a level surface
Tip: If the dough tears, gently pinch it back together. Work quickly so the butter doesn't warm up too much.
Make thumbprint indents
- Dip your thumb or the back of a small round spoon into a cup of cold water.
- Press your thumb or spoon into the dough to create a shallow dimple, then move about 1½ inches (4 cm) away and repeat in a grid pattern across the entire sheet—you should create about 12 indents total (3 rows of 4).
- The indents should be deep enough to hold jam but not so deep that they go all the way through to the pan.
+ Show details− Hide details
Ready when: Sheet has 12 evenly spaced, thumb-sized dimples
Tip: Keep your thumb or spoon damp so the dough doesn't stick; wipe it clean as needed between presses.
Fill thumbprints with jam
- Spoon about 1 tablespoon (15 ml) of room-temperature jam into each indentation, slightly mounding it.
- Be generous but don't overfill; the jam will spread slightly as it bakes.
+ Show details− Hide details
Ready when: Each dimple is filled with jam
Tip: If your jam is cold from the fridge, let it sit at room temperature for a few minutes so it spreads smoothly.
Brush with egg wash
- Brush the lightly beaten egg white over all the exposed dough, being careful not to drench the jam.
- This creates a light, golden, slightly shiny finish.
+ Show details− Hide details
Ready when: All visible dough has a light coating of egg wash
Tip: Use a soft pastry brush or the back of a fork to apply a thin, even layer; too much egg wash can make the pastry soggy.
Bake until goldenOven 375°F / 190°C
- Bake in a preheated 375°F (190°C) oven for 22–25 minutes, until the dough is light golden-brown on the edges and pale golden on the surface.
- The jam should be bubbly at the edges and still glossy in the center.
+ Show details− Hide details
Ready when: Edges are light golden, jam is bubbly, and dough looks set but still pale in the center
Tip: If the edges brown too quickly, loosely tent the sheet with foil for the last 5 minutes.
Cool and serve
- Remove the sheet from the oven and place it on a wire rack to cool for at least 10 minutes.
- The pastry will firm up slightly as it cools.
- Once cool enough to handle, slice into 12 pieces (3 cuts lengthwise and 3 cuts widthwise), or cut as desired.
- Serve warm or at room temperature.
+ Show details− Hide details
Ready when: Pastry has cooled enough that jam is no longer runny but still soft
Tip: A sharp knife dipped in hot water and wiped clean between cuts will help you get neat slices without tearing the jam.
Good to know
Tips
- Use room-temperature jam so it distributes smoothly in the thumbprints without tearing the dough
- For a uniform grid, lightly mark the dough with a knife before making indents, spacing marks 1½ inches (4 cm) apart
- Different jams bake at different rates; berry jams tend to bubble more than stone-fruit or citrus preserves
- The pastry is most tender and flakiest when served still slightly warm or at room temperature; it hardens when cold, so remove from the fridge 15 minutes before serving
Make ahead
Dough can be mixed up to 2 hours ahead and refrigerated in the bowl covered with plastic wrap. Press into the pan and add jam just before baking. Unbaked sheet can also be frozen for up to 1 week; bake from frozen, adding 3–5 minutes to the baking time.
Storage & reheating
Room temperature: up to 2 days in an airtight container. Refrigerator: up to 4 days. Freezer: up to 1 month wrapped individually in plastic wrap, then in a freezer-safe container. Reheat frozen pieces in a 300°F (150°C) oven for 8–10 minutes, or thaw at room temperature for 1–2 hours and serve as is.
Substitutions
- unsalted butter → Salted butter. Use salted butter and reduce the kosher salt to ¼ tsp (1.5 g). The pastry will have a subtle salty note that complements the jam.
- jam or preserves (any flavor) → Lemon curd, almond butter, or Nutella. Any thick, spreadable filling works. Almond butter creates a richer, more savory pastry; curd adds brightness; Nutella appeals to chocolate lovers.
- large egg white → Whole beaten egg or milk. Whole egg wash will create a deeper golden color; milk creates a paler, matte finish.
- granulated sugar → Demerara or turbinado sugar. Coarse sugars create a sparkly, slightly crunchy texture on the baked pastry and add visual interest.
More no-bake desserts
See all →



Find more like this
- Meal
- Dessert
- Diet
- VegetarianHalal
- Method
- Oven
- Quick & Easy
- EasyMake Ahead