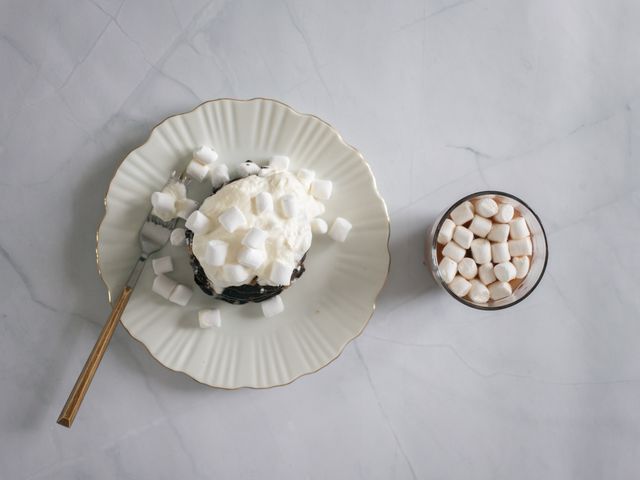
Korean Bingsu Shaved Ice Tartlet with Sweetened Beans
A modern take on the classic Korean shaved ice dessert, served in an individual crispy tartlet shell. Layers of shaved ice, sweetened red azuki beans, mochi, and a drizzle of condensed milk and syrup create a refreshing, playful treat perfect for warm afternoons. The tartlet can be assembled moments before serving for maximum crispness and chill.
Steps
Before you start
- Chill the tartlet pans in the freezer for 15 minutes before baking (this helps the pastry cook evenly and prevents shrinking)
- Prepare ice by freezing water in a shallow pan or using crushed ice from your freezer; if using a shaved ice machine, chill it in the freezer
- Have all toppings prepped and chilled before you begin assembly
Make the tartlet dough
- In a medium bowl, whisk together flour, sugar, and salt.
- Add the cold cubed butter and use your fingertips to rub the mixture together until it resembles coarse breadcrumbs with some pea-sized butter pieces still visible.
- In a small bowl, whisk the egg yolk with vanilla and ice water.
- Pour the wet mixture over the flour mixture and gently fold with a rubber spatula until a shaggy dough just comes together.
- Do not overmix; some floury bits are okay.
- Divide the dough into 4 equal portions, shape into disks, wrap in plastic, and refrigerate for at least 15 minutes (or up to 2 hours).
+ Show details− Hide details
Ready when: Dough is firm and holds together when pressed
Tip: Keep dough cold throughout; if it warms, chill it longer. Overworking develops gluten and makes the shell tough.
Line tartlet pansOven 375°F / 190°C
- Preheat the oven to 375°F (190°C).
- Remove the chilled dough from the refrigerator.
- Working with one disk at a time, flatten it slightly and place it in a tartlet pan.
- Using your fingers or the base of a measuring cup, gently press the dough evenly into the bottom and up the sides of the pan, filling any cracks.
- There should be no thick or thin spots.
- The dough should come just to the rim.
- Trim any excess dough flush with the top of the pan by running your thumb along the rim.
- Prick the base and lower sides all over with a fork to prevent puffing.
- Repeat with remaining dough disks.
+ Show details− Hide details
Ready when: Dough is evenly distributed in each pan with no gaps
Tip: If dough is too soft to work with, place pans in the freezer for 5 minutes. Pricking prevents a puffed, uneven shell.
Prebake the shellsOven 375°F / 190°C
- Place the lined tartlet pans on a baking sheet.
- Bake at 375°F (190°C) for 12–14 minutes, until the shells are light golden brown at the edges and the base is set but still pale.
- The shells will look slightly underbaked in the center; this is intentional, as they will firm up as they cool.
- Remove from the oven and let cool on the baking sheet for 2 minutes, then carefully unmold the tartlets onto a wire rack to cool completely (about 5–10 minutes).
- Handle gently as they are still fragile.
+ Show details− Hide details
Ready when: Shells are pale golden at edges, base is set, and they release cleanly from pans
Tip: If the edges brown too quickly, loosely tent with foil. Cool completely before assembly or they may crack; you can also bake them a few hours ahead.
Sweeten the azuki beans
- Pour the drained azuki beans into a small saucepan.
- Add sugar and water.
- Bring to a gentle simmer over medium-low heat, stirring occasionally.
- Cook for 3–4 minutes, until the syrup is clear and the beans are warmed through and coated with sweet syrup.
- The beans should remain intact and not break apart.
- Season with a small pinch of salt.
- Remove from heat and let cool to room temperature, about 5 minutes.
- Transfer the beans and syrup to a bowl and refrigerate until needed.
+ Show details− Hide details
Ready when: Syrup is clear and glossy, beans are heated through but still hold their shape
Tip: Do not overcook or the beans will fall apart. A quick simmer is all that's needed; the residual heat will continue to warm them.
Chill all components
- Place the cooled tartlet shells, sweetened azuki beans, mochi pieces, condensed milk, corn syrup, and shaved ice in the refrigerator (or freezer for the ice).
- Everything should be very cold before assembly.
- If using a shaved ice machine, chill it in the freezer as well.
- This step is crucial for the final texture and presentation.
+ Show details− Hide details
Ready when: All items are cold to the touch
Tip: The colder everything is, the longer the ice will stay shaved and crunchy. Do not assemble more than a minute or two before serving.
Assemble the tartlets
- Working quickly, place a cooled tartlet shell on a chilled serving plate or bowl.
- Spoon 2–3 tablespoons of the sweetened azuki beans and a drizzle of their syrup into the bottom of the shell.
- Top with a small handful of the mochi pieces (about 3 tablespoons).
- Immediately mound about ¾ cup (approximately 50 g) of shaved ice on top of the beans and mochi, packing it gently so it holds together but doesn't compress into a solid block.
- Drizzle 1–1.5 tablespoons of chilled condensed milk over the shaved ice in a thin, steady stream, and drizzle about ½ tablespoon of chilled corn syrup as well.
- If desired, garnish with fresh fruit and a small handful of cereal.
- Serve immediately, while the ice is still fluffy and the shell is crisp.
- Repeat with the remaining tartlets.
+ Show details− Hide details
Ready when: Tartlet is fully assembled with a fluffy mound of shaved ice and all toppings are visible
Tip: Speed is key—the moment you add the ice, begin eating. If ice melts a little, that's part of the charm; it releases a sweet syrup that pools in the shell. You can assemble one at a time for different serving times, or all four quickly if serving together.
Good to know
Tips
- Shaving ice: If you don't have a dedicated shaved ice machine, you can use a block grater and an ice block from the freezer, or crush ice in a blender on the pulse setting and then freeze it briefly until it's fluffy again. The texture should be fine and fluffy, not chunks.
- Sweetened condensed milk drizzle: For easier drizzling, transfer a small amount to a small ziplock bag, snip a tiny corner, and pipe it over the ice. Or warm it slightly to make it less viscous, then drizzle quickly before it cools again.
- Flavor variations: Try adding a thin layer of fresh fruit, a sprinkle of matcha powder, or a small scoop of shaved ice made from sweetened fruit juice or coffee for color and flavor variety.
- Tartlet shells: If they crack during unmolding, it's okay—they'll still taste delicious and hold together. Or, you can bake them in the pans and serve them unmolded just before eating, using the tartlet as a mold on the plate.
Make ahead
The tartlet shells can be baked up to 8 hours ahead and stored in an airtight container at room temperature. The sweetened azuki beans can be made up to 3 days ahead and stored in the refrigerator. Do not assemble until just before serving for the best texture.
Storage & reheating
Baked tartlet shells: Store in an airtight container at room temperature for up to 2 days. They can also be frozen in a freezer bag for up to 3 weeks (thaw at room temperature before assembly). Sweetened azuki beans: Refrigerate in an airtight container for up to 4 days; do not freeze. Assembled tartlets are best eaten immediately but can be held in the refrigerator for up to 10 minutes before the ice melts noticeably. To reheat and crisp the shells (if made ahead), place them in a 325°F / 160°C oven for 2–3 minutes.
Substitutions
- canned azuki beans → sweetened black beans or white mung beans (canned, drained). Azuki beans are traditional, but other legumes work well. Adjust the added sugar if your beans are already sweetened.
- light corn syrup or rice syrup → honey, agave syrup, or rice syrup. Use an equal amount by volume. Rice syrup is closest to the traditional Korean bingsu syrup, but corn syrup and honey both work.
- mochi pieces (plain or flavored) → soft-serve ice cream, shaved ice with milk, or diced jelly (like agar-agar). Mochi adds a chewy texture, but ice cream melts nicely into the shaved ice, and agar jellies hold their shape well in the cold.
- all-purpose flour → whole wheat flour or a blend of whole wheat and all-purpose flour (up to 50% substitution). The tart will have a slightly nuttier flavor and denser crumb. Use the same weight.