Japanese Castella Honey Sponge Cake Loaf
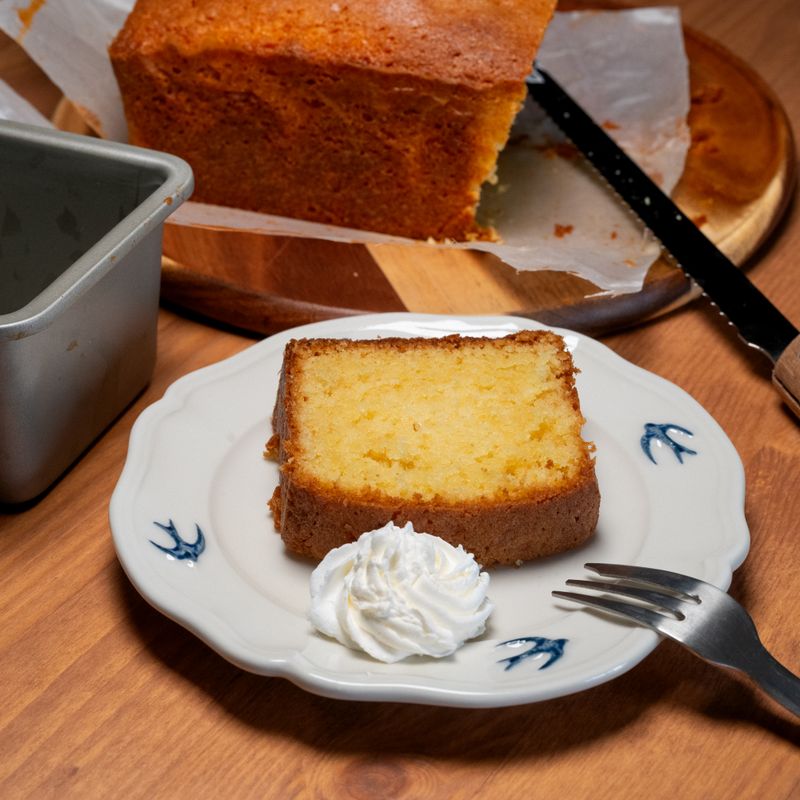
Castella is a traditional Japanese sponge cake with origins in Portuguese trading history. This version highlights honey's delicate floral notes while maintaining the cake's signature moist, tender crumb and golden-brown exterior. The technique relies on careful egg whisking to trap air and a water bath to ensure even, gentle cooking. The result is an elegant loaf with a fine, almost custard-like interior that slices cleanly and keeps well for several days.
- Prep
- 20 min
- Cook
- 50 min
- Wait
- 1 hr 30 min
- Total
- 2 hr 40 min
- Makes
- 1 loaf (10 slices)
Steps
Before you start
- Preheat oven to 325°F (160°C) at least 15 minutes ahead
- Have all eggs at room temperature (70°F/21°C) before starting
- Line a 8½×4½-inch (21×11 cm) loaf pan with parchment paper, leaving overhang on long sides
- Set up a shallow water bath (roasting pan with 1 inch of hot water) on the lower oven rack
Combine yolks with honey
- In a medium heatproof bowl, whisk together the 5 egg yolks with 100 ml (⅓ cup) honey and 80 g (⅜ cup) of the granulated sugar.
- Place the bowl over a pot of gently simmering water (a double boiler), ensuring the bowl doesn't touch the water.
- Whisk constantly for 3–4 minutes until the mixture reaches 110°F (43°C) and feels warm to the touch, then remove from heat.
- This slight warming helps dissolve the sugar and will improve the cake's texture.
+ Show details− Hide details
Ready when: Mixture is warm and sugar is dissolved
Tip: Don't overheat—if the mixture exceeds 120°F (49°C), it may begin to cook the eggs. Stop heating once it reaches 110°F.
Add oil and water to yolks
- Pour 60 ml (¼ cup) vegetable oil and 45 ml (3 tablespoons) water into the warmed yolk mixture, whisking until completely emulsified and smooth.
- Add 2.5 ml (½ teaspoon) vanilla extract and whisk to combine.
+ Show details− Hide details
Ready when: Mixture is pale, smooth, and emulsified
Tip: Whisking the oil in gradually ensures a stable, homogeneous batter without greasiness.
Sift flour and salt
- Sift 110 g (1 cup) cake flour and 1.5 g (¼ teaspoon) fine sea salt directly over the yolk mixture in 3 additions, gently folding with a rubber spatula after each addition until just combined.
- Do not overmix.
+ Show details− Hide details
Ready when: No streaks of flour remain and batter is smooth
Tip: Fold gently and stop as soon as the flour disappears—overmixing develops gluten and toughens the cake.
Whip egg whites to stiff peaks
- In a large, very clean, dry mixing bowl, use a stand mixer fitted with the whisk attachment (or hand mixer) to beat the 5 egg whites on medium-high speed.
- When soft peaks form (after about 3 minutes), gradually sprinkle in the reserved 20 g (1½ tablespoons) of granulated sugar while continuing to beat for another 2–3 minutes until stiff, glossy peaks form.
+ Show details− Hide details
Ready when: Egg whites form stiff, glossy peaks that hold their shape when the beater is lifted
Tip: Any trace of yolk or fat will prevent the whites from whipping properly. Use a very clean bowl and beaters.
Fold whites into batter
- Gently fold one-third of the whipped egg whites into the yolk mixture with a rubber spatula using a few large, sweeping motions to lighten the batter.
- Then fold in the remaining two-thirds in two additions, turning the bowl as you fold, until just a few streaks of white remain visible.
+ Show details− Hide details
Ready when: Streaks of white are barely visible; mixture is light and fluffy
Tip: Fold gently to preserve the air you've whipped in. Overfolding deflates the batter and results in a dense cake.
Pour into prepared pan
- Pour the batter into the parchment-lined 8½×4½-inch (21×11 cm) loaf pan, using the spatula to spread it evenly.
- Tap the pan gently on the counter a few times to release any large air bubbles, but do not tap it hard.
+ Show details− Hide details
Ready when: Batter is level in the pan
Tip: Gentle taps release trapped air bubbles without causing the batter to deflate significantly.
Set up water bath and bakeOven 325°F / 165°C
- Place the filled loaf pan into the preheated water bath on the lower oven rack (the water should come halfway up the sides of the pan).
- If needed, add more hot water to achieve this level.
- Bake at 325°F (160°C) for 45–50 minutes, or until a skewer inserted in the center comes out with a few moist crumbs attached and the top is golden brown.
+ Show details− Hide details
Ready when: Skewer inserted in center has a few moist crumbs; top is golden brown; cake springs back lightly when gently touched
Tip: The water bath prevents the edges from overbaking while the center stays moist. Do not open the oven door in the first 30 minutes.
Cool in pan and unmold
- Remove the loaf pan from the water bath and place it on a wire rack.
- Let the cake cool in the pan for 15 minutes at room temperature, then carefully invert it onto the rack and remove the parchment paper.
- Turn the cake right-side up and allow it to cool completely to room temperature, about 1 hour.
+ Show details− Hide details
Ready when: Cake is cool to the touch and feels firm
Tip: Cooling in the pan first allows the structure to set before unmolding, which prevents cracking or falling apart.
Good to know
Tips
- The water bath is essential—it provides gentle, even heat that prevents dry edges and guarantees a moist interior. Without it, the cake will bake too quickly and unevenly.
- Room-temperature eggs whip to greater volume because the proteins are more flexible. Cold eggs take longer to whip and trap less air, resulting in a denser cake.
- Castella improves with age: slice and serve the next day for the most tender crumb and fully integrated honey flavor.
- For a shinier, more professional appearance, brush the cooled cake's top with a light glaze: warm 30 g (¼ cup) honey with 15 ml (1 tablespoon) water, brush on the cooled loaf, and allow to set.
Make ahead
Bake the castella 1–2 days ahead and store covered at room temperature. It actually improves slightly as flavors mellow and the crumb continues to set.
Storage & reheating
Room temperature: Keep wrapped in parchment or plastic wrap in an airtight container for up to 3 days. The cake stays moist and tender. Refrigerator: Store in an airtight container for up to 5 days (the cake will firm slightly but remain delicious). Freezer: Wrap the cooled loaf in plastic wrap and then foil; freeze for up to 2 months. Thaw overnight at room temperature. To serve chilled, refrigerate for 30 minutes before slicing, which creates cleaner cuts.
Substitutions
- cake flour → All-purpose flour. All-purpose flour has slightly more protein and will yield a slightly denser cake, but it works well. Sift twice if using all-purpose flour.
- mild honey (such as acacia or orange blossom) → Light agave nectar or light corn syrup. These will reduce the pronounced honey flavor but maintain the moistness. Use the same volume (100 ml) and reduce granulated sugar by 10 g if using corn syrup, as it is sweeter.
- neutral vegetable oil → Light olive oil or refined coconut oil. Use neutral-flavored oils only. Avoid extra-virgin olive oil and unrefined coconut oil, which will impart unwanted flavors.
- pure vanilla extract → Brandy or sweet sake (mirin). Replace vanilla with 2.5 ml (½ teaspoon) brandy or 5 ml (1 teaspoon) mirin for a more traditional Japanese castella flavor.