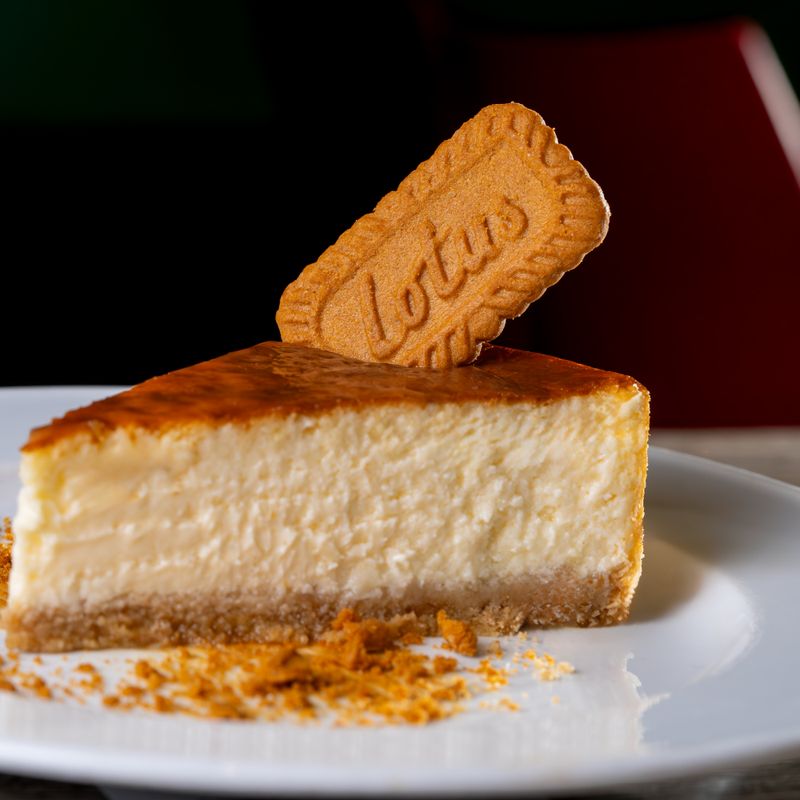
Instant Pot Biscoff Cookie Blondies
Rich, fudgy blondies infused with Biscoff cookie flavor, made conveniently in an Instant Pot. Crushed Biscoff cookies mixed into a brown sugar batter create pockets of spiced caramel flavor, while a Biscoff spread swirl adds creamy richness. The pressure cooking method creates incredibly moist, tender bars in under 30 minutes total.
- Prep
- 12 min
- Cook
- 16 min
- Wait
- 5 min
- Total
- 33 min
- Makes
- 9 blondies (3×3-inch / 7.5×7.5 cm squares)
Steps
Before you start
- Use a 7-inch (18 cm) round cake pan or 6×6-inch (15×15 cm) square pan that fits inside your Instant Pot
- Have all ingredients at room temperature for even mixing
- Fill the Instant Pot with 1 cup (240 ml) water and place the trivet inside before starting
Prepare the pan and Instant Pot
- Line a 7-inch (18 cm) round cake pan or 6×6-inch (15×15 cm) square pan with parchment paper, allowing overhang on all sides for easy removal.
- Fill your Instant Pot with 1 cup (240 ml) water and place the metal trivet inside.
- Close the lid loosely so steam can escape as the pot preheats.
+ Show details− Hide details
Tip: Overhang parchment makes lifting the blondies out much easier after cooking.
Crush the Biscoff cookies
- Place 10 Biscoff cookies (about 100 g) in a food processor and pulse 8–10 times until you have coarse, chunky crumbs roughly the size of small peas.
- Alternatively, place cookies in a zip-top bag and crush them with a rolling pin, aiming for coarse, uneven pieces.
- Set aside 3 tbsp (30 g) of the crumbs for topping; reserve the rest for the batter.
+ Show details− Hide details
Ready when: Crumbs range from fine dust to pea-sized pieces
Tip: Don't overprocess; you want texture, not a fine powder.
Cream butter and sugars
- In a medium mixing bowl, whisk together 4 oz (113 g) softened butter, 0.75 cup (165 g) packed light brown sugar, and 0.25 cup (50 g) granulated sugar.
- Whisk vigorously for 1–2 minutes until the mixture is pale, light, and fluffy.
- This aerates the batter for a tender crumb.
+ Show details− Hide details
Ready when: Mixture is visibly lighter in color and increased in volume
Tip: Use softened, not melted, butter so you can properly aerate the mixture.
Add egg and vanilla
- Add 1 large room-temperature egg and 0.5 tsp (2.5 ml) vanilla extract to the butter mixture.
- Whisk vigorously for 1 minute until fully combined and the mixture is pale and emulsified.
- The egg acts as a binder and adds moisture.
+ Show details− Hide details
Ready when: Mixture is smooth, homogeneous, and slightly thickened
Tip: Don't skip the room-temperature egg; cold eggs can cause the batter to separate.
Combine dry ingredients
- In a separate small bowl, whisk together 0.75 cup (90 g) all-purpose flour, 0.5 tsp (2.5 g) baking powder, and 0.25 tsp (1.5 g) kosher salt.
- Set aside.
+ Show details− Hide details
Ready when: Flour mixture is evenly combined with no visible streaks
Fold in flour and cookies
- Add the dry ingredients to the wet mixture and fold gently with a rubber spatula until just combined, about 8–10 folds.
- Fold in the crushed Biscoff crumbs (reserving the 3 tbsp for topping) until evenly distributed.
- Do not overmix; a few streaks of flour are okay.
+ Show details− Hide details
Ready when: Batter is cohesive with no visible pockets of flour; cookie crumbs are evenly scattered
Tip: Overmixing develops gluten and can lead to tough, dense blondies.
Spread batter and add swirl
- Transfer the batter to the prepared pan and spread it evenly with a spatula, pressing gently into the corners.
- Dollop 3 tbsp (45 g) Biscoff spread in small spoonfuls across the top—about 4–5 dollops arranged in a grid pattern.
- Using a toothpick or knife, gently swirl the spread into the batter in a figure-8 or spiral pattern, being careful not to fully blend it; you want distinct ribbons of flavor.
+ Show details− Hide details
Ready when: Batter is level and Biscoff spread forms visible swirls throughout
Tip: Light swirling preserves pockets of Biscoff flavor; heavy swirling makes it uniform and less interesting.
Sprinkle and load into Instant Pot
- Sprinkle the reserved 3 tbsp (30 g) crushed Biscoff cookie crumbs evenly over the top of the batter.
- Carefully lower the pan onto the trivet using a foil sling (fold two long pieces of foil and crisscross under the pan) or by holding both sides with oven mitts.
- The pan should sit flat on the trivet, away from the walls of the pot.
+ Show details− Hide details
Ready when: Pan is centered and stable on the trivet
Tip: A foil sling prevents burns and makes removal much easier—don't skip it.
Pressure cook the blondies
- Close the Instant Pot lid and set the valve to "Sealing." Press the "Pressure Cook" or "Manual" button and set the time for 16 minutes at high pressure.
- The pot will take about 2–3 minutes to come to pressure before the timer starts.
- Once the timer beeps, let the pressure release naturally for 5 minutes, then carefully quick-release any remaining pressure by moving the valve to "Venting."
+ Show details− Hide details
Ready when: Pressure pin drops, indicating pressure is released; blondies are set but still moist when tested with a toothpick
Tip: Natural pressure release for 5 minutes prevents the blondies from deflating or becoming tough. Do not skip this step.
Cool and remove from pan
- Carefully open the lid away from your face to release residual steam.
- Using the foil sling, gently lift the pan out of the Instant Pot and set it on a wire rack to cool for 10 minutes.
- The blondies will firm up as they cool but remain fudgy.
- Once cool enough to handle, gently peel away the parchment paper and transfer the entire blondie slab to the rack, or leave it on the parchment.
- Cool for another 15–20 minutes until room temperature.
+ Show details− Hide details
Ready when: Blondies are firm enough to handle without breaking; toothpick inserted in center comes out with a few moist crumbs
Tip: Cooling is critical—cutting too soon will result in a crumbly mess. Let them set completely.
Cut and serve
- Once fully cooled, use a sharp, dry knife to cut the blondie slab into 9 equal pieces (3×3 grid for square pan, or 3 wedges per "ring" for round pan).
- Wipe the knife between cuts for clean edges.
- Serve at room temperature or gently warm in a microwave for 10–15 seconds for a fudgier texture.
+ Show details− Hide details
Ready when: Blondies are sliced into distinct, clean pieces
Tip: A hot, wet knife wiped dry between cuts yields the cleanest edges.
Good to know
Tips
- The Instant Pot's moist heat environment prevents these blondies from drying out, creating a fudgier texture than conventional oven baking. The 16-minute cook time is non-negotiable—undercooking leaves raw batter near the edges, while overcooking dries them out.
- For a less sweet bar, reduce brown sugar by 2 tbsp (20 g) and use just 2 tbsp (30 g) Biscoff spread instead of 3 tbsp. The cookies provide plenty of sweetness.
- If you don't have a foil sling, carefully lower the pan using tongs or silicone tongs, but a sling prevents burns and makes removal foolproof.
- Biscoff spread can separate and become very soft if overheated. Chill it for 10 minutes before using if it seems too loose.
Make ahead
Bake up to 2 days ahead. Store in an airtight container at room temperature.
Storage & reheating
Room temperature (airtight container): up to 3 days. Refrigerator (airtight container): up to 5 days; warm gently before serving. Freezer (airtight container or wrapped individually): up to 1 month. Thaw at room temperature for 1 hour or microwave for 20–30 seconds.
Substitutions
- Biscoff spread → creamy peanut butter or almond butter. Swap for a 1:1 amount by volume for a different spiced-caramel flavor.
- Biscoff cookies (Lotus Biscoff) → Lotus Biscoff Thins or homemade spiced cookie crumbs. Use any thin, crisp spiced cookie crushed to the same texture.
- all-purpose flour → cake flour or pastry flour. Use 0.75 cup (68 g) cake flour for an even more tender, delicate crumb.
- vanilla extract → almond extract or omit entirely. Almond extract adds nuttiness; omitting it lets the Biscoff flavor shine through.
More brownies & bars
See all →



Find more like this
- Meal
- Dessert
- Diet
- VegetarianHalal
- Method
- Instant Pot
- Quick & Easy
- EasyMake AheadFreezer Friendly