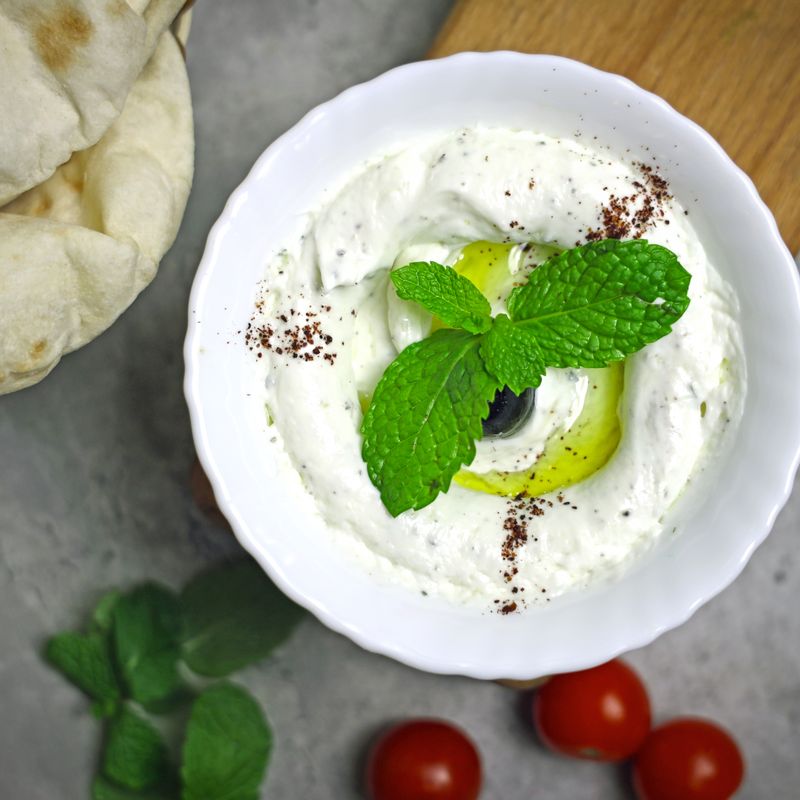
Homemade Greek Yogurt
Thick, tangy, creamy Greek yogurt made from just whole milk and a spoonful of live-culture yogurt. Heat, cool, culture, then strain through cheesecloth to the thickness you like.
- Prep
- 30 min
- Cook
- 20 min
- Wait
- 15 hr 35 min
- Total
- 16 hr 25 min
- Makes
- About 3 cups (700 g) strained yogurt, 6 servings of ½ cup
Steps
Before you start
- Plan for about 16 hours, mostly hands-off: roughly 1 hour heating and cooling, 8 to 10 hours culturing, 3 hours chilling, and 2 to 4 hours straining. Starting in the evening works well.
- Use pasteurized whole milk, not ultra-pasteurized (UHT), which often sets poorly. Ultra-pasteurized milk can work if you heat it as directed, but results vary.
- Choose a plain yogurt starter with 'live and active cultures' and no added thickeners or sweeteners. Use one that is fresh, within its date.
- Wash all pots, whisks, jars and spoons in hot soapy water and rinse well so unwanted bacteria don't compete with the culture.
- Take the starter yogurt out of the fridge when you start heating the milk so it isn't ice-cold when added.
Sanitize your equipment
- Wash the pot, whisk, spatula, small bowl, jar and thermometer in hot soapy water, then rinse well.
- Pour boiling water over the jar and whisk, or run them through a hot dishwasher cycle, and let them drain.
- Set the starter yogurt on the counter.
+ Show details− Hide details
Ready when: Everything is clean and hot to the touch or freshly rinsed.
Tip: Don't dry with a dish towel, which can reintroduce bacteria. Let items air-dry.
Heat the milk
- Pour the 2 quarts (1.9 L) milk into the 4-quart pot.
- Warm over medium heat, stirring gently every minute or two with the spatula and scraping the bottom, until the thermometer reads 180°F (82°C).
- This takes about 15 to 20 minutes.
- Small bubbles will form at the edges and the surface will steam.
+ Show details− Hide details
Ready when: Thermometer reads 180°F (82°C) with steam rising and small bubbles at the edge, but no full boil.
Tip: Don't walk away. Milk scorches on the bottom and boils over quickly. Heating to 180°F changes the milk proteins so the yogurt sets thicker.
Cool the milk
- Remove the pot from the heat and take off any skin with a spoon if you like.
- Let the milk cool, stirring occasionally, until it reads 110°F (43°C).
- This takes 30 to 45 minutes.
- For faster cooling, set the pot in a sink with a few inches of cold water and stir.
- Don't go below 105°F (40°C).
+ Show details− Hide details
Ready when: Thermometer reads 110°F (43°C); a drop on your wrist feels comfortably warm, not hot.
Tip: Milk hotter than 115°F (46°C) kills the cultures and the yogurt won't set.
Add the starter
- Put the 3 tablespoons (45 g) starter in the small bowl.
- Whisk in about 1 cup (240 ml) of the warm milk until completely smooth.
- Pour this mixture back into the pot and stir gently for 30 seconds to blend evenly.
+ Show details− Hide details
Ready when: No lumps of starter remain and the milk looks uniform.
Tip: Tempering the starter in a little milk first prevents clumps.
Culture until set
- Pour the milk into the clean 2-quart jar (or two 1-quart jars) and cover with the lid.
- Wrap the jar in a towel and set it in a cooler.
- Fill the gaps around it with a little 110°F (43°C) water, then close the cooler.
- Keep the yogurt at 100 to 110°F (38 to 43°C) and undisturbed for 8 to 10 hours.
- Don't stir or jostle it.
+ Show details− Hide details
Ready when: Yogurt jiggles as one mass when the jar is tilted, with a clean break and a little clear yellowish whey on top; it smells pleasantly tangy.
Tip: Longer culturing, up to 12 hours, gives tangier yogurt. If still liquid at 12 hours, your starter or temperature was likely off.
Chill the yogurt
- Refrigerate the set yogurt, still covered and undisturbed, for at least 3 hours.
- Chilling firms the curd so it strains cleanly and stops the fermentation.
+ Show details− Hide details
Ready when: Yogurt is cold throughout and noticeably firmer.
Tip: You can skip chilling in a pinch, but warm yogurt is looser and may pass through the cloth.
Set up the strainer
- Set the sieve over the large bowl.
- Line it with the doubled cheesecloth, rinsed in hot water and wrung out, leaving extra cloth hanging over the sides.
- Make sure the bottom of the sieve sits at least 3 inches (7.5 cm) above the bottom of the bowl.
+ Show details− Hide details
Ready when: Cloth is snug against the sieve with overhang on all sides.
Tip: If the sieve touches the whey, the yogurt can't drain properly.
Strain to thickness
- Gently spoon the chilled yogurt into the lined sieve.
- Cover with a plate or plastic wrap and refrigerate.
- Strain for 2 hours for a thick, spoonable yogurt, or 4 hours for a very thick, almost cream-cheese texture.
- Check at 2 hours, pour off the whey if the bowl is filling, and stir the yogurt at the edges toward the center once.
+ Show details− Hide details
Ready when: Yogurt holds a soft peak on a spoon and no longer drips steadily; about 3 cups (700 g) remain after 2 to 3 hours.
Tip: Save the whey for smoothies, bread dough or soup; it keeps a week in the fridge.
Store and serve
- Scrape the strained yogurt into a clean airtight container, whisking briefly with a spoon for a smooth, creamy texture.
- Thin with a splash of whey if it's thicker than you like.
- Reserve 3 tablespoons (45 g) as starter for your next batch if you wish.
- Serve cold.
+ Show details− Hide details
Ready when: Yogurt looks smooth, glossy and spoonable.
Tip: Use saved starter within 7 days for best results.
Good to know
Tips
- A reliable thermometer matters most: heat to 180°F (82°C), cool to 110°F (43°C), and keep culturing at about 100 to 110°F (38 to 43°C).
- Don't disturb the jar while it sets; moving it can break the curd and make the yogurt runny or grainy.
- For extra-thick labneh-style yogurt, strain 8 to 12 hours in the fridge and season with a pinch of salt.
- Starter from your own batch works for several generations, but start fresh with store-bought yogurt after 4 to 5 batches if the flavor weakens.
Make ahead
Culture the yogurt up to 1 day ahead and refrigerate it unstrained for up to 5 days, then strain the amount you need a few hours before serving.
Storage & reheating
Refrigerate in an airtight container for up to 10 days; stir in any liquid that separates. Not recommended at room temperature beyond 2 hours. Freezing is possible for up to 2 months, but the texture becomes grainy, so thaw overnight in the fridge, stir well, and use in smoothies, dips or baking.
Substitutions
- plain yogurt with live and active cultures → 1 packet freeze-dried yogurt starter culture. Follow the packet directions for the amount per 2 quarts; usually reliable and good for making many batches.
- cheesecloth → nut milk bag, clean thin cotton tea towel, or coffee filter in a sieve. A tight-weave cloth needs longer straining; coffee filters work but clog easily.
- whole milk → 2% milk. Gives a lighter, less creamy yogurt; skim milk produces a chalkier, less rich result.
More yogurt & granola
See all →

Find more like this
- Meal
- Breakfast
- Cuisine
- Greek
- Method
- Stovetop
- Quick & Easy
- 5 Ingredients or LessEasyMake Ahead