
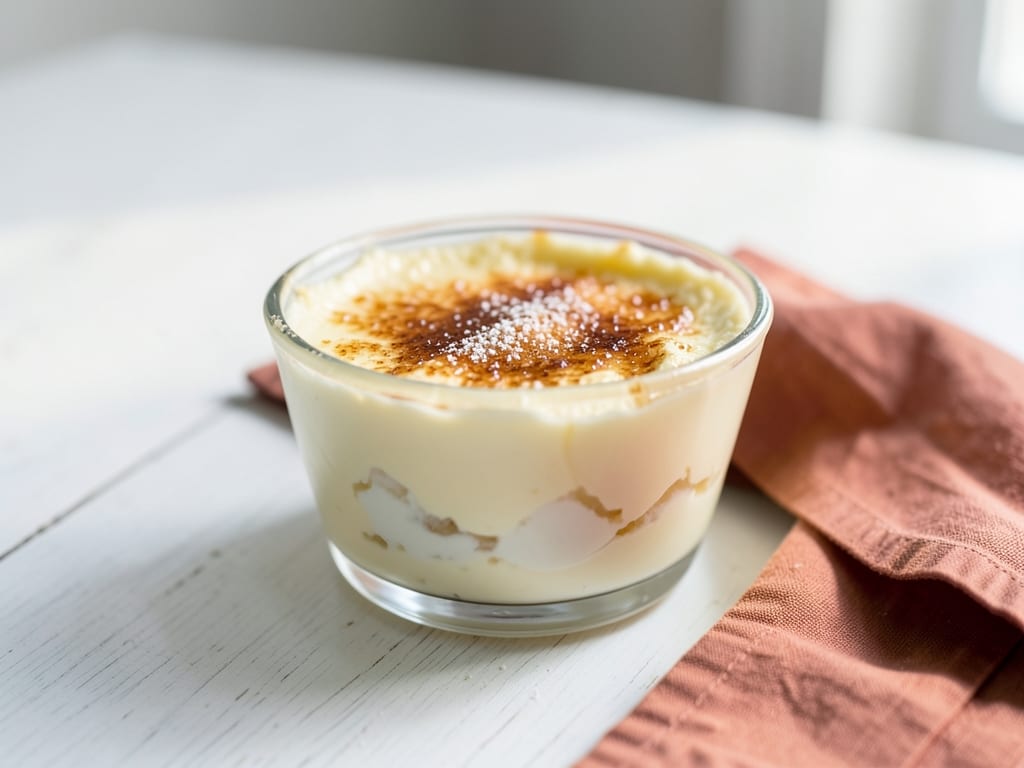
French Crème Brûlée Yogurt Pots with Granola Crunch
This sophisticated yet simple dessert bridges French tradition and modern flavors, pairing creamy yogurt custard with the signature crackling caramel top of crème brûlée. Individual pots feature a silky, gently-heated custard base—made from egg yolks, Greek yogurt, and vanilla—that's chilled until set, then finished with a torched sugar shell and crunchy granola topping. The result is elegant enough for entertaining but easy enough for a weeknight treat, with beautiful contrasts of texture and temperature in every spoonful.
- Prep
- 20 min
- Cook
- 10 min
- Wait
- 2 hr 5 min
- Total
- 2 hr 35 min
- Makes
- 4 servings (4 individual pots)
Steps
Before you start
- Chill ramekins in the freezer for at least 15 minutes—this helps the custard set faster
- Have your kitchen torch ready and check that it's loaded with fuel and working
- Read the full recipe to understand timing—the longest wait is the chilling stage
- Use fresh, high-quality eggs from a reliable source for food safety
Heat water bath
- Fill a saucepan with about 2 inches of water and bring to a simmer over medium heat.
- The water should be steaming gently, not boiling vigorously.
- You'll need this to create a double boiler for pasteurizing the egg yolks.
+ Show details− Hide details
Ready when: Water simmers gently with steady steam rising from the surface
Make custard baseOven 160°F / 70°C
- Place 4 large egg yolks and 1/3 cup (66 g) sugar in a heatproof mixing bowl.
- Set the bowl over the simmering water, making sure the bottom of the bowl does not touch the water.
- Whisk constantly and steadily for 8–10 minutes.
- The mixture will gradually become pale, fluffy, and ribbon-like.
- Continue whisking until an instant-read thermometer reads 160°F (71°C)—this temperature pasteurizes the eggs.
- The mixture should be noticeably thicker and paler than when you started, with a mousse-like texture.
- If using a thermometer, it's the best way to ensure food safety; without one, whisk for the full 10 minutes and the mixture should be thick enough to form ribbons that briefly hold their shape.
+ Show details− Hide details
Ready when: Pale, fluffy, reaches 160°F (71°C), and ribbons form when whisk is lifted
Tip: Don't let the water boil vigorously, or the eggs may scramble. If it's getting too hot, lift the bowl briefly and reduce the heat slightly. The water should steam gently, never bubble.
Cool custard
- Remove the bowl from the heat.
- Let it cool for 5 minutes, stirring occasionally with a whisk or rubber spatula.
- The mixture should still be warm but cool enough to touch the side of the bowl comfortably.
- Don't let it cool completely—you want it warm enough that the yogurt will blend smoothly into it.
+ Show details− Hide details
Ready when: Mixture is warm but no longer hot; you can hold your hand against the bowl comfortably
Combine with yogurt
- Add 1.5 cups (375 g) Greek yogurt, 1/2 cup (120 ml) heavy cream, 1 teaspoon (5 ml) vanilla extract, and 1/4 teaspoon (1 g) salt to the cooled custard.
- Whisk gently and steadily until completely combined and smooth, about 2–3 minutes.
- There should be no visible streaks of yogurt or cream.
- The mixture will be thick and creamy.
- Don't overwhisk—you want to keep the light, airy texture of the custard.
+ Show details− Hide details
Ready when: Mixture is smooth, homogeneous, and glossy with no visible streaks
Chill in ramekins
- Divide the mixture evenly among 4 chilled ramekins (6 oz / 177 ml each), pouring about 6 ounces into each.
- If the ramekins aren't pre-chilled, use room-temperature ones—chilling them beforehand just helps the custard set a bit faster.
- Cover each ramekin with plastic wrap and place them in the refrigerator.
- Chill for at least 2 hours, or up to overnight.
- The mixture will gradually set from the edges inward, transforming from pourable to silky and spoon-able, while developing the flavors.
+ Show details− Hide details
Ready when: Mixture is set but still creamy when gently jiggled; a spoon drawn across the surface leaves a slight trail
Tip: You can make these pots up to 24 hours ahead. Keep them covered in the fridge until you're ready to serve.
Torch the tops
- Just before serving, sprinkle about 1 tablespoon (10–12 grams) of granulated sugar evenly over the surface of each chilled custard pot, making sure to cover the top without piling it too high.
- Light your kitchen torch and hold the flame about 2–3 inches from the sugar.
- Move the torch slowly and steadily across the surface in a circular motion, spending about 1–2 minutes per pot.
- You'll see the sugar melt and darken gradually from white to pale gold to deep amber.
- Stop when it turns golden amber and you hear a faint crackling sound—just before it turns dark brown or black.
- Repeat with the remaining pots.
- Each pot should have a thin, caramelized sugar shell on top.
+ Show details− Hide details
Ready when: Sugar is completely melted and turns golden amber with a slight crackling sound
Tip: If you don't have a torch, place the ramekins under a preheated broiler (about 550°F / 288°C) for 2–3 minutes instead. Watch very carefully—the sugar burns quickly under the broiler, and you want golden amber, not black.
Cool and serve
- Let the caramelized sugar cool for 1–2 minutes until it hardens into a crisp, crackling shell.
- Sprinkle about 2 tablespoons of granola over the top of each pot and serve immediately while the caramel is still hot and crisp.
- The contrast of textures—crackly caramel, creamy yogurt custard, and crunchy granola—is the signature of this dessert.
- Eat with a spoon, breaking through the caramel layer first.
+ Show details− Hide details
Ready when: Caramel shell is hard and crisp when tapped with a spoon; granola is distributed on top
Tip: Serve immediately after torching so the caramel stays crispy and snaps when you break it with your spoon. If you prep these early and the caramel softens, just torch it again right before serving—the custard underneath will stay cold.
Good to know
Tips
- The gentle double-boiler heat pasteurizes the eggs at 160°F (71°C) without scrambling them. Use an instant-read thermometer to ensure you reach this temperature for food safety and peace of mind.
- Don't skip cooling the custard before mixing with yogurt—adding cold yogurt to hot custard can cause lumps. A quick 5-minute cool is all you need to prevent this.
- Make these pots up to 24 hours ahead, but torch the sugar top and add granola just before serving for the crispiest, most satisfying caramel effect.
- If you don't have a kitchen torch, place the pots under a preheated broiler (about 550°F / 288°C) for 2–3 minutes instead. Watch carefully, as the sugar burns quickly under direct heat.
Make ahead
Yes, the custard pots can be made up to 24 hours in advance. Cover with plastic wrap and refrigerate. Torch the sugar top and sprinkle granola just before serving for the best crispy caramel effect and texture contrast.
Storage & reheating
Room temperature: Not suitable; the custard will soften and become unstable outside refrigeration. Refrigerator: Up to 3 days, covered. The caramelized sugar will soften over time, but you can torch it again just before serving. Freezer: Not recommended; the custard texture will break down when thawed.
Substitutions
- vanilla extract → Vanilla bean paste. Use 1 teaspoon in place of extract for deeper, more complex vanilla flavor
- Greek yogurt → Regular plain full-fat yogurt. Use 2 cups instead of 1.5 cups to account for the thinner consistency
- heavy cream → Whole milk. Use the same amount, though the texture will be lighter and less rich
- granola → Crushed honeycomb candy, toasted nuts, or cookie crumbles. Use the same amount for alternative textures and complementary flavors
More puddings & custards
See all →



Find more like this
- Meal
- Dessert
- Cuisine
- French
- Main ingredient
- Eggs
- Method
- Stovetop
- Quick & Easy
- Make Ahead