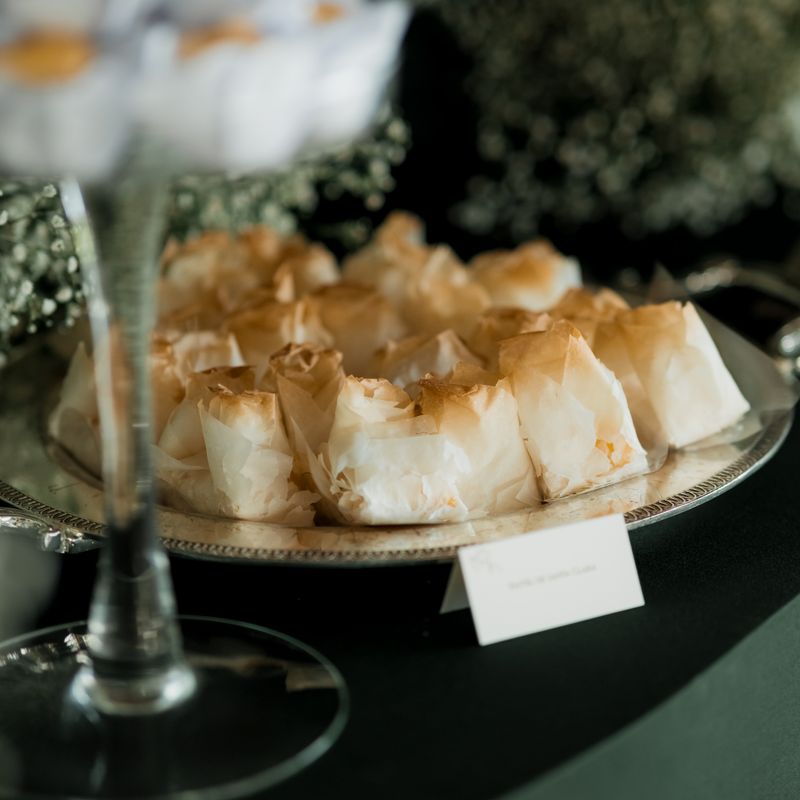
Crispy Shallot and Goat Cheese Phyllo Cups
Individual crispy phyllo cups filled with creamy goat cheese and topped with slow-caramelized shallots and fresh thyme. These elegant bite-sized appetizers deliver sweet, golden caramelized shallots and tangy cheese in a shatteringly crispy pastry shell. Perfect for cocktail parties, elegant gatherings, or as a sophisticated make-ahead appetizer.
- Prep
- 15 min
- Cook
- 45 min
- Wait
- 10 min
- Total
- 1 hr 10 min
- Makes
- 12 phyllo cups (serves 4–6 as an appetizer, 2–3 as a light snack)
Steps
Before you start
- Thaw phyllo dough completely at room temperature (1–2 hours); keep it covered with a damp paper towel while you work to prevent drying
- Preheat the oven to 375°F (190°C) before you begin shaping the phyllo cups
- Slice the shallots as evenly as possible (about ⅛ inch / 3 mm thick) so they cook at the same rate
- Measure and assemble all ingredients near your work surface before starting
Prepare the Muffin Tin
- Brush a 12-cup muffin tin lightly with olive oil, coating the bottom and sides of each cup.
- This prevents sticking and helps the phyllo cups release cleanly.
- Line a baking sheet with parchment paper and place the prepared muffin tin on top for easy oven handling.
+ Show details− Hide details
Ready when: All cups are evenly and thinly coated with oil
Tip: Use a light hand when brushing—too much oil will make the phyllo heavy and greasy.
Preheat Oven and Prep PhylloOven 375°F / 190°C
- Preheat the oven to 375°F (190°C).
- Remove the phyllo package and carefully unfold the sheets on your work surface.
- Phyllo dries out quickly, so keep all sheets except the one you're working with covered with a slightly damp (not wet) paper towel.
- Have all other ingredients measured and ready on your work surface.
+ Show details− Hide details
Tip: If phyllo dries out, it becomes brittle and tears easily. Work quickly, and replace the damp towel cover between steps.
Shape Phyllo Cups
- Cut the phyllo sheets into 4-inch (10 cm) squares (you can stack 2–3 sheets and cut to speed up the process, but work quickly).
- For each muffin cup, place one phyllo square flat in the bottom and brush very lightly with olive oil.
- Layer 2–3 more squares on top, rotating them slightly so the corners don't all point the same direction, brushing each lightly with oil.
- Press gently into the cup to create a ruffled, cup-like shape.
- Repeat for all 12 cups.
- The phyllo should stick up slightly above the rim of the muffin tin, creating decorative ruffled edges.
+ Show details− Hide details
Ready when: All 12 cups are shaped with ruffled edges standing slightly above the rim
Tip: Rotate each layer of phyllo slightly so the corners fan out naturally—this creates an elegant, decorative look and prevents the phyllo from sealing shut.
Bake Phyllo CupsOven 375°F / 190°C
- Place the muffin tin in the preheated 375°F (190°C) oven.
- Bake for 12–15 minutes until the phyllo is golden brown and crispy throughout.
- The ruffled edges will be darker and more caramelized than the bottoms.
- Remove from the oven and let the cups cool in the tin for 5 minutes—this allows them to firm up and hold their shape.
- Gently run a thin knife around the edges of each cup to loosen them, then carefully pop each one out and place on a cooling rack.
+ Show details− Hide details
Ready when: Phyllo is golden brown throughout and feels crispy and papery to the touch
Tip: Don't skip the 5-minute cooling time in the tin—this resting period is crucial for the cups to firm up and release cleanly without cracking.
Slice and Cook Shallots
- While the phyllo bakes (or immediately after it comes out), peel the shallots and slice them thinly, about ⅛ inch (3 mm) thick, keeping rings intact where possible.
- Heat 2 tbsp (30 ml) olive oil in a large 10–12 inch (25–30 cm) skillet over medium heat.
- Add all the sliced shallots and a small pinch of salt (salt helps draw out their moisture and promotes caramelization).
+ Show details− Hide details
Tip: Slice shallots as evenly as possible—uniform thickness ensures they cook at the same rate and caramelize evenly.
Caramelize Shallots Slowly
- Cook the shallots, stirring occasionally (every 4–5 minutes) but not constantly, for 25–30 minutes.
- Resist the urge to rush by raising the heat.
- The shallots will gradually transform from white to pale gold to a deep amber brown.
- They're done when deeply golden, very tender, and smelling sweet and nutty.
- The volume should reduce by about half, and the texture should be jammy.
- This slow, patient cooking is what develops their sweet, complex, caramel-like flavor.
+ Show details− Hide details
Ready when: Shallots are deep golden brown, very tender, and taste sweet with no sharp onion flavor
Tip: Slow caramelization is the key to avoiding burnt, bitter shallots. If they're browning too fast, lower the heat. Patience here is rewarded with incredible flavor.
Season Caramelized Shallots
- Taste the caramelized shallots and season generously with salt and freshly ground black pepper.
- The salt will highlight their natural sweetness.
- Remove from heat and set aside to cool slightly for a few minutes while you prepare the goat cheese filling.
+ Show details− Hide details
Tip: Taste as you season—you want the sweetness to shine, but salt is essential for balancing and deepening the flavor.
Prepare Goat Cheese Filling
- In a small mixing bowl, combine the crumbled goat cheese (6 oz / 170g) with the finely chopped fresh thyme leaves (2 tbsp / 6g).
- Add a pinch of salt and a few grinds of black pepper.
- Stir gently with a fork until just combined—the mixture should be creamy and evenly flecked with thyme.
- Avoid overmixing, as goat cheese can become grainy if overworked.
+ Show details− Hide details
Ready when: Thyme is evenly distributed throughout and filling is creamy
Tip: Mix gently—rough handling will make the goat cheese grainy and unpleasant in texture. A light hand with a fork is better than vigorous stirring.
Assemble the Phyllo Cups
- Arrange the cooled phyllo cups on a serving platter or individual plates.
- Spoon about 1 tbsp (15g) of the thyme-goat cheese mixture into each cup, creating a small mound in the center.
- Top each cup with a generous spoonful of the caramelized shallots, distributing them as evenly as possible.
- Garnish each cup with a small fresh thyme sprig placed on top.
- The contrast of the creamy, tangy cheese against the sweet, golden shallots and crispy phyllo is what makes these special.
+ Show details− Hide details
Ready when: All 12 cups are filled, topped with shallots, and garnished
Tip: Assemble these no more than 2–3 hours before serving to keep the phyllo as crispy as possible; moisture from the filling will soften it over time.
ServeOven 300°F / 150°C
- Serve the phyllo cups at room temperature for the best crispy texture, or warm them briefly.
- To warm, place the assembled cups (unfilled or freshly assembled) on a baking sheet and warm in a 300°F (150°C) oven for 3–5 minutes just before serving.
- These are best served within 30 minutes of assembly while the phyllo is at its crispiest.
- The combination of warm, creamy cheese and cool, crispy pastry is perfect.
+ Show details− Hide details
Ready when: Cups are warmed through and phyllo is crispy
Tip: These are crispiest when served as soon as possible after assembly. If you must hold them, keep phyllo cups separate from filling and shallots until the last moment, then assemble just before serving.
Good to know
Tips
- Keep phyllo covered with a damp (not wet) paper towel while working—even a few minutes of exposure will dry it out, causing it to crack and become difficult to layer.
- Don't rush the shallot caramelization. Slow cooking over medium heat develops sweet, complex flavors that give these cups their signature taste. High heat will burn them, making them bitter.
- If phyllo cups break or shatter during filling or handling, don't discard them. Crumble them into a composed salad with the goat cheese, shallots, and fresh greens for an elegant deconstructed version.
- These are crispiest when assembled close to serving time. Filling them more than 3–4 hours ahead will cause the phyllo to absorb moisture and become soft. For advance preparation, keep components separate and assemble fresh.
Make ahead
Phyllo cups can be baked up to 1 day ahead and stored in an airtight container at room temperature. Caramelized shallots can be made 1 day ahead and reheated gently in a skillet over low heat. Goat cheese filling can be prepared up to 4 hours ahead and kept covered in the refrigerator. Assemble cups no more than 2–3 hours before serving to keep the phyllo crispy; if you must assemble ahead, keep phyllo cups separate from the filling and shallots until just before serving.
Storage & reheating
Room temperature (loosely covered): up to 2 hours. Refrigerator (in an airtight container): up to 2 days; reheat gently in a 300°F (150°C) oven for 3–5 minutes before serving. Freezer: unbaked phyllo cups freeze well for up to 1 month (wrap individually in plastic wrap, then foil); bake directly from frozen at 375°F (190°C) for 15–18 minutes.
Substitutions
- goat cheese, crumbled → Crumbled feta cheese or whipped ricotta. Both provide a similar creamy texture and subtle tang. Feta will be saltier, so reduce added salt slightly.
- shallots, large → Caramelized onions (1 large yellow onion, thinly sliced). Use the same slow-cooking technique over 30–35 minutes. Onions will yield slightly more volume, so reduce the amount of filling per cup slightly.
- fresh thyme → Fresh rosemary or oregano. Use only 1 tbsp (3g) of rosemary as it's more potent; oregano can be used at full strength (2 tbsp / 6g).
- phyllo dough sheets, thawed → Puff pastry or filo alternative. Cut puff pastry into 3-inch (7.5 cm) rounds, press into muffin cups, and bake at 400°F (200°C) for 10–12 minutes. Texture will be slightly different but still delicious.
More stuffed bites
See all →


Find more like this
- Meal
- Snack
- Main ingredient
- Cheese
- Diet
- HalalSugar-Free
- Quick & Easy
- 5 Ingredients or LessMake Ahead
- Occasion
- Parties