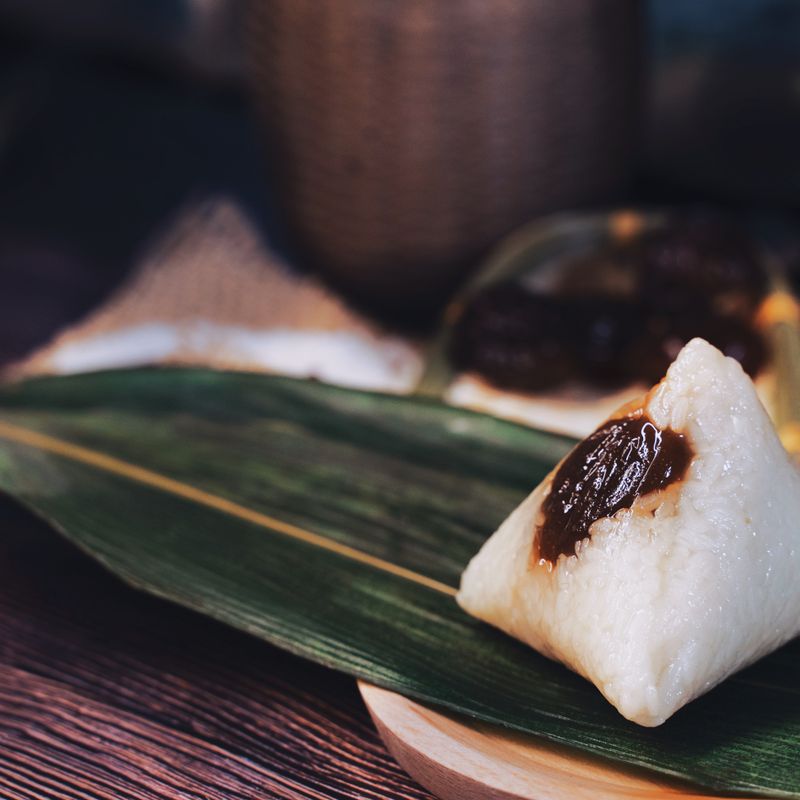
Coconut Sticky Rice with Crispy Garlic Shallots
Sweet, creamy coconut sticky rice topped with shatteringly crisp fried garlic and shallots. This Thai comfort classic pairs with curries, grilled meats, and seafood, or stands on its own as a fragrant, indulgent side. The rice steams until tender, then absorbs a warm coconut-cream mixture while the toppings fry golden brown in oil until deeply caramelized.
- Prep
- 15 min
- Cook
- 35 min
- Wait
- 35 min
- Total
- 1 hr 25 min
- Makes
- 6 servings (about 4½ cups)
Steps
Before you start
- Soak sticky rice 30 minutes to 2 hours (or use freshly cooked rice)
- Rinse shallots and garlic under cold water and pat very dry—moisture prevents crispy frying
- Have all equipment ready; crispy toppings must be added just before serving
Steam the rice
- Pour the drained sticky rice into a steamer basket lined with damp cheesecloth or a banana leaf, spreading it into an even layer.
- Bring the water to a rolling boil in the pot beneath the steamer.
- Set the steamer basket over the boiling water, cover with a lid, and steam over medium-high heat for 20–25 minutes, until the rice is translucent and tender with no hard center when bitten.
- The rice should absorb nearly all the water and smell fragrant.
+ Show details− Hide details
Ready when: Rice is translucent, tender, with no hard core when bitten; water is nearly absorbed
Tip: Damp cheesecloth prevents the rice from sticking to the basket and makes serving easier.
Warm the coconut mixture
- While the rice steams, combine the coconut milk, palm sugar, and salt in a medium pot.
- Warm over medium heat, stirring gently until the sugar dissolves completely, about 2–3 minutes.
- Do not boil.
- Once the sugar is dissolved and the mixture is steaming, remove from heat and set aside.
- The residual heat will keep it warm.
+ Show details− Hide details
Ready when: Sugar dissolves completely; mixture is hot and steaming but not boiling
Tip: Gentle heat prevents the coconut milk from breaking or separating. If using canned coconut milk with a thick layer on top, stir it well before heating.
Transfer rice and soak
- Carefully transfer the steamed rice to a 9×13-inch (23×33 cm) shallow baking dish, spreading it into an even layer.
- Slowly pour the warm coconut mixture over the rice, starting at one end and working across to ensure even distribution.
- Let it rest, uncovered, for 10–12 minutes so the rice fully absorbs the coconut cream.
- Stir gently once halfway through to help even absorption.
+ Show details− Hide details
Ready when: Rice is creamy and cohesive; coconut liquid is almost completely absorbed
Tip: Gentle stirring halfway through helps the rice absorb evenly without breaking the grains. The rice should stay warm and absorb faster because the coconut mixture was hot.
Prepare shallots and garlic
- While the rice absorbs the coconut, place the sliced shallots and garlic on separate paper towels.
- Pat them very dry with additional towels—any surface moisture will cause splattering and prevent them from crisping.
- Ensure both are as dry as possible before frying.
+ Show details− Hide details
Ready when: Shallots and garlic are visibly dry with no moisture beading on the surface
Tip: This step is critical: wet vegetables will steam rather than crisp. Excess moisture creates a soggy, greasy result instead of shatteringly crisp toppings.
Fry the shallotsOven 325°F / 165°C
- Pour the oil into a small 8–10-inch (20–25 cm) skillet and heat to 325°F (163°C), or until a thin slice of shallot sizzles immediately but doesn't brown in 10 seconds.
- Working in two batches if needed, carefully add the sliced shallots to the hot oil.
- Stir frequently with a slotted spoon, watching carefully as they cook.
- After about 4–5 minutes, as the shallots begin to turn light golden, reduce the heat to medium-low to prevent burning.
- Continue stirring until they are deep golden brown and crispy, another 2–3 minutes.
- The residual heat will continue to crisp them after they're removed from the oil.
+ Show details− Hide details
Ready when: Shallots are deep golden brown, crispy to the touch, and not at all translucent
Tip: Do not walk away: shallots can go from golden to burnt in seconds. If they start to brown too quickly, lower the heat immediately. Slightly underdone is better than overdone—they'll crisp more as they cool.
Drain and season shallots
- Using a slotted spoon, transfer the fried shallots to a plate lined with fresh paper towels.
- Spread them in a single layer and immediately sprinkle with a pinch of salt.
- Let them cool and crisp completely, about 2–3 minutes.
- They will continue to firm up as they cool.
- Do not cover them (steam makes them soggy).
+ Show details− Hide details
Ready when: Shallots are completely crisp and light enough to snap between your fingers
Tip: Salt them immediately while hot so it adheres. If you wait until they cool, the salt won't stick.
Fry the garlicOven 300°F / 150°C
- Return the oil to the stove (you should still have about ½ cup/120 ml; if not, add a bit more).
- Heat to 300°F (150°C)—garlic burns more easily than shallots, so use slightly lower heat.
- Carefully add the sliced garlic to the oil and stir constantly with a slotted spoon.
- The garlic will cook quickly, turning from white to pale gold in about 2–3 minutes.
- As soon as it reaches a light golden color, remove it from the oil.
- It will darken further as it cools, so pull it off the heat before it looks deeply golden.
+ Show details− Hide details
Ready when: Garlic is pale to light golden throughout; fragrant and makes a light snapping sound
Tip: Garlic burns much faster than shallots. Watch constantly and remove it slightly underdone—carryover heat will darken it further. Burned garlic tastes bitter and will ruin the dish.
Drain and season garlic
- Transfer the fried garlic to a separate plate lined with fresh paper towels.
- Spread in a single layer and immediately sprinkle lightly with salt.
- Let cool completely, about 2–3 minutes.
- Do not cover.
+ Show details− Hide details
Ready when: Garlic is completely crisp and shatters easily when pressed
Tip: Fried garlic is delicate; handle gently so it doesn't break into tiny pieces.
Assemble and serve
- Gently fluff the coconut sticky rice with a fork.
- Transfer to a serving platter or individual bowls.
- Just before serving, scatter the crispy shallots and fried garlic generously over the top.
- Add a few cilantro leaves if desired.
- Serve warm or at room temperature with Thai curries, grilled chicken, beef, or seafood, or enjoy on its own.
+ Show details− Hide details
Ready when: Dish is plated and ready to eat
Tip: Add the crispy toppings no more than 1–2 minutes before serving. If they sit on the warm rice, they will absorb moisture and lose their crispness.
Good to know
Tips
- Pat the shallots and garlic completely dry before frying—moisture is the enemy of crispness and causes dangerous oil splattering. Use paper towels multiple times if needed.
- Fry the shallots and garlic separately at different temperatures because garlic burns much faster. Monitor the garlic constantly and remove it at pale gold; carryover heat will deepen the color as it cools.
- Add the fried toppings to the rice just before serving, no more than 1–2 minutes ahead. The warm rice will steam them and they'll soften if they sit too long.
- If the coconut mixture breaks or looks separated, whisk it briskly off the heat. If it's still broken after cooling, stir it well when pouring over the rice—the grains will help emulsify it as they absorb it.
Make ahead
Rice can be steamed up to 2 hours ahead and kept covered at room temperature. The coconut mixture can be made ahead and reheated gently before pouring. Soak the shallots and garlic (prep step 4) up to 4 hours ahead and store on paper towels in a sealed container. Fry the toppings within 30 minutes of serving for maximum crispness.
Storage & reheating
Store covered at room temperature up to 4 hours (rice will harden as it cools). The crispy toppings lose crispness once added; store the rice and toppings separately if holding overnight. Refrigerate the rice in an airtight container up to 3 days. Reheat gently in a covered pot over low heat with a splash of water (1–2 tablespoons), or microwave covered for 1–2 minutes. Make fresh fried shallots and garlic or crisp stale ones briefly in a 350°F (175°C) oven for 3–4 minutes. Freeze the cooked rice (without toppings) up to 1 month; thaw and reheat as above.
Substitutions
- palm sugar or light brown sugar → light brown sugar or white sugar. Use equal amounts by weight. Brown sugar will add a slight molasses note; white sugar is more neutral. Palm sugar has a subtle caramel depth.
- unsweetened coconut milk (full-fat, canned or fresh) → heavy cream mixed with coconut extract (use 1 cup cream + 1 tablespoon coconut extract). This is richer and less coconut-forward than true coconut milk but still delicious. Coconut milk is more authentic and preferred.
- neutral oil (vegetable, peanut, or canola) → peanut oil or sesame oil. Peanut oil fries at a similar temperature and imparts a light nutty flavor. Sesame oil will add a strong sesame aroma (use less or skip garlic frying with it).
- sticky rice (glutinous rice), uncooked → short-grain white sushi rice or jasmine rice (increase water to 2.5 cups / 590 ml). The texture and stickiness won't be identical, but both work. Jasmine rice will cook in the same time; sushi rice absorbs liquid similarly and is a common substitute when sticky rice is unavailable.
More Thai recipes
See all →



Find more like this
- Meal
- Dinner
- Cuisine
- Thai
- Main ingredient
- Rice
- Method
- Stovetop
- Quick & Easy
- 5 Ingredients or Less