
Classic Vanilla Bean Gelato
Dense, silky Italian-style gelato built on a milk-forward custard with just enough cream and egg yolk for richness. A real vanilla bean gives it a deep, floral flavor, and slow churning keeps the texture smooth and scoopable.
- Prep
- 25 min
- Cook
- 15 min
- Wait
- 7 hr 7 min
- Total
- 7 hr 47 min
- Makes
- About 1 quart (950 ml), 6 servings of ½ cup
Steps
Before you start
- Freeze the canister of your ice cream maker for at least 24 hours (or follow your machine's instructions) so it is rock solid.
- The custard must chill at least 4 hours before churning, so start early in the day or make it the night before.
- Fill a large bowl with ice and water and set a medium heatproof bowl inside it before you start cooking.
- Have an instant-read thermometer ready. Taking the custard to 170°F (77°C) is the key to a thick, safe, non-scrambled base.
Set up ice bath
- Fill a large bowl halfway with ice and cold water.
- Nestle a medium heatproof bowl inside it, and set a fine-mesh strainer on top of the medium bowl.
- Have your spatula and thermometer within reach.
+ Show details− Hide details
Ready when: The medium bowl sits securely in the ice with the strainer ready above it.
Tip: Setting this up now means you can chill the custard the instant it is done, which stops the eggs from overcooking.
Heat and steep milk
- In the saucepan, combine the milk, cream, 75 g (6 tablespoons) of the sugar, the salt, the vanilla seeds, and the scraped pod.
- Warm over medium heat, stirring occasionally, about 8 minutes, until steaming with small bubbles around the edge (about 175°F / 80°C).
- Do not let it boil.
- Remove from the heat, cover, and steep 20 minutes.
+ Show details− Hide details
Ready when: Milk is steaming with tiny bubbles at the edge, and the vanilla seeds are dispersed throughout.
Tip: If the milk boils, remove from the heat right away and let it settle; boiling can cause the milk to scorch on the bottom.
Whisk the yolks
- In a separate medium bowl, whisk the egg yolks with the remaining 75 g (6 tablespoons) sugar for about 2 minutes, until thick, pale yellow, and the sugar has mostly dissolved.
- Set the bowl on a folded damp towel to keep it from sliding.
+ Show details− Hide details
Ready when: The mixture is pale and falls from the whisk in a thick ribbon.
Tip: Whisk the sugar and yolks right before tempering, since sugar left sitting on yolks can create small hard specks.
Temper the yolks
- Return the steeped milk to low heat just until hot again (about 2 minutes).
- While whisking the yolks constantly, slowly pour in about 1 cup (240 ml) of the hot milk in a thin stream.
- Then pour the warmed yolk mixture back into the saucepan, whisking as you go.
+ Show details− Hide details
Ready when: The mixture is smooth with no streaks of yolk or lumps of cooked egg.
Tip: Pour slowly. Adding the hot milk too fast cooks the yolks into little scrambled bits.
Cook the custard
- Cook over medium-low heat, stirring constantly and scraping the bottom and corners with the spatula, 6–8 minutes, until the custard reaches 170°F (77°C) on the thermometer.
- It should coat the back of the spatula so that a finger drawn across it leaves a clean line.
- Do not let it boil.
+ Show details− Hide details
Ready when: 170°F (77°C), and a clean line holds when you swipe a finger across the coated spatula.
Tip: Take it off the heat immediately at 170°F (77°C); above about 180°F (82°C) the yolks can curdle.
Strain and chill
- Immediately pour the custard through the strainer into the bowl set in the ice bath.
- Press the vanilla pod against the strainer to squeeze out the seeds and liquid, then discard the pod.
- Stir every few minutes for about 20 minutes, until the custard is cooled to room temperature or just below.
+ Show details− Hide details
Ready when: Custard feels cool, not warm, to the touch (under about 70°F / 21°C).
Tip: Straining catches any tiny bits of cooked egg so the gelato is perfectly smooth.
Age in the fridge
- Cover the bowl with plastic wrap pressed directly onto the surface of the custard to prevent a skin.
- Refrigerate at least 4 hours, or overnight, until completely cold (below 40°F / 4°C).
+ Show details− Hide details
Ready when: The custard is very cold and slightly thickened.
Tip: A fully cold base churns faster and has smaller ice crystals, which means a creamier result.
Churn the gelato
- Set up the ice cream maker with the frozen canister and turn it on.
- Stir the chilled custard, pour it in, and churn for 20–25 minutes, or according to your machine's directions, until it looks like thick soft-serve and holds a soft peak.
+ Show details− Hide details
Ready when: Thick, smooth, soft-serve consistency that clings to the paddle.
Tip: Pour the custard in with the paddle already turning to prevent it from freezing to the canister wall.
Freeze to firm
- Quickly transfer the gelato to the freezer-safe container, smoothing the top.
- Press a piece of parchment directly on the surface, cover with the lid, and freeze 2 hours, until firm enough to scoop.
+ Show details− Hide details
Ready when: Firm throughout, with no soft liquid center when pressed with a spoon.
Tip: Pre-chill the container in the freezer so the gelato doesn't melt when transferred.
Rest and serve
- Let the container sit at room temperature for about 5 minutes.
- Scoop with a spoon or scoop warmed in hot water, and serve in chilled bowls or cones.
+ Show details− Hide details
Ready when: The surface looks slightly glossy and a scoop goes in easily.
Tip: Gelato is best served a little warmer than ice cream, so don't skip the short rest.
Good to know
Tips
- Use an instant-read thermometer for the custard; 170°F (77°C) is thick enough and below the point where yolks curdle.
- Do not skip straining. It removes any cooked egg bits and gives the silkiest texture.
- Gelato is churned slowly and holds less air than ice cream, so it will be dense. Do not over-churn into a whipped texture.
- For a flavor variation, steep a strip of lemon zest or a cinnamon stick with the vanilla, and remove before tempering.
Make ahead
"The custard base can be made, strained, and refrigerated up to 2 days before churning. The finished gelato can be made up to 3 days ahead and kept frozen."
Storage & reheating
"Freezer: store in an airtight container with parchment pressed on the surface for up to 1 week for best texture (up to 2 weeks acceptable). Not suitable for room-temperature storage; serve within about 10 minutes of removing from the freezer. Fridge: custard base only, up to 2 days. To serve from frozen, rest at room temperature 5–10 minutes (or in the fridge for 15 minutes) until scoopable."
Substitutions
- vanilla bean → 1 tablespoon (15 ml) pure vanilla extract. Stir it into the cooled, strained custard instead of steeping. The flavor will be a little less complex and you will not have the vanilla specks.
- vanilla bean → 1 tablespoon (15 g) vanilla bean paste. Add it with the milk in step 2 for visible specks and good flavor.
- heavy cream → Additional whole milk (120 ml). Produces a lighter, more traditional gelato that is slightly icier and less rich.
- granulated sugar → Superfine sugar, same weight. Dissolves a little faster; do not use brown sugar or honey unless you accept a different flavor and softer set.
More frozen desserts
See all →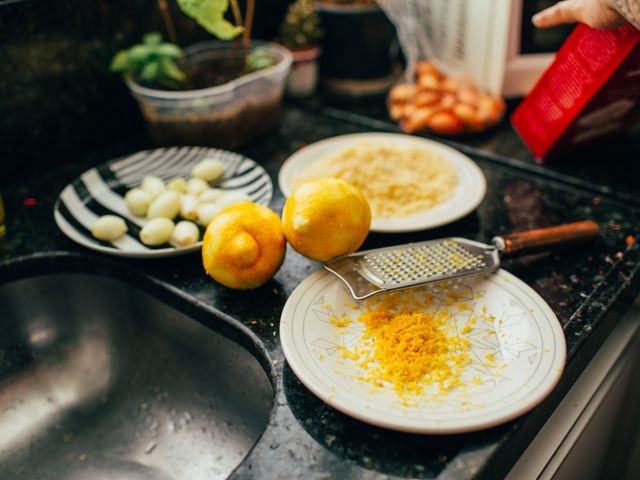



Find more like this
- Meal
- Dessert
- Cuisine
- Italian
- Method
- Stovetop
- Quick & Easy
- Make Ahead
- Season
- Summer