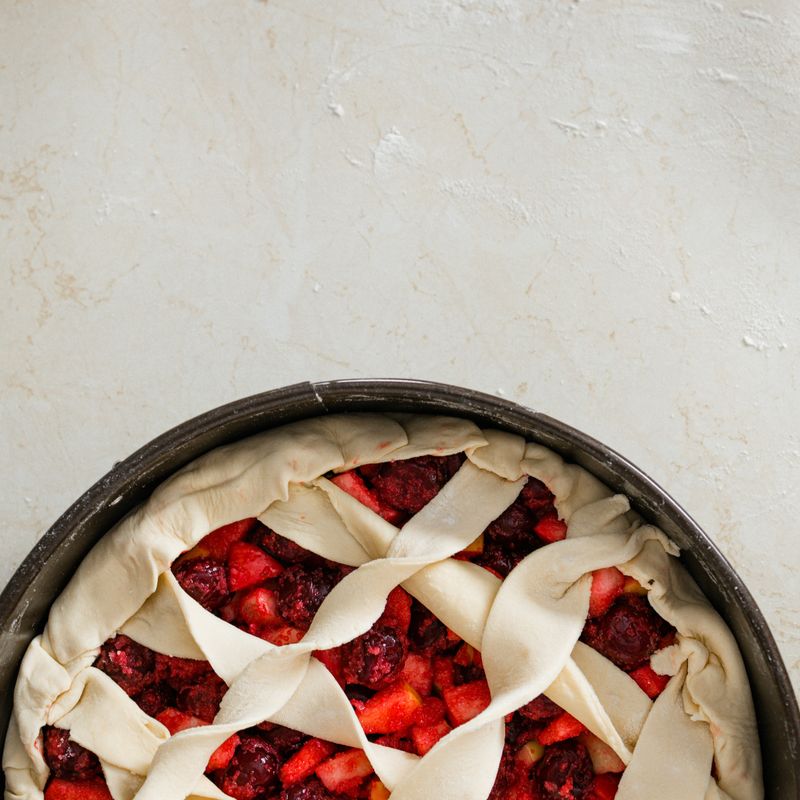
Classic Cherry Pie
A deep-red, sliceable cherry pie with a flaky all-butter double crust and a bright, jammy tart cherry filling thickened with cornstarch. Baking on a hot sheet and cooling fully keeps the bottom crisp and the slices clean.
- Prep
- 55 min
- Cook
- 1 hr 10 min
- Wait
- 5 hr 35 min
- Total
- 7 hr 40 min
- Makes
- 1 double-crust 9-inch pie (8 slices)
Steps
Before you start
- Cut the crust butter into cubes and put it in the freezer for 15 minutes before you start, and fill a measuring cup with water and ice.
- If using fresh cherries, pit them first (a pitter or a sturdy paperclip works). You need 900 g / about 6 cups pitted. If using frozen, thaw completely and drain off the liquid.
- Plan on about 7½ hours start to finish: the dough needs 1 hour to chill and the baked pie needs at least 4 hours to cool so the filling sets.
- Set an oven rack in the lower third and put a rimmed baking sheet on it. Preheat later, as directed, while the assembled pie chills.
Mix the dough
- In a large bowl whisk the flour, 1 tablespoon sugar and 1 teaspoon salt.
- Add the cold butter cubes and toss to coat.
- Using a pastry cutter, your fingertips, or short pulses in a food processor, work the butter in until it is a mix of pea-sized and almond-sized pieces with some flat flakes.
- Drizzle in ¼ cup (60 ml) ice water and toss with a fork.
- Add more water 1 tablespoon at a time (up to ½ cup / 120 ml total) until the dough looks shaggy but clumps when squeezed in your hand.
+ Show details− Hide details
Ready when: Dough holds together when pinched, with visible streaks and chunks of butter and no dry flour at the bottom of the bowl.
Tip: Stop mixing when butter is still visible. Those pieces create the flaky layers.
Divide and chill
- Turn the dough out onto a clean counter and gather it, pressing gently.
- Divide into two pieces, one slightly larger (about 60/40) for the bottom crust.
- Shape each into a flat disk about 1 inch (2.5 cm) thick, wrap tightly in plastic, and refrigerate for at least 1 hour (up to 2 days).
+ Show details− Hide details
Ready when: Disks feel firm and cold throughout when pressed.
Make the filling
- In a large bowl, stir together 1 cup (200 g) sugar, the cornstarch and ¼ teaspoon salt until no lumps remain.
- Add the pitted cherries, lemon juice and almond extract (if using) and fold until every cherry is coated.
- Let sit 15 minutes so the sugar draws out juices and the cornstarch begins to dissolve.
- Meanwhile, put a rimmed baking sheet on the lower oven rack.
+ Show details− Hide details
Ready when: Cherries look glossy and sit in a thick syrupy liquid with no dry cornstarch visible.
Tip: Do not skip the cornstarch whisking with the sugar first; it prevents white clumps in the finished pie.
Roll the bottom crust
- On a lightly floured counter, roll the larger disk into a 13-inch (33 cm) circle about ⅛ inch (3 mm) thick, turning it a quarter turn after every couple of rolls and dusting with flour as needed.
- Loosely roll it around the pin and unroll it over the 9-inch (23 cm) pie plate.
- Ease it into the corners without stretching, and leave the overhang untrimmed.
- Refrigerate the lined plate while you roll the top.
+ Show details− Hide details
Ready when: Dough circle is even, and lifts without tearing or sticking to the counter.
Tip: If the dough cracks or turns soft and sticky, patch it with scraps or return it to the fridge for 10 minutes.
Fill and top
- Roll the second disk into an 11-inch (28 cm) circle.
- Stir the cherries once more, then pour them with all their juices into the lined plate and mound slightly.
- Scatter the 2 tablespoons butter bits over the top.
- Lay the top crust over the filling.
- Trim both crusts to leave a ¾-inch (2 cm) overhang, fold the edge under itself, and crimp firmly with your fingers to seal.
- Cut 5 or 6 slits (about 2 inches / 5 cm long) in the top for steam to escape.
+ Show details− Hide details
Ready when: Edge is sealed all the way around and the vents are cut cleanly through the top crust.
Tip: Vents matter: a pie without them will bubble over and the top crust will go soggy.
Chill and preheatOven 425°F / 220°C
- Refrigerate the assembled pie for 20 minutes to firm the crust.
- Meanwhile, preheat the oven with the baking sheet inside to 425°F (220°C).
- Whisk the egg and milk together.
+ Show details− Hide details
Ready when: Crust feels firm and cold, and the oven has reached 425°F (220°C).
Tip: The hot baking sheet gives the bottom crust a head start so it bakes crisp instead of pale and damp.
Glaze and start bakingOven 425°F / 220°C
- Brush the top crust and edge lightly with the egg wash, then sprinkle with the coarse sugar.
- Place the pie directly on the hot baking sheet and bake at 425°F (220°C) on the lower rack for 25 minutes.
+ Show details− Hide details
Ready when: Crust is set and pale golden, and juices begin to bubble at the vents.
Tip: Don't let egg wash pool in the vents; it can seal them shut.
Lower heat and finishOven 375°F / 190°C
- Reduce the oven to 375°F (190°C).
- If the edge is browning faster than the center, cover it with a ring of foil.
- Bake 40 to 45 minutes more, until the crust is deep golden brown and the filling is thick and bubbling slowly through the vents, not just around the edges.
+ Show details− Hide details
Ready when: Deep golden crust, with thick, slow, glossy bubbles visible through the center vents.
Tip: The cornstarch only reaches full thickening power once the juices bubble thickly, so don't pull the pie early.
Cool completely
- Transfer the pie to a wire rack and cool at room temperature for at least 4 hours before slicing.
- Serve at room temperature or gently warmed.
+ Show details− Hide details
Ready when: Pie bottom feels barely warm to the touch, and the filling no longer jiggles when the plate is nudged.
Tip: Cutting a warm pie gives runny slices. Patience is part of the recipe.
Good to know
Tips
- Keep everything cold: if the dough gets warm and greasy while you roll, slide it onto a tray and chill for 10 minutes.
- Bake on the lowest-third rack on a preheated sheet; it also catches any juice that bubbles over.
- Make a lattice instead of a solid top by cutting 10 strips from the second disk and weaving them over the filling; bake the same way.
- For the cleanest slices, cool for the full 4 hours and cut with a sharp knife wiped between cuts.
Make ahead
Dough disks can be refrigerated up to 2 days or frozen up to 2 months (thaw overnight in the fridge). The whole pie can be assembled (without egg wash) and frozen unbaked up to 1 month; bake from frozen at 425°F (220°C) for 25 minutes, then 375°F (190°C) for 55 to 65 minutes.
Storage & reheating
Room temperature, loosely covered, up to 2 days. Refrigerate up to 5 days. Freeze baked slices or the whole pie, wrapped well, up to 2 months. Reheat slices or the pie at 350°F (175°C) for 15 to 20 minutes (whole pie 25 to 30 minutes) to re-crisp the crust.
Substitutions
- tart cherries (such as Montmorency) → Sweet cherries (such as Bing). Reduce filling sugar to ¾ cup (150 g) and increase lemon juice to 2 tablespoons (30 ml) to keep the flavor bright.
- cornstarch → Instant tapioca starch (quick-cooking tapioca). Use 3 tablespoons (about 30 g) ground fine; the filling will be slightly more translucent and glossy.
- pure almond extract → Vanilla extract. Use ½ teaspoon (2.5 ml) for a milder, rounder flavor.
- unsalted butter → Half unsalted butter, half vegetable shortening. Use 113 g of each; the crust is a little more tender and holds its shape well but has less butter flavor.
More pies & tarts
See all →


Find more like this
- Meal
- Dessert
- Cuisine
- American
- Diet
- VegetarianHalal
- Method
- Oven
- Quick & Easy
- Make Ahead