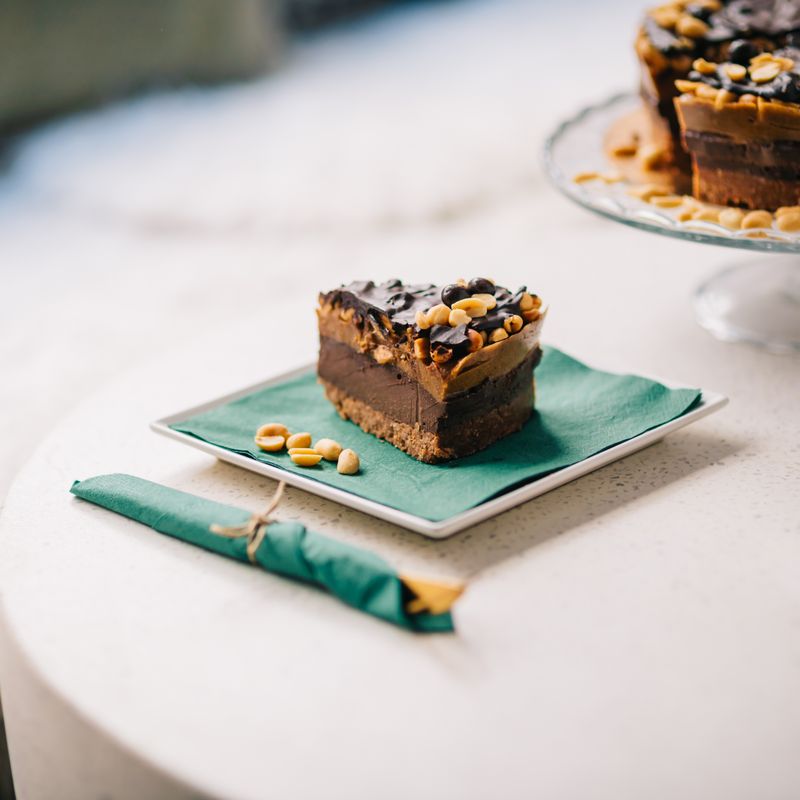
Chocolate Peanut Butter No-Bake Bars
A thick, creamy peanut butter graham crumb base topped with a smooth layer of glossy chocolate. No oven needed, just a bowl, a pan and a little patience while they chill.
- Prep
- 25 min
- Cook
- 5 min
- Wait
- 2 hr 2 min
- Total
- 2 hr 32 min
- Makes
- 16 bars (one 8-inch square pan)
Steps
Before you start
- Line the pan with parchment first so the bars lift out cleanly after chilling.
- Use standard creamy peanut butter (like Jif or Skippy), not natural-style, which can make the base oily and crumbly.
- Plan on about 2 hours of chilling in total; the bars slice best when fully firm.
- If you don't have pre-made crumbs, crush about 11 full graham sheets in a food processor or zip-top bag until fine like sand.
Line the pan
- Line an 8×8-inch (20×20 cm) pan with parchment paper, leaving about 2 inches of overhang on two opposite sides to use as handles.
+ Show details− Hide details
Ready when: Parchment lies flat against the bottom and two sides.
Tip: Dab a little butter in the corners of the pan so the parchment stays put.
Mix dry ingredients
- In a large bowl, stir the graham cracker crumbs, powdered sugar and salt with a spatula until evenly combined.
+ Show details− Hide details
Ready when: No streaks or lumps of powdered sugar remain.
Tip: Break up sugar lumps now; they won't dissolve later.
Melt the butter
- Melt the butter in a microwave-safe bowl in 20-second bursts (about 40 seconds total), or in a small saucepan over low heat.
- Let it cool for 2 minutes.
+ Show details− Hide details
Ready when: Butter is fully liquid and warm to the touch, not steaming.
Make the base mixture
- Pour the warm butter into the dry ingredients.
- Add 1 cup peanut butter and the vanilla.
- Stir firmly with the spatula, pressing against the bowl, until a thick, uniform, sand-like dough forms with no dry pockets.
+ Show details− Hide details
Ready when: A pinch squeezed in your hand holds together without crumbling or leaving a greasy film.
Tip: If it seems crumbly, knead with clean hands for 30 seconds; the warmth helps it bind.
Press into the pan
- Transfer the mixture to the lined pan.
- Press it into an even layer, into the corners, using the bottom of a measuring cup or a piece of parchment over the top for a flat, tightly packed surface.
+ Show details− Hide details
Ready when: Surface is smooth, level and firmly packed, about ¾ inch thick.
Tip: Press hard; a loosely packed base crumbles when sliced.
Chill the base
- Refrigerate the pan, uncovered, for 30 minutes while you prepare the topping.
+ Show details− Hide details
Ready when: Base feels firm and cool when touched.
Melt the chocolate
- Combine the chocolate chips and 3 tablespoons peanut butter in a microwave-safe bowl.
- Heat at 50% power in 30-second bursts, stirring after each, for about 2 minutes total (4–5 bursts) until nearly melted, then stir until completely smooth.
+ Show details− Hide details
Ready when: Mixture is glossy, smooth and pourable with no visible chips.
Tip: Stop heating while a few chips remain; residual heat finishes the job and prevents scorching. Stovetop alternative: stir in a heatproof bowl over barely simmering water.
Spread the topping
- Pour the chocolate over the chilled base.
- Spread to the edges with an offset spatula or the back of a spoon.
- Sprinkle with flaky salt if using.
+ Show details− Hide details
Ready when: Chocolate forms an even, glossy layer covering the base completely.
Chill until firm
- Refrigerate for at least 1½ hours (90 minutes), until the chocolate is completely set.
+ Show details− Hide details
Ready when: Chocolate is matte, hard and doesn't dent when pressed gently.
Slice and serve
- Lift the slab out using the parchment handles.
- Let it sit 5 minutes at room temperature, then cut into 4 strips and each strip into 4 bars (16 bars).
- Wipe the knife with a hot damp towel between cuts.
+ Show details− Hide details
Ready when: Cuts are clean, with the chocolate layer not shattering.
Tip: Cutting straight from the fridge can crack the chocolate; the short rest prevents it.
Good to know
Tips
- Pack the base firmly; it is the key to bars that hold together.
- Melt chocolate gently at 50% power to keep it glossy and prevent seizing.
- Warm the knife under hot water and dry it between cuts for neat edges.
- For easier slicing, let the bars sit for 5 minutes out of the fridge first.
Make ahead
Make the bars up to 3 days ahead and keep them refrigerated, uncut or sliced.
Storage & reheating
Room temperature: up to 2 hours for serving. Fridge: airtight container with parchment between layers, up to 7 days. Freezer: up to 3 months, wrapped well; thaw in the fridge for 1 hour, or at room temperature for 15 minutes, before serving.
Substitutions
- graham cracker crumbs → Vanilla wafer or digestive biscuit crumbs. Use the same weight (170 g); digestives may need 1 extra tablespoon melted butter.
- semisweet chocolate chips → Milk or dark chocolate chips. Milk chocolate gives a sweeter, softer topping; dark (60%) balances the sweet base.
- creamy peanut butter → Almond butter or sunflower seed butter. Use a no-stir, creamy style for the same texture.
- unsalted butter → Salted butter. Reduce the added salt to a tiny pinch.
More no-bake desserts
See all →



Find more like this
- Meal
- Dessert
- Cuisine
- American
- Diet
- VegetarianHalal
- Method
- Microwave
- Quick & Easy
- EasyMake Ahead