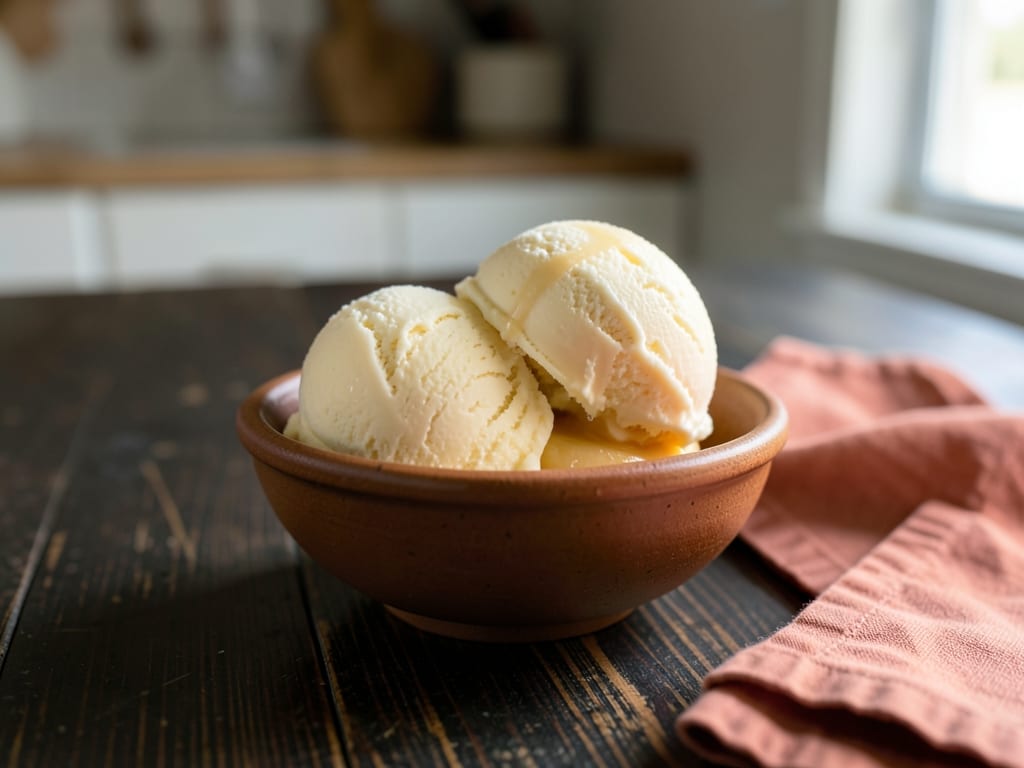
Cajeta Ice Cream
A luxurious, creamy ice cream infused with the distinctive caramelized goat milk flavor of cajeta. This traditional custard-based, churned ice cream captures the richness and complexity of Mexican cajeta—deep caramel notes balanced with subtle salt and vanilla. The result is silky, deeply satisfying, and perfect for warm weather or as an elegant dessert.
- Prep
- 20 min
- Cook
- 15 min
- Wait
- 6 hr 30 min
- Total
- 7 hr 5 min
- Makes
- About 1 quart (4 cups), serves 4–6
Steps
Before you start
- Ensure your ice cream maker's bowl is frozen in the freezer (typically requires 24 hours beforehand)—check your machine's manual
- Bring egg yolks to room temperature about 30 minutes before starting
- Measure all ingredients and have them ready (mise en place)
- Read your ice cream maker's instructions to confirm freezing and churning time, which may vary by brand
Warm the dairy baseOven 170°F / 75°C
- Pour 2 cups cold heavy cream and 1 cup cold whole milk into a medium 2–3 quart saucepan.
- Place over medium heat and stir occasionally.
- Heat until the mixture is steaming with small bubbles forming around the edge of the pan (about 160–170°F if using a thermometer).
- Do not let it boil.
- This should take about 5–6 minutes.
- Remove from heat.
+ Show details− Hide details
Ready when: mixture steams with small bubbles around edge; reaches 160–170°F
Tip: Do not boil the cream or dairy may scorch. Watch carefully; you want it hot but not bubbling vigorously.
Prepare the egg yolks
- While the cream heats, place 6 large room-temperature egg yolks in a medium stainless steel or glass bowl.
- Add 1/4 tsp salt and whisk together until the mixture is pale yellow and slightly thickened, about 1–2 minutes.
- The eggs should lighten noticeably in color.
+ Show details− Hide details
Ready when: yolks are pale and slightly thickened in texture
Tip: Room-temperature eggs emulsify more smoothly than cold ones. If your eggs were cold, set the bowl in warm water for 1–2 minutes to bring them up in temperature.
Temper and cook the custardOven 180°F / 80°C
- Slowly pour about 1/4 of the hot cream mixture into the whisked eggs while constantly whisking—this raises the egg temperature gradually without scrambling them.
- Once smoothly combined, whisk in another 1/4 of the remaining hot cream.
- Now pour the entire egg mixture back into the saucepan with the remaining cream, whisking constantly to combine evenly.
- Place the saucepan back over medium-low heat.
- Cook, stirring constantly with a wooden spoon or whisk, until the custard coats the back of the spoon (when you run your finger across the spoon, it leaves a clear trail that does not immediately fill in) and the internal temperature reaches 170–180°F on an instant-read thermometer.
- This takes about 8–10 minutes.
- Do not let the mixture boil or the eggs will scramble.
- The custard should be noticeably thicker than when you started cooking it.
+ Show details− Hide details
Ready when: custard coats back of spoon and reaches 170–180°F (internal temperature)
Tip: Stir constantly, paying attention to the corners and bottom of the pan where heat can concentrate. If you see small flecks of cooked egg appearing, the temperature spiked too high; lower heat immediately.
Strain and flavor the custard
- Remove the saucepan from heat.
- Immediately pour the custard through a fine-mesh strainer into a clean medium bowl, pressing gently on any small cooked bits with the back of the spoon.
- This removes any accidentally cooked egg pieces and ensures a silky, smooth texture.
- Stir in 1/2 cup cajeta and 1 tsp vanilla extract until fully combined and smooth.
- The cajeta should be evenly distributed throughout the custard with no visible streaks.
+ Show details− Hide details
Ready when: custard is smooth; cajeta fully incorporated
Tip: Do not skip straining. Even tiny cooked egg bits will create a grainy texture in the finished ice cream. If your cajeta is very thick, warm it gently in the microwave (15–20 seconds) and stir to loosen before adding.
Chill the custard thoroughly
- Cover the bowl with plastic wrap or transfer the custard to an airtight container and refrigerate for at least 4 hours, preferably overnight (up to 24 hours).
- The custard must be thoroughly chilled to at least 40°F before churning.
- This is essential for proper ice cream texture; cold custard churns faster and incorporates air more evenly, resulting in a creamy, less icy texture.
+ Show details− Hide details
Ready when: custard is very cold, at least 40°F
Tip: If you are in a hurry, place the bowl in an ice bath (bowl set in a larger bowl filled with ice and a little water) for 30–45 minutes instead of full refrigeration.
Churn the ice cream
- Verify that your ice cream maker bowl has been frozen according to the manufacturer's instructions (typically 24 hours in a standard freezer).
- Pour the chilled custard into the ice cream maker and begin churning according to your machine's directions.
- Most machines will take 20–30 minutes to reach soft-serve consistency.
- As it churns, the mixture will lighten in color and increase in volume, with a deep caramel appearance from the cajeta.
- When it reaches soft-serve consistency (when you can see the paddle turning the ice cream over itself and it holds its shape slightly), the churning is complete.
+ Show details− Hide details
Ready when: ice cream reaches soft-serve consistency; appears light and airy
Tip: Do not skip pre-freezing the ice cream maker bowl—room-temperature custard will not freeze properly. If your machine came with a paddle, use it as directed; do not add ice or salt unless your machine specifically requires it.
Transfer and final freeze
- Immediately transfer the churned ice cream to a freezer-safe container, using a silicone spatula to scrape out every bit from the machine.
- Cover the container tightly with a lid or plastic wrap and place in the freezer for at least 2 hours until it reaches a firm, scoopable texture.
- At this point, it is ready to serve with a scoop, or you can keep it frozen for up to 2 weeks.
+ Show details− Hide details
Ready when: ice cream is firm enough to scoop cleanly without running
Tip: Transfer immediately after churning while the ice cream is still soft, as it sets faster than you might expect. If your ice cream becomes too hard to scoop, let it sit at room temperature for 3–5 minutes to soften slightly.
Serve
- Scoop the ice cream into bowls or cones.
- If it has been frozen longer than a few hours and become very hard, let it sit at room temperature for 5–10 minutes to reach scoopable consistency.
Good to know
Tips
- If your cajeta is very thick or concentrated, reduce the amount to 3/8 cup and taste the chilled custard before churning; you can always add more cajeta if you want it sweeter.
- Churning time varies significantly by ice cream maker model (anywhere from 20–40+ minutes). Refer to your machine's manual, and watch the texture; do not rely on time alone.
- For the silkiest final texture, do not skip the straining step. Even tiny cooked egg bits will create a grainy mouthfeel in the finished ice cream.
- Cajeta is quite sweet on its own, so the custard base is less sweet than some traditional ice cream recipes. If you prefer a sweeter ice cream, add 2–3 tablespoons of sugar to the chilled custard before churning.
Make ahead
Yes. Churn the ice cream and freeze up to 1 week ahead. The ice cream freezes well in an airtight container. After about 1 week, it may develop slight ice crystals, but will still taste delicious.
Storage & reheating
Freezer: up to 2 weeks in an airtight, freezer-safe container. For best texture and to prevent freezer burn, press plastic wrap directly onto the surface of the ice cream before sealing the container. To serve, let sit at room temperature for 5–10 minutes if frozen solid, then scoop.
Substitutions
- Cajeta (Mexican caramel sauce) → Dulce de leche (canned or homemade). Use the same amount (1/2 cup). Dulce de leche is very similar to cajeta; the flavor will be slightly less complex but equally delicious.
- Pure vanilla extract → Vanilla bean paste or 1 whole vanilla bean, split and seeds scraped. Use 3/4 tsp vanilla paste, or scrape the seeds from 1 vanilla bean into the custard after straining. Omit the extract. This adds visible vanilla flecks and deeper vanilla flavor.
- Large egg yolks, at room temperature → Pasteurized eggs (large eggs, yolks only). If you are concerned about consuming raw or lightly cooked eggs, use pasteurized eggs. They perform the same way in custard.
- Whole milk, cold → Evaporated milk or a non-dairy milk (oat or almond milk). Non-dairy substitutes will produce a slightly less rich ice cream but will still freeze well. Use the same volume.
More frozen desserts
See all →
Find more like this
- Meal
- Dessert
- Cuisine
- Mexican
- Main ingredient
- Eggs
- Method
- Stovetop
- Quick & Easy
- Make Ahead