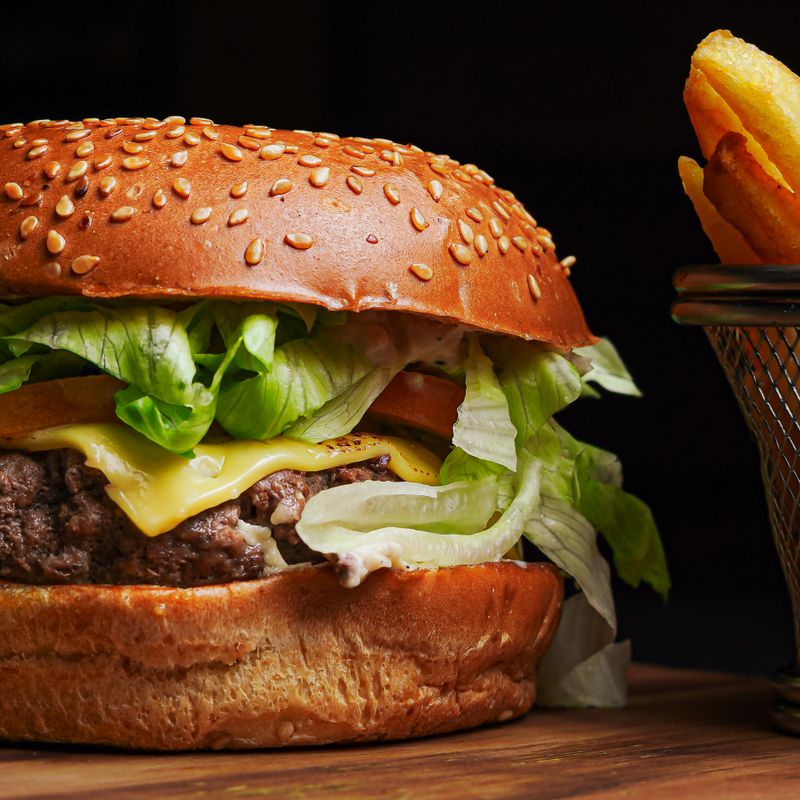
Budget Beef Burgers with Colby Jack and Crispy Shoestring Fries Topping
Juicy pan-fried beef burgers topped with melted Colby Jack cheese and a generous handful of crispy shoestring fries for a playful, satisfying meal. These budget-friendly burgers skip the fancy ingredients but deliver big flavor through proper seasoning, high-heat searing, and the irresistible crunch of fries baked right on top of the melted cheese.
Steps
Before you start
- Preheat your oven to 425°F (220°C) for the fries
- Set out the ground beef 15 minutes before cooking so it's not ice-cold
- Have all your toppings and burger buns ready within reach of your cooking station
Start the friesOven 425°F / 220°C
- Spread the frozen shoestring fries on your baking sheet in a single layer and place in your preheated 425°F (220°C) oven.
- Let them bake for about 10–12 minutes until they're golden and crispy.
- They'll finish cooking in a moment, so aim for just-cooked, not overdone yet.
+ Show details− Hide details
Ready when: Fries are golden brown and crispy on the edges
Tip: Don't shake or stir the fries; let them sit for an even, crispy result.
Form the patties
- Divide the ground beef into 4 equal portions (about 4.5 oz / 140 g each).
- Gently shape each into a patty roughly ¾ inch (2 cm) thick and about 3.5 inches (9 cm) wide.
- Make a small thumb indent in the center of each patty to prevent it from puffing up as it cooks.
- Avoid overworking the meat—handle it as little as possible.
+ Show details− Hide details
Ready when: Patties are evenly shaped with a slight dimple in the center
Tip: Cold beef is harder to shape; if yours is too warm, refrigerate the patties for 5 minutes before cooking.
Season the patties
- Just before cooking, sprinkle the kosher salt and black pepper on both sides of each patty.
- Season generously—don't be shy, as some will fall off during cooking.
- Season only right before cooking; seasoning too early draws out moisture.
+ Show details− Hide details
Ready when: All patties are evenly seasoned on both sides
Tip: Salt draws moisture to the surface and creates a better crust, but only salt immediately before cooking.
Sear the patties
- Heat the vegetable oil in a 10-inch (25 cm) skillet over medium-high heat until it shimmers (about 1 minute).
- Place all 4 patties in the skillet.
- Do not move them for 3–4 minutes; they need an uninterrupted sear to develop a golden crust.
- The burgers should be about ⅛ inch (1 cm) thick with a rich brown exterior when ready to flip.
+ Show details− Hide details
Ready when: Golden brown crust forms on the bottom side; patties release easily from the pan
Tip: Resist the urge to press or flip early—a good sear creates flavor through the Maillard reaction.
Flip and cook throughOven 160°F / 70°C
- Flip each patty once using a spatula.
- Cook for another 2–3 minutes on the second side until the internal temperature reaches 160°F (71°C) for medium doneness.
- The burgers will be firm to the touch but still moist inside.
+ Show details− Hide details
Ready when: Internal temperature reads 160°F (71°C); meat is no longer pink inside
Tip: Use an instant-read thermometer inserted horizontally into the thickest part of the patty, avoiding the indent.
Add the cheese
- Lower the heat to medium and immediately place a slice of Colby Jack cheese (about 1 oz / 30 g) on each hot patty.
- Cover the skillet with a lid or a baking sheet to trap the heat and melt the cheese, about 1–2 minutes.
- The cheese should be soft and draped over the sides of the patties.
+ Show details− Hide details
Ready when: Cheese is fully melted and glossy
Tip: If your cheese isn't melting quickly, cover the pan for just 1–2 minutes; the residual heat will do the work.
Toast the buns
- If you haven't already, lightly butter and toast your burger buns.
- You can do this in a separate skillet over medium-low heat for about 1 minute per side, or under your oven broiler, but watch them closely to avoid burning.
- The buns should be warm, lightly golden, and sturdy enough to hold the burgers without falling apart.
+ Show details− Hide details
Ready when: Buns are warm and lightly toasted with a bit of color
Tip: Toasted buns don't get soggy from the burger juices and add a professional touch.
Crisp the fries againOven 425°F / 220°C
- If your fries have cooled slightly while you cooked the burgers, give them a quick 2–3 minute toss back in the 425°F (220°C) oven to re-crisp them.
- You want them hot and crunchy, not soft.
- Remove from the oven and let them cool for just 30 seconds so you don't burn yourself handling them.
+ Show details− Hide details
Ready when: Fries are hot, golden, and crispy throughout
Tip: This step ensures the fries stay crunchy on the burger instead of going limp from burger moisture.
Assemble the burgers
- Place each cheese-topped patty on the bottom half of a toasted bun.
- If desired, layer on lettuce, tomato slices, and pickles.
- Top generously with a handful of the hot, crispy shoestring fries (about ¼ to ⅓ cup / 40–50 g per burger), then place the top bun on.
- The fries should be piled high enough that they stick out a bit, making the burger fun and crunchy.
+ Show details− Hide details
Ready when: Burgers are fully assembled with fries piled generously on top
Tip: Assemble right before serving so the fries stay crispy and the cheese stays warm.
Rest and serve
- Let the assembled burgers rest for 1–2 minutes before serving.
- This allows the cheese to fully set so it doesn't slide off when you bite down, and it gives you a moment to avoid burning your mouth on the hot fries and patty.
+ Show details− Hide details
Ready when: Cheese is set but still warm; burgers are cool enough to handle safely
Tip: Serve immediately after resting to keep the fries at peak crispiness.
Good to know
Tips
- For extra flavor on a budget, mix a tiny pinch of garlic powder or onion powder into the beef right before forming patties. Use sparingly—½ teaspoon per 1.25 lb is plenty and keeps the pure beef flavor front and center.
- The thumb indent in the center of each patty prevents it from puffing up like a balloon as it cooks. This keeps the thickness even and the cooking time predictable.
- Frozen fries work beautifully here because they're crispy by design. Fresh-cut fries cooked at home will also work but may require more oil and careful frying.
- For a fun twist, toss the hot fries with a pinch of salt, paprika, and black pepper right before adding them to the burger. This seasons them directly without making the buns soggy.
Storage & reheating
Leftover cooked patties can be refrigerated in an airtight container for up to 3 days. Reheat gently in a skillet over medium heat for 1–2 minutes per side. Do not reheat the fries this way; they will become soggy. Best enjoyed fresh and assembled to order.
Substitutions
- Colby Jack cheese, sliced or shredded → cheddar, American, or Monterey Jack cheese. Any melting cheese works; avoid hard cheeses like Parmesan. One slice of American cheese is slightly thinner, so use 5 slices instead of 4.
- frozen shoestring fries → crinkle-cut fries or waffle fries. Any frozen french fry style works. Thicker fries will take 13–15 minutes to bake; thinner ones may be done in 8–10 minutes. Aim for golden and crispy.
- ground beef, 80/20 blend → ground chuck at 85/15 blend. Slightly leaner beef will work but may cook a bit drier. Use 80/20 or 75/25 for juicier burgers if you can find it.
- burger buns, toasted → brioche buns, potato buns, or seeded rolls. Any sturdy, soft roll works. Avoid super thin or delicate buns that will fall apart under the weight of the toppings and hot fries.
More beef burgers
See all →
Find more like this
- Meal
- Dinner
- Main ingredient
- Ground BeefCheese
- Diet
- HalalSugar-Free
- Quick & Easy
- 5 Ingredients or LessEasyBudget