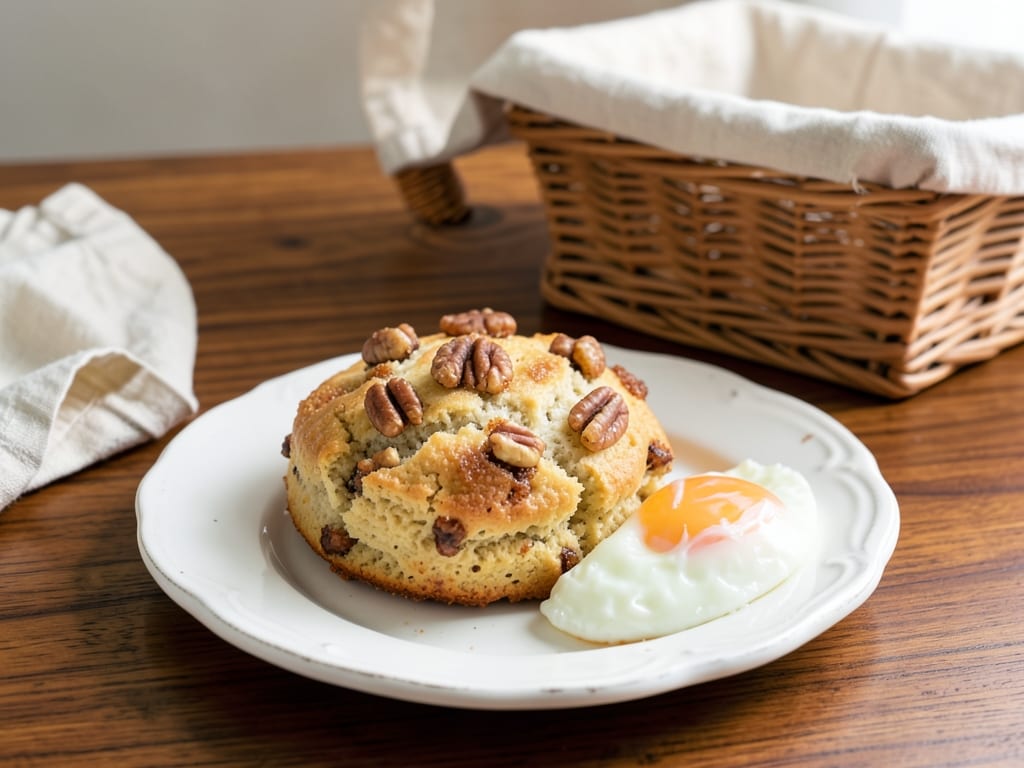
Brown Sugar and Pecan Scones
These tender, buttery scones are studded with toasted pecans and warm brown sugar for a subtle caramel sweetness. Perfect for breakfast, brunch, or afternoon tea, they come together quickly with simple technique. The key is keeping everything cold and mixing minimally—treat the dough gently and you'll be rewarded with scones that are soft and flaky inside, golden and crispy outside.
- Prep
- 18 min
- Cook
- 18 min
- Wait
- 20 min
- Total
- 56 min
- Makes
- 12 scones (6 servings of 2 each)
Steps
Before you start
- Preheat the oven to 400°F (200°C)
- Chill a large bowl and measuring cups in the freezer for 15 minutes, along with the butter—cold tools are essential for tender scones
- Make sure the heavy cream is cold (straight from the refrigerator)
- Have a baking sheet and parchment paper ready
Line baking sheet
- Line a large baking sheet with parchment paper.
Mix dry ingredients
- In a large bowl, whisk together the flour, brown sugar, baking powder, and salt until combined.
- Make sure there are no lumps of brown sugar.
Cut in cold butter
- Add the cold butter cubes to the flour mixture.
- Using a pastry cutter, two forks, or your fingertips, work the butter into the flour until the mixture resembles coarse breadcrumbs with some pea-sized pieces of butter still visible throughout.
- This should take about 2–3 minutes.
- Do not overmix or allow the butter to warm up.
+ Show details− Hide details
Ready when: Mixture resembles coarse breadcrumbs with pea-sized pieces of butter still visible
Tip: Keep your hands cool and work quickly; warm butter will produce dense scones instead of tender ones
Fold in pecans
- Gently fold the chopped pecans into the mixture until evenly distributed.
- Use a spatula or wooden spoon to fold gently rather than stirring.
Add cream and form dough
- Pour the cold heavy cream (and vanilla extract if using) over the mixture.
- Using a fork or spatula, gently stir and fold until the dough just comes together—there should be a few streaks of flour still visible.
- Stop mixing immediately; do not overmix as this develops gluten and results in tough, dense scones.
+ Show details− Hide details
Ready when: Dough just comes together with a few flour streaks still visible
Tip: Slight unevenness in the dough is good—stop as soon as it barely holds together
Shape and chill scones
- Lightly flour a clean work surface.
- Gently turn the dough out onto the surface and form it into a disk about 3/4 inch (2 cm) thick.
- Using a sharp knife, cut the disk into 12 wedges (like cutting a pizza), or cut into rounds with a 2-inch (5 cm) biscuit cutter.
- Place each scone on the prepared baking sheet, leaving about 2 inches (5 cm) between them.
- Cover loosely with plastic wrap and place in the freezer for 20 minutes until the scones are very firm and cold.
+ Show details− Hide details
Ready when: Scones are firm and very cold to the touch
Tip: Chilling is essential—it prevents spreading and ensures a tender, flaky crumb
Brush with egg and bakeOven 400°F / 205°C
- Remove the scones from the freezer.
- Brush the top of each scone lightly with the beaten egg.
- Bake at 400°F (200°C) for 15–18 minutes, until the tops are deep golden brown and a toothpick inserted into the center of one comes out with a few moist crumbs.
- Do not overbake.
- Let cool on the baking sheet for 5 minutes, then transfer to a wire rack to cool slightly.
+ Show details− Hide details
Ready when: Tops are deep golden brown and a toothpick inserted in the center comes out with a few moist crumbs, not clean
Tip: Avoid egg dripping down the sides of the scones, which prevents even rising; slightly underbaked scones are moister and more tender than fully baked ones
Good to know
Tips
- Keep all ingredients cold—cold butter and cream produce tender, flaky scones; warm butter results in dense, heavy scones
- Don't skip the chilling step—cold dough bakes into lighter, more evenly risen scones with better texture
- Scones are best served warm with butter, jam (particularly raspberry or strawberry), and whipped cream
- For extra sweetness and crunch, brush the tops with melted butter and sprinkle with coarse sugar (such as Demerara) before baking
Make ahead
Shaped scones can be frozen up to 1 week; bake directly from frozen, adding 2–3 minutes to the baking time. Or bake the scones and freeze for up to 1 month; reheat wrapped in foil at 325°F (163°C) for 10 minutes.
Storage & reheating
Room temperature (up to 2 days): Store in an airtight container away from heat. Refrigerator (up to 4 days): Store in an airtight container; reheat gently before serving. Freezer (up to 1 month): Wrap scones individually in plastic wrap, then place in a freezer bag; reheat wrapped in foil at 325°F (163°C) for 10–12 minutes.
Substitutions
- pecans → walnuts or chopped hazelnuts. Use equal amount by weight; walnuts are slightly bitter, hazelnuts are sweeter and will make a richer scone
- packed brown sugar → white granulated sugar. Use 1/4 cup (50g); scones will be less rich and less caramel-forward in flavor
- heavy cream, cold → buttermilk or whole milk mixed with 1/2 tsp lemon juice. Use 3/4 cup (180ml) total; scones will be slightly tangier and less tender (better for savory versions)
- all-purpose flour → 1 3/4 cups (210g) all-purpose flour mixed with 1/4 cup (30g) whole wheat pastry flour. Texture will be nuttier and slightly denser; adjust if using more than 1/4 cup whole wheat flour
More scones & biscuits
See all →




Find more like this
- Meal
- Breakfast
- Diet
- VegetarianHalal