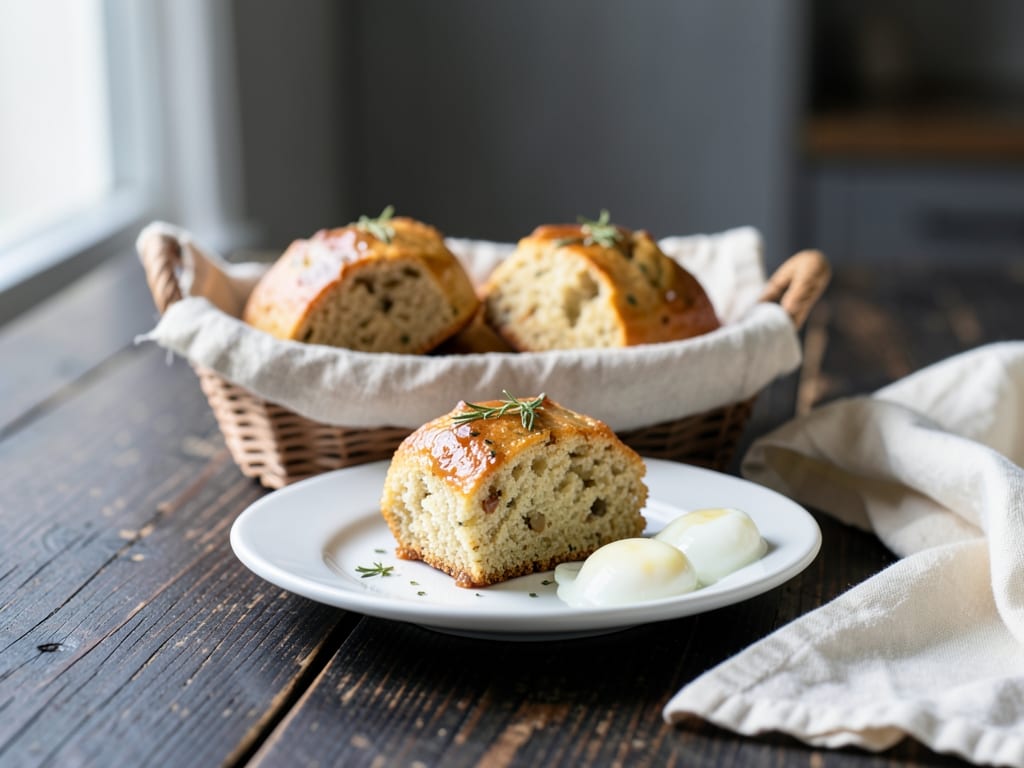
Brown Butter and Sage Scones
Nutty brown butter and fresh sage create sophisticated scones with a tender crumb and delicate flaky layers. Serve warm with goat cheese, honey, or alongside a light salad for an elegant brunch.
Steps
Before you start
- Brown 6 oz (170g) unsalted butter in a small saucepan over medium heat for 8-10 minutes until the milk solids turn deep golden and the butter smells nutty. Pour into a bowl, cool to room temperature (about 30 minutes), then refrigerate until firm, about 30-45 minutes.
- Preheat oven to 400°F (200°C) before mixing the dough.
- Keep all ingredients cold until ready to use.
- Line a baking sheet with parchment paper.
Combine flour, salt, and pepper
- In a large bowl, whisk together 2 cups (250g) all-purpose flour, 1 teaspoon (6g) kosher salt, and ½ teaspoon (1g) freshly ground black pepper until evenly combined.
- Make sure there are no lumps.
Cut butter into flour
- Cut the cold brown butter into ½-inch (1.5 cm) cubes.
- Add the butter cubes to the flour mixture.
- Using a pastry cutter, two forks, or your fingertips, work the butter into the flour.
- Rub the butter between your fingers, breaking it into smaller pieces.
- You want the mixture to resemble coarse breadcrumbs with some pea-sized pieces of butter still visible.
- This should take 3-5 minutes.
- Work quickly to keep the mixture cold—if it starts to feel warm, refrigerate it for a few minutes.
+ Show details− Hide details
Ready when: Mixture resembles coarse breadcrumbs with pea-sized butter pieces still visible
Tip: Keeping the butter cold is essential for flaky scones. If your fingers warm the mixture, use a pastry cutter or fork instead.
Fold in fresh sage
- Finely chop 2 tablespoons (6g) fresh sage leaves.
- Gently fold the chopped sage into the flour-butter mixture using a rubber spatula until evenly distributed.
Mix in cream and form dough
- Make a well in the center of the flour mixture.
- Pour ¾ cup (180ml) cold heavy cream into the well.
- Using a fork or rubber spatula, gently fold the cream into the dry ingredients.
- Mix until the dough just comes together—it should look shaggy and slightly damp, with a few flour streaks visible.
- Stop mixing as soon as the cream is fully incorporated.
- Overmixing develops gluten and will make the scones tough.
+ Show details− Hide details
Ready when: Dough just comes together with cream fully incorporated; still looks shaggy and slightly damp
Tip: Don't be tempted to overmix. A slightly shaggy dough produces the fluffiest, most tender scones.
Shape and cut scones
- Turn the dough out onto a lightly floured surface.
- Using your hands, gently shape it into a disk about ¾ inch (2 cm) thick, being careful not to compress the dough.
- Using a sharp knife dipped in flour (or a 2-inch/5 cm biscuit cutter), cut the dough into 8 equal pieces.
- If using a knife, cut the disk into 8 wedges like a pizza, or cut out rounds and reshape any trimmings.
- Place the scones on the prepared baking sheet, spacing them about 2 inches (5 cm) apart.
+ Show details− Hide details
Tip: Handle the dough as little as possible. Light, gentle shaping preserves the air pockets that make scones fluffy.
Apply egg wash
- In a small bowl, whisk together 1 large egg yolk and 1 tablespoon (15ml) water until smooth.
- Using a pastry brush, lightly brush the top of each scone with the egg wash.
- This gives the scones a beautiful golden shine when baked.
Bake until goldenOven 400°F / 205°C
- Bake at 400°F (200°C) for 15-18 minutes.
- The scones are done when the tops are light golden brown and a toothpick inserted into the center of a scone comes out clean or with a few moist crumbs.
- The scones should rise well and feel firm but not hard to the touch.
+ Show details− Hide details
Ready when: Tops are light golden brown; toothpick inserted in center comes out clean or with a few moist crumbs
Tip: Don't overbake—scones can dry out quickly. Start checking at 15 minutes.
Cool before serving
- Remove the baking sheet from the oven and let the scones cool on the sheet for 5 minutes.
- This allows them to set slightly.
- Transfer the scones to a wire rack and serve warm or at room temperature.
- They're best enjoyed within an hour or two of baking.
Good to know
Tips
- Cold ingredients are essential for flaky scones—the butter creates steam pockets as it melts in the oven, creating delicate layers.
- Overmixing develops gluten and makes scones tough. Mix just until combined, no more.
- Watch the brown butter carefully in the last minute or two; you want deep golden milk solids, not black or burnt.
- If you don't have an egg, brush the scones with a little cold heavy cream—they'll still brown nicely and taste delicious.
Make ahead
Shaped dough can be refrigerated up to 4 hours or frozen for up to 1 month (bake from frozen, adding 2-3 minutes). Baked scones freeze well for up to 1 month.
Storage & reheating
Room temperature: 2 days in an airtight container. Refrigerator: 3-4 days in an airtight container. Freezer: up to 1 month wrapped individually. Reheat in a 350°F (175°C) oven for 5-10 minutes, or microwave for 20-30 seconds.
Substitutions
- Fresh sage → Fresh thyme or fresh rosemary, finely chopped. Use the same amount as the sage for a different but complementary herb flavor
- Heavy cream → Whole milk mixed with 1 tablespoon melted butter. Use the same total volume for a slightly less rich scone
- Unsalted butter → Cold unsalted butter, cut into small cubes. Scones will lack the nutty brown-butter flavor but will still be delicious
More scones & biscuits
See all →



Find more like this
- Meal
- Brunch
- Method
- Oven
- Quick & Easy
- 5 Ingredients or LessEasy