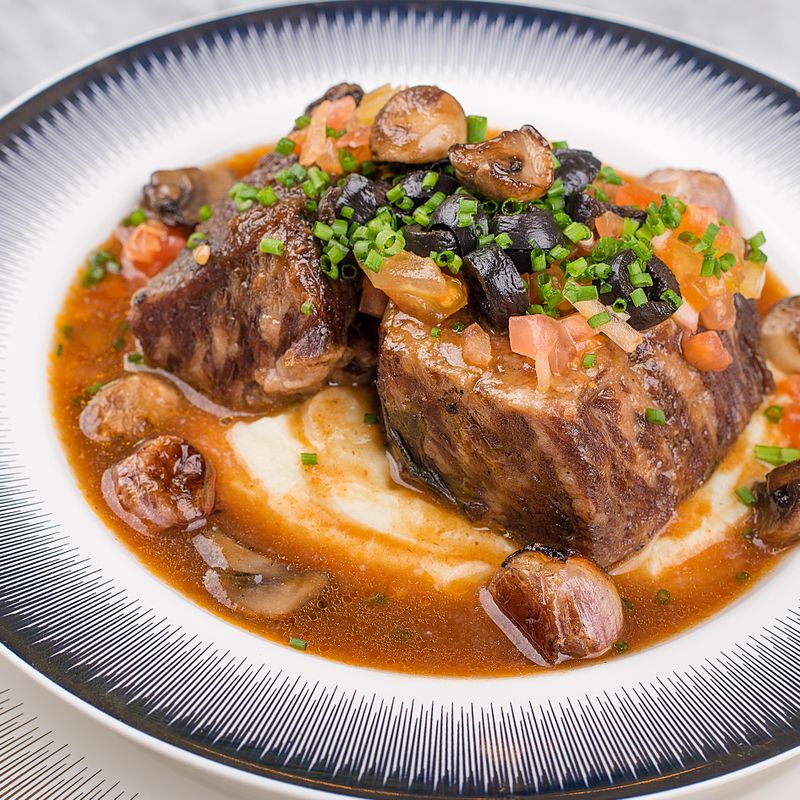
Braised Beef Short Rib Burritos
Tender, fall-apart beef short ribs braised low and slow with tomatoes, cumin, and bay leaves, then shredded and filled into warm flour tortillas. The braising liquid is reduced into a rich, savory sauce that keeps the filling moist. These hearty, satisfying burritos are perfect for feeding a crowd or meal-prepping ahead.
- Prep
- 20 min
- Cook
- 4 hr 35 min
- Wait
- 30 min
- Total
- 5 hr 25 min
- Makes
- 4 large burritos
Steps
Before you start
- Pat the beef short ribs dry with paper towels so they brown properly
- Preheat your oven to 325°F (163°C) if braising in the oven (or use low stovetop heat)
- Read through the braising time—the ribs need 3 to 3.5 hours of gentle heat
- Have all aromatics (onion, garlic) chopped and spices measured before you start browning the ribs
Brown the short ribsOven 400°F / 205°C
- Pat the beef short ribs completely dry with paper towels.
- Season all sides generously with salt and pepper.
- Heat the vegetable oil in a large Dutch oven or heavy braising pot over medium-high heat until it shimmers and just begins to smoke (about 2 minutes—around 375–400°F / 190–200°C if measuring oil temp).
- Working in two batches so the pan isn't crowded, lay the short ribs carefully in the hot oil and leave them undisturbed for exactly 4 minutes.
- Flip each rib and sear the other side for 4 minutes more, until deeply browned and caramelized.
- Transfer the browned ribs to a plate.
- You should see a rich brown layer (fond) coating the bottom of the pot—this is liquid gold for your sauce.
+ Show details− Hide details
Ready when: Ribs are deep golden-brown on all exposed sides with visible caramelized fond covering the pot bottom
Tip: Don't move the ribs while searing or you'll break the browning crust. Set a timer for 4 minutes per side—patience here pays off in flavor.
Sauté aromatics and spices
- Reduce the heat to medium.
- Add the chopped onion to the pot and cook, stirring occasionally with a wooden spoon, for 4 minutes until the onion softens and begins to turn translucent at the edges.
- Add the minced garlic and stir constantly for 1 minute until it becomes fragrant and just barely golden.
- Sprinkle in the cumin and oregano, and stir continuously for 30 seconds, coating all the vegetables with the spices.
- You'll smell the spices bloom as they toast in the fat—this deepens their flavor immensely.
+ Show details− Hide details
Ready when: Onion is soft and translucent, garlic is fragrant and just barely golden, spices coat the vegetables and release their aroma
Tip: Blooming the spices in fat for just 30 seconds concentrates and integrates their flavor—don't skip or rush this step.
Deglaze and build the braising liquid
- Pour the beef broth into the pot slowly, scraping the bottom and sides with a wooden spoon to loosen every trace of the browned fond.
- Add the can of crushed tomatoes with all its juice, the 3 bay leaves, and the juice from 1 lime.
- Stir everything together until well combined.
- Carefully nestle the browned short ribs back into the pot, arranging them so they're surrounded by liquid.
- The ribs should be about three-quarters submerged; if they're mostly sticking out above the surface, add a splash more broth.
- The liquid should smell rich and savory.
+ Show details− Hide details
Ready when: Fond is completely dissolved, ribs are nestled in liquid showing about 1/2 inch of braising liquid on top, liquid is aromatic
Tip: Deglaze thoroughly by scraping every bit of fond—those browned bits carry the depth of flavor your sauce needs.
Bring to a simmer and coverOven 190°F / 90°C
- Increase the heat to medium-high and watch the liquid until you see small bubbles breaking the surface (about 2–3 minutes).
- Once it reaches a gentle simmer, reduce the heat to low and place the lid on the pot.
- Adjust the heat so that only a lazy bubble emerges from the liquid every few seconds (you're aiming for around 180–190°F / 82–88°C on a thermometer, or just below an active simmer).
- This low, steady heat is crucial for tender, moist, not stringy meat.
+ Show details− Hide details
Ready when: Liquid is at a bare simmer with only a few bubbles surfacing every few seconds, steam just visible when you crack the lid
Tip: If the liquid boils vigorously, lower the heat immediately. A rolling boil will make the meat tough and stringy—low and gentle is the key.
Braise until meat is fork-tenderOven 325°F / 165°C
- You now have two options: (1) Oven braise (preferred): Transfer the covered pot to a preheated 325°F (163°C) oven and leave it undisturbed for 3 to 3.5 hours.
- (2) Stovetop braise: Keep the covered pot on low heat at the same temperature for the same time.
- Check the ribs at the 2.5-hour mark by lifting one with tongs and probing the thickest meat with a fork—it should pull apart easily.
- If it still feels firm, cover and continue braising for 15–30 minutes more.
- The short ribs are perfectly done when the meat pulls apart with minimal pressure and the bone slides away from the meat almost on its own.
- A meat thermometer inserted into the thickest meat (not touching bone) will read 190–203°F (88–95°C).
+ Show details− Hide details
Ready when: Meat pulls apart with a fork with virtually no resistance; the bone slides away easily when nudged; internal temperature is 190–203°F (88–95°C)
Tip: Don't rush the braise by raising the heat—low and slow produces buttery, moist meat. If using the stovetop, maintain a bare simmer by frequently adjusting heat.
Cool and shred the meat
- Remove the pot from the oven (or turn off the stovetop).
- Let the short ribs rest undisturbed in their braising liquid for 15 minutes—this keeps the meat moist and makes it easier to shred.
- Using tongs or a slotted spoon, transfer each short rib to a large cutting board.
- Let them cool just enough to handle (about 10 more minutes), then use two forks or your fingers to pull the meat away from the bones, shredding it into bite-sized pieces as you go.
- Discard the bones and any large chunks of fat.
- You should end up with about 3 to 3.5 cups (500–600 g) of shredded meat.
- Shred while the meat is still warm—once cold, it's much harder to pull apart.
+ Show details− Hide details
Ready when: Meat shreds easily into tender pieces; bones are clean with no meat clinging; no large fatty chunks remain
Tip: Shred the meat while still warm—if it cools completely, the fibers tighten and become much harder to separate. Work quickly.
Strain and reduce the braising liquid
- Pour the remaining braising liquid through a fine-mesh strainer into a medium saucepan, pressing gently on the solids to extract all the flavorful liquid.
- Discard the solids and bay leaves.
- Place the strained liquid over medium-high heat and bring it to a gentle simmer.
- Let it bubble gently for 8 to 10 minutes, stirring occasionally, to reduce by about one-third.
- The liquid will become thicker, darker, and more intensely flavored—you want it to coat the back of a spoon lightly.
- Taste it and adjust the seasoning with a pinch of salt or pepper if needed.
+ Show details− Hide details
Ready when: Liquid has reduced by about one-third and is glossy and slightly thick; it coats the back of a spoon
Tip: Reducing the braising liquid concentrates and darkens the flavor—you need less sauce but it's much more intense and rich.
Combine meat with sauce and cilantro
- Return the shredded beef to the pot with the reduced braising liquid (or pour the hot sauce over the shredded meat if it's in a bowl).
- Gently stir in the finely chopped cilantro, folding it evenly throughout.
- Let the mixture sit undisturbed for 5 minutes so the flavors marry and the cilantro wilts slightly.
- The shredded beef should be moist and glistening but not swimming in liquid—if it seems soupy, return it to medium heat for 2–3 minutes to evaporate excess moisture so the burritos don't get soggy.
+ Show details− Hide details
Ready when: Shredded beef is evenly coated with glossy sauce, cilantro is distributed throughout, mixture is moist but not soupy
Tip: If the filling is watery, simmer it gently for 2–3 minutes to evaporate excess liquid—a wet burrito is a torn burrito.
Warm the tortillas
- Heat a large skillet or griddle over medium heat for 1 minute.
- Working with one tortilla at a time, lay it flat on the hot surface and warm it for about 20 seconds per side until it's soft, pliable, and warm throughout.
- A light char or browning is fine—it adds flavor.
- Very lightly brush one or both sides with softened butter if you like (optional but recommended for richness).
- Stack the warmed tortillas on a clean kitchen towel and fold the towel over them to keep them warm and pliable.
- They'll toughen quickly if exposed to air, so keep them covered until you're ready to fill them.
+ Show details− Hide details
Ready when: Tortillas are warm, soft, and pliable; they bend easily without cracking or becoming papery
Tip: Warm them right before filling—cold tortillas will crack when you try to roll them. A damp kitchen towel keeps them from drying out.
Fill and roll the burritos
- Place a warm tortilla on a clean, dry work surface.
- Spoon about 1 to 1.25 cups (170–210 g) of the shredded beef mixture slightly below the horizontal center of the tortilla, leaving a 1.5-inch (4 cm) border on the left and right sides and about 2 inches (5 cm) on the bottom edge.
- This sounds like a lot but is the right amount for a tightly rolled burrito.
- If using any optional toppings (shredded cheese, lettuce, sour cream, extra cilantro), add them now.
- Fold the bottom edge of the tortilla up and over the filling, tucking it in snugly with your fingers.
- Fold in the left side, then the right side, overlapping them slightly so they seal.
- Now roll upward, pulling the burrito away from you to tighten it as you go.
- The seam should end up on the bottom.
- Place it seam-side down on a serving plate.
- Repeat with the remaining three tortillas.
+ Show details− Hide details
Ready when: Burritos are tightly rolled with the seam tucked underneath; no large gaps or openings on the sides; filling doesn't peek out
Tip: Don't overfill—about 1 cup per burrito is the sweet spot. Too much and the tortilla tears; too little and you lose structural integrity when eating.
Pan-sear for a finished exterior (optional)
- For extra texture and to seal the seams so filling doesn't leak, heat a large skillet or griddle over medium heat and lightly brush or wipe it with a bit of butter or oil.
- Place the burritos seam-side down in the pan and sear undisturbed for 2 minutes until the bottom is golden and crispy.
- Carefully flip (they're sturdy at this point) and sear the other side for another 1–2 minutes.
- The tortillas should be lightly golden and crispy.
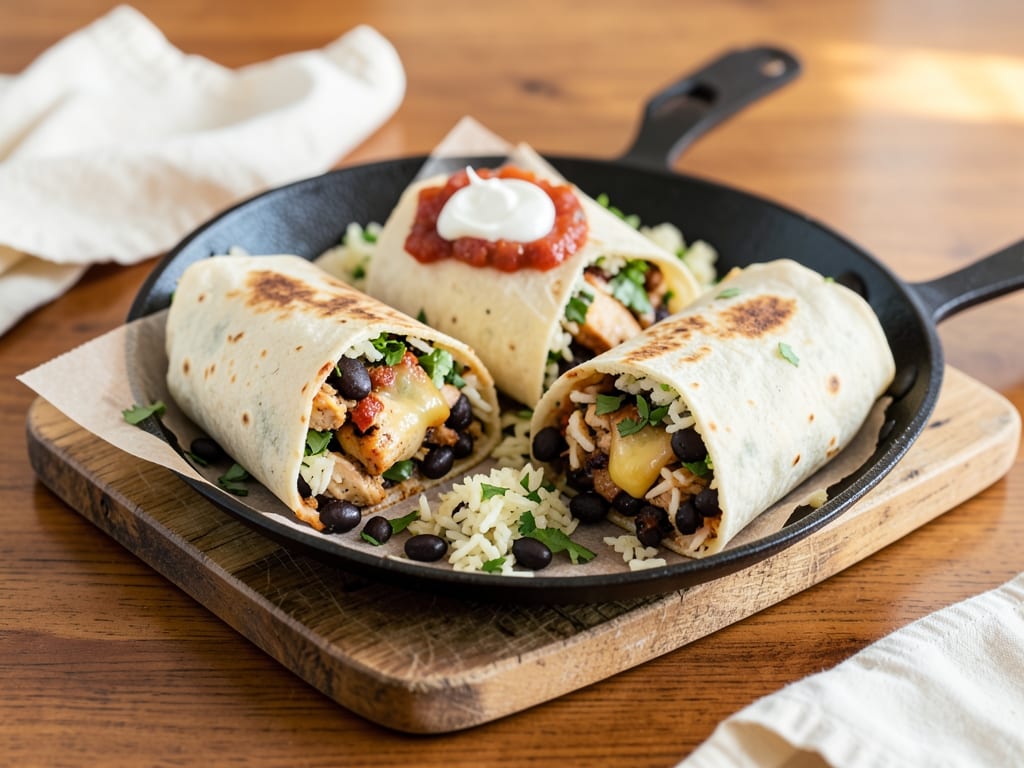
- Serve the burritos hot, seam-side down so they look finished.
+ Show details− Hide details
Ready when: Tortilla exterior is lightly golden and crispy; seams are sealed and won't split when bitten into; burrito is hot throughout
Tip: Pan-searing is optional but highly recommended—it seals the seams so your filling stays inside, and the crispy exterior is delicious.
Good to know
Tips
- Don't skip the browning step—those deep brown, caramelized bits (fond) create the rich, complex flavor that makes the braising liquid special. Rushed browning means a thin-tasting braise.
- Keep the braising temperature low and steady (around 180–190°F / 82–88°C). A rolling boil toughens the meat, causes excessive evaporation, and produces a stringy texture instead of tender, moist shreds.
- For a spicier filling, add 1 to 2 dried chiles (guajillo, ancho, or arbol work well)—remove stems and seeds first—or stir in 1 to 2 tablespoons (15–30 ml) of hot sauce or chile paste at the end after reducing the liquid.
- Serve the burritos with lime wedges, sour cream, extra shredded cheese (cheddar, Oaxaca, or Cotija), salsa, hot sauce, shredded lettuce, and extra cilantro so guests can customize their meal to taste.
Make ahead
The beef can be braised up to 2 days ahead. Cool the ribs and braising liquid completely, then cover and refrigerate together. To reheat and finish: gently warm the ribs in their liquid in a covered pot over low stovetop heat (about 20 minutes) or in a 325°F / 163°C oven (about 30 minutes) until heated through. Then shred the meat, reduce the liquid, and combine with cilantro as instructed. Alternatively, you can assemble the filled, uncooked burritos, cover them tightly, and refrigerate for up to 1 day before pan-searing and serving.
Storage & reheating
Room temperature: Burritos are best eaten fresh but will hold at room temperature (loosely covered) for up to 2 hours. Refrigerator: Store covered burritos in an airtight container for up to 3 days. Reheat gently: wrap in a damp paper towel and microwave for 2–3 minutes, or wrap in foil and warm in a 350°F / 176°C oven for 12–15 minutes until heated through. Freezer: Wrap cooled, uncut burritos individually in plastic wrap and then in foil; freeze for up to 3 months. Thaw overnight in the refrigerator and then reheat as above.
Substitutions
- bone-in beef short ribs, well-trimmed of excess surface fat → Beef chuck roast (4 lbs / 1.8 kg), cut into 3-inch / 7.5 cm cubes. Chuck roast has similar collagen content and will braise to similar tenderness. Braising time may be slightly shorter (2.5 to 3 hours) since smaller pieces cook faster. The result is equally tender and flavorful.
- bone-in beef short ribs, well-trimmed of excess surface fat → Pork shoulder (4 lbs / 1.8 kg), trimmed and cut into 4-inch / 10 cm chunks. Pork braises faster than beef and has a naturally sweet flavor that pairs well with cumin and tomato. Reduce braising time to 2.5 to 3 hours. The filling will be slightly lighter in color but equally rich.
- beef broth (preferably low-sodium) → Chicken broth (2 cups / 480 ml). Chicken broth creates a lighter, more delicate braising liquid. The beef will cook at the same rate, but the finished filling will be milder. Increase the cumin slightly (3 tsp instead of 2) to compensate for lost depth.
- canned crushed tomatoes (with juice) → Fresh ripe tomatoes (2 lbs / 900 g, cored and roughly chopped) or cherry tomatoes (1.5 lbs / 680 g, halved). Fresh tomatoes add brightness and natural acidity. Since they release more liquid, you may need to simmer the braising liquid 2–3 extra minutes during the reduction phase to achieve the right consistency.
More tacos & burritos
See all →
Find more like this
- Meal
- Dinner
- Cuisine
- Tex-Mex
- Main ingredient
- Short Ribs
- Diet
- HalalSugar-Free
- Quick & Easy
- Meal PrepMake AheadFreezer Friendly