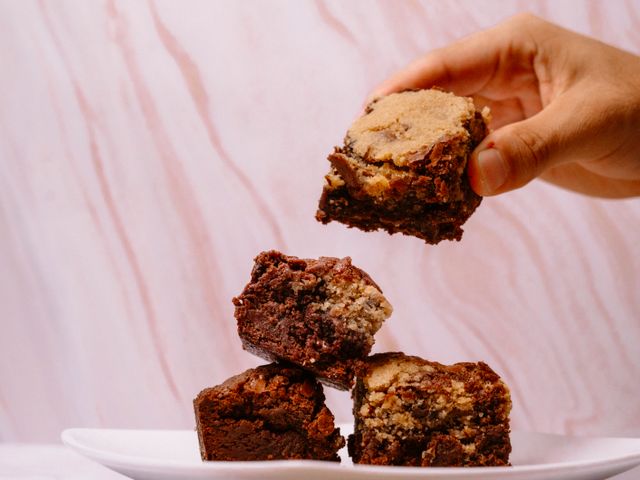
Yerba Mate White Chocolate Blondies
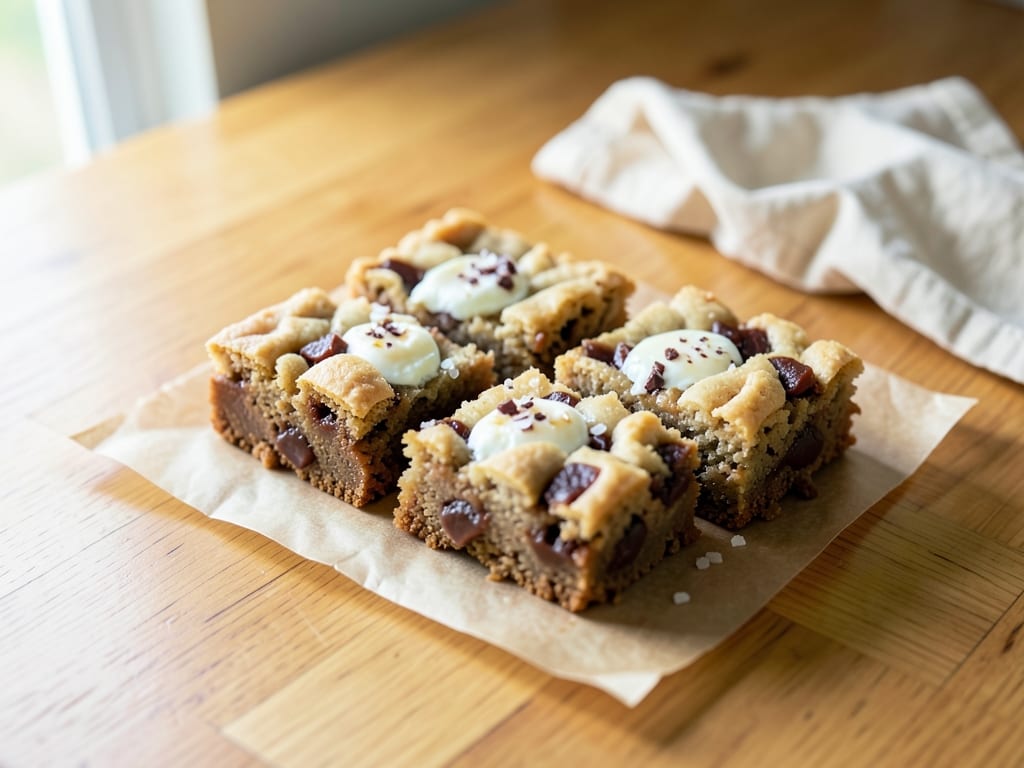
These tender, fudgy blondies marry the subtle earthiness of yerba mate powder with rich white chocolate, creating a sophisticated bar cookie with an Argentine twist. The yerba mate provides a gentle, herbaceous note that complements rather than overwhelms the sweetness, while ensuring these bars stay wonderfully moist.
- Prep
- 20 min
- Cook
- 25 min
- Wait
- 45 min
- Total
- 1 hr 30 min
- Makes
- 16 blondies
Steps
Before you start
- Bring unsalted butter and large eggs to room temperature (soften butter ~1 hour ahead, or place eggs in warm water for 5 minutes if needed)
- Preheat your oven to 350°F (175°C) before you begin mixing
- Line a 9×9-inch (23×23 cm) baking pan with parchment paper, leaving a 2-inch overhang on two opposite sides
Preheat oven and line panOven 350°F / 175°C
- Preheat your oven to 350°F (175°C).
- Line a 9×9-inch (23×23 cm) baking pan with parchment paper, leaving a 2-inch overhang on two opposite sides.
- This allows you to easily lift out the entire block of baked blondies for clean edges.
+ Show details− Hide details
Tip: The parchment overhang is essential—it lets you lift the entire batch out as a single block, ensuring uniform cutting and neat edges.
Cream butter and brown sugar
- In a large mixing bowl, add the room-temperature butter cut into cubes and the packed brown sugar.
- Using an electric mixer on medium speed (or a whisk by hand), beat for 3–4 minutes until the mixture is pale, fluffy, and noticeably lighter than when you started.
- Scrape down the sides of the bowl halfway through.
+ Show details− Hide details
Ready when: Mixture is pale, fluffy, and noticeably lighter in color and texture
Tip: This creaming process incorporates air into the batter, which gives the finished blondies a tender crumb and slightly cakey texture rather than dense and fudgy.
Incorporate eggs and vanilla
- Add one large egg to the creamed butter mixture and beat on medium speed for about 1 minute until fully incorporated.
- Add the second egg and beat for another minute until the mixture is smooth.
- Pour in the vanilla extract and mix for another 30 seconds until fully combined.
- The mixture should look thick and pale yellow.
+ Show details− Hide details
Ready when: Mixture is smooth, thick, and pale yellow
Tip: Room-temperature eggs blend in smoothly and incorporate more evenly. If your mixture looks slightly curdled, don't worry—it will come together as you mix.
Combine dry ingredients
- In a separate medium bowl, whisk together the all-purpose flour, finely sifted yerba mate powder, baking powder, and fine sea salt.
- Whisk for 1–2 minutes, breaking up any small clumps of yerba mate powder as you go.
- The mixture should look uniform in color with no visible green specks clumped together.
+ Show details− Hide details
Ready when: Mixture is uniform in color with no visible clumps of yerba mate
Tip: Sifting the yerba mate powder before mixing prevents raw green specks and ensures the herbal flavor distributes evenly throughout the batch.
Fold dry mixture into wet
- Pour the dry ingredient mixture into the bowl with the egg mixture.
- Using a rubber spatula or wooden spoon, gently fold the two together, scraping from the bottom and sides of the bowl and folding over the top.
- Stop as soon as no streaks of flour are visible.
- Do not overmix.
+ Show details− Hide details
Ready when: No visible streaks of flour remain; mixture is evenly combined
Tip: Overmixing develops gluten, which makes the blondies dense and tough. Stop folding as soon as the streaks disappear.
Fold in white chocolate
- Add the roughly chopped white chocolate to the batter and gently fold in until the pieces are evenly distributed throughout.
- Be gentle to preserve large chocolate chunks, which will create pockets of melted white chocolate in the baked bars.
+ Show details− Hide details
Ready when: White chocolate pieces are evenly distributed throughout the batter
Tip: Handle the chocolate gently to avoid crushing it—larger chunks create better texture and appearance in the finished blondies.
Transfer batter to pan
- Pour the batter into the prepared 9×9-inch (23×23 cm) pan with the parchment overhang.
- Using an offset spatula or the back of a spoon, spread it into an even layer, pressing gently to fill all corners.
- Tap the pan once or twice on the counter to release any air bubbles.
+ Show details− Hide details
Ready when: Batter is evenly spread and fills all corners
Tip: An even thickness ensures all parts of the batch bake at the same rate, giving you uniform blondies from edge to center.
Bake until golden and setOven 350°F / 175°C
- Place the pan in the preheated 350°F (175°C) oven.
- Bake for 24–26 minutes.
- The blondies are done when the top is light golden brown and a toothpick inserted in the center comes out with moist crumbs (not wet, but not completely clean).
- The edges should be set and pulling slightly away from the pan, and the center should jiggle just barely when you gently shake the pan—they'll firm up as they cool.
+ Show details− Hide details
Ready when: Top is light golden brown; toothpick shows moist crumbs; center barely jiggles
Tip: Slightly underbaked is better than overbaked—they continue to cook and firm up as they cool, resulting in a fudgier, more tender texture.
Cool in pan
- Remove the pan from the oven and place it on a wire rack or heatproof surface.
- Let the blondies cool in the pan for 20 minutes.
- This resting period allows them to firm up enough to hold their shape when removed, while still being soft inside.
+ Show details− Hide details
Ready when: Blondies are firm enough to touch and hold together
Remove from pan and cut
- Using the parchment overhang, carefully lift the entire block of blondies out of the pan and place it on a cutting board.
- Let cool to room temperature, about 10–15 minutes.
- Using a sharp chef's knife, cut the block into a 4×4 grid to create 16 equal squares.
- Wipe the blade between cuts with a warm, damp cloth for clean, neat edges.
+ Show details− Hide details
Ready when: Blondies are at room temperature and firm throughout
Tip: A warm, damp knife prevents white chocolate from sticking to the blade, giving you clean cuts and professional-looking squares.
Good to know
Tips
- Don't overbake these blondies—they should still be slightly jiggly in the center when they come out of the oven. They continue to cook and firm up as they cool, resulting in a fudgier, more tender texture.
- Use high-quality white chocolate; cheaper varieties contain less cocoa butter and can taste waxy. Look for products with cocoa butter in the first few ingredients.
- Sift or finely grind the yerba mate powder to eliminate clumps and ensure even flavor distribution throughout the batch.
- A warm, damp knife between cuts prevents the white chocolate from sticking and smudging, keeping your squares neat and professional-looking.
Make ahead
Blondies can be baked up to 3 days ahead. You can also measure all dry ingredients the night before and store in an airtight container until ready to use.
Storage & reheating
Room temperature: Store in an airtight container for 3–4 days. Refrigerator: Up to 5 days in an airtight container. Freezer: Up to 3 months in a freezer-safe container or wrapped individually in plastic wrap. To serve chilled blondies or reheat, bring to room temperature or warm a single square in the microwave for 10–15 seconds.
Substitutions
- yerba mate powder → matcha powder or finely ground green tea powder. Substitute equal amount; matcha will give a more vibrant green color and slightly more bitter, grassy flavor, but pairs beautifully with white chocolate.
- white chocolate → milk chocolate or dark chocolate (chopped). Use the same amount; milk chocolate is milder and sweeter, while dark chocolate brings sophistication and a slight bitterness that balances the yerba mate.
- brown sugar → light brown sugar. Use the same amount; light brown sugar has less molasses, giving slightly less caramel flavor but still working beautifully in these bars.
- all-purpose flour → cake flour. Use the same amount; cake flour is softer and will make the blondies more tender and delicate with an even more tender crumb.