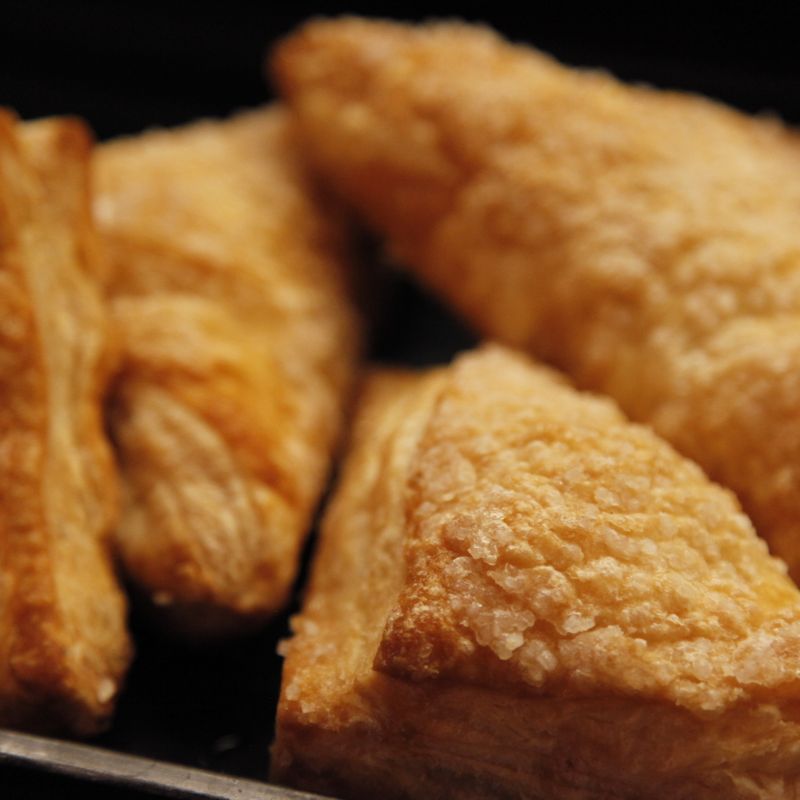
Vietnamese Pâté Chaud (Flaky Pork Puff Pastry Pies)
Little domed pies of buttery puff pastry filled with a savory, peppery pork and shallot filling seasoned with fish sauce. This is the classic Vietnamese bakery snack. A muffin tin gives you neat, evenly baked pies with crisp, golden, shatteringly flaky shells.
Steps
Before you start
- Thaw the puff pastry in the refrigerator overnight, or on the counter for 40 minutes, until pliable but still cold. Unfold it only when you are ready to roll.
- The filling must be completely cool before it goes into the pastry. Warm filling melts the butter layers and the pies won't puff. Plan on 30 minutes for cooling.
- Your oven needs about 15 minutes to preheat to 400°F (200°C). Start it during the chilling step, with a rack in the center.
- You'll use 8 cups of a standard 12-cup muffin tin. Leave the other 4 empty, or fill them with a little water so the tin doesn't warp.
Soften the aromatics
- Heat the oil in a 10-inch (25 cm) skillet over medium heat for 1 minute.
- Add the minced shallots and garlic and stir often for about 3 minutes.
+ Show details− Hide details
Ready when: Shallots are translucent and soft, smell sweet, and have only just started to turn pale gold.
Tip: Lower the heat if the garlic browns. Burnt garlic turns the whole filling bitter.
Brown the pork
- Raise the heat to medium-high.
- Add the ground pork and break it into pea-sized crumbles with a wooden spoon.
- Cook, stirring, for 5 to 6 minutes.
- Stir in the fish sauce, sugar, and black pepper and cook 1 minute more.
+ Show details− Hide details
Ready when: No pink remains, the pork has released its liquid and most of it has cooked off, and the crumbles smell savory and slightly caramelized. The pork should reach at least 160°F (71°C).
Tip: Crumble the pork finely. Large chunks make the pies bulge and bake unevenly.
Simmer and thicken
- Pour in the stock and bring to a simmer over medium heat.
- Stir the cornstarch into the 2 tablespoons cold water until smooth.
- Pour it into the pan, stirring constantly, and simmer 1 to 2 minutes.
- Remove from the heat and stir in the scallion greens.
+ Show details− Hide details
Ready when: The filling is thick and glossy and holds together on the spoon. A spoon dragged across the pan bottom leaves a trail that stays open for a second. It should look like a moist, spoonable paste, not a sauce.
Tip: Loose filling will leak and soak the bottom of the pastry. If it looks wet, simmer another minute.
Cool the filling
- Spread the filling on a plate or small tray in a thin layer.
- Let it cool at room temperature, then refrigerate if needed, until no longer warm to the touch.
- Meanwhile, move on to the pastry.
+ Show details− Hide details
Ready when: The filling feels cool or only barely cool when you touch it.
Tip: Warm filling is the number one reason pâté chaud pastry turns greasy and doesn't puff.
Roll and cut pastry
- Dust the counter lightly with flour.
- Roll each puff pastry sheet to a roughly 10-inch (25 cm) square, about ⅛ inch (3 mm) thick.
- Cut four 4-inch (10 cm) rounds from each sheet, for 8 bottoms total.
- Stack the scraps without kneading them, roll them to ⅛ inch, and cut eight 3-inch (7.5 cm) rounds for the lids.
- Keep the cut rounds on a parchment-lined tray in the fridge.
+ Show details− Hide details
Ready when: You have 8 bottoms and 8 lids, all of even thickness with clean cut edges.
Tip: Press the cutter straight down without twisting. Twisting seals the layers together and the edges won't rise.
Line the muffin tinOven 400°F / 205°C
- Press each 4-inch round gently into one of 8 cups of an ungreased muffin tin.
- Let the edges stand up slightly above the rim.
- Prick each base 3 or 4 times with a fork.
- Chill the lined tin for 15 minutes.
- Preheat the oven to 400°F (200°C) with a rack in the center during this time.
+ Show details− Hide details
Ready when: Pastry fits snugly against the sides of each cup with no gaps or tears on the bottom.
Tip: Butter-based puff pastry is easy to patch. Press any tears together with a fingertip.
Fill the shells
- Mix the egg and 1 tablespoon water with a fork in a small bowl.
- Spoon about 3 tablespoons (45 g) of cooled filling into each shell and press it down gently.
- Leave about ¼ inch (6 mm) of pastry showing around the edge.
- Brush that rim with egg wash.
+ Show details− Hide details
Ready when: The filling is mounded slightly but sits below the cup rim, and the pastry rims are glossy with egg wash.
Tip: Don't overfill. Filling that touches the rim keeps the lid from sealing.
Top, seal, and glaze
- Lay a 3-inch lid over each pie.
- Press the edges together with the tines of a fork to seal them.
- Brush the tops with egg wash, avoiding the cut sides, which would glue the layers together.
- Cut a small slit in the center of each lid with a knife tip so steam can escape.
+ Show details− Hide details
Ready when: Every lid is sealed all the way around and the tops are evenly glossy.
Tip: Don't let egg wash drip down the sides of the pastry. It glues the layers and stops the rise.
Bake until goldenOven 400°F / 205°C
- Bake on the center rack at 400°F (200°C) for 22 to 25 minutes.
- Rotate the tin front to back after 12 minutes.
+ Show details− Hide details
Ready when: The pies are puffed, deep golden brown on top and around the sides, and the layers look crisp and dry. The filling should be hot, at least 160°F (71°C).
Tip: If the tops brown before the sides do, tent loosely with foil for the last 5 minutes.
Cool and unmold
- Set the tin on a wire rack for 10 minutes.
- Run a small knife around each pie and lift it out.
- Serve warm.
+ Show details− Hide details
Ready when: Pies lift out easily and the bottoms are firm and golden.
Tip: The filling stays very hot inside. Let the pies cool before the first bite.
Good to know
Tips
- Keep the pastry cold at every stage. If it gets soft or sticky while you work, slide it onto a tray and chill it for 10 minutes.
- A thick, almost paste-like filling is what you want. It firms up as it cools, so judge it a little looser than the final texture.
- Don't twist the cutter, and keep egg wash off the cut edges, so the layers can rise freely.
- For a more traditional filling, stir in 2 tablespoons of finely chopped soaked wood ear mushroom or cooked glass noodles with the scallions.
Make ahead
"Cook and cool the filling up to 2 days ahead and refrigerate it in a covered container. You can also assemble the unbaked, unglazed pies in the tin, cover them, and refrigerate them up to 8 hours, or freeze them solid on a tray, then bag them for up to 1 month. Glaze and slit them just before baking. Bake frozen pies at 400°F (200°C) for 28 to 32 minutes."
Storage & reheating
"Room temperature: up to 2 hours. Refrigerator: up to 3 days in an airtight container. Freezer: baked pies up to 2 months, wrapped individually. To reheat, bake at 350°F (175°C) for 10 to 12 minutes from the fridge, or 18 to 20 minutes from frozen, until the pastry is crisp and the filling is hot throughout. Avoid the microwave, which makes the pastry soggy."
Substitutions
- ground pork → ground chicken or ground beef. Use the same weight. Chicken is leaner, so add an extra teaspoon of oil when browning.
- shallots → yellow onion. Use ½ cup (80 g) finely minced onion and cook 1 to 2 minutes longer to soften. The flavor is a little less sweet.
- fish sauce → light soy sauce. Use the same amount. The flavor is less funky, but the pies are still savory.
- chicken stock or water → water. The filling will be a little less rich, so add an extra pinch of pepper.