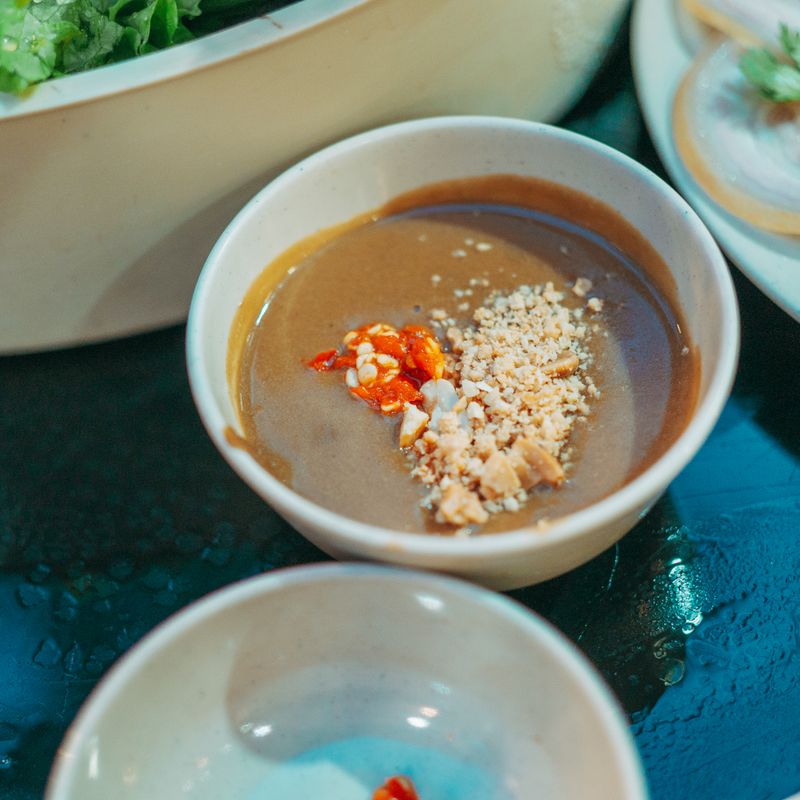
Thai Peanut Dip
This silky Thai peanut dip is a perfect balance of creamy, spicy, salty, sour, and umami flavors. Made with natural peanut butter, coconut milk, and fresh lime juice, enlivened by red chili and aromatic garlic, and deepened with fish sauce, it comes together in minutes without any cooking. Serve with fresh vegetables, crackers, or as a sauce for grilled chicken or shrimp.
- Prep
- 10 min
- Cook
- —
- Total
- 10 min
- Makes
- 1 cup (6 servings, about 3 tablespoons each)
Steps
Before you start
- Gather all ingredients before you begin—this makes blending fast and seamless
- Have your food processor or blender and a rubber spatula ready
- Prep the garlic and chili first so they're ready to go into the blender immediately
Prepare ingredients
- Finely mince the 3 garlic cloves.
- For the red chilies, cut each one in half lengthwise, remove and discard the seeds and white inner membrane, then chop the flesh very finely.
- Measure the peanut butter, coconut milk, lime juice, fish sauce, brown sugar, and salt into separate small bowls or directly into your food processor or blender.
+ Show details− Hide details
Ready when: Garlic is finely minced, chilies are finely chopped, and all ingredients are measured and ready to combine
Tip: Prep the garlic and chili first so you're not standing over a running blender—this ensures smooth, quick blending without interruptions
Combine and blend until smooth
- Transfer all the main ingredients to your food processor or blender: peanut butter, coconut milk, lime juice, minced garlic, chopped red chili, fish sauce, brown sugar, and salt.
- Blend on high speed for 1–2 minutes, pausing halfway through to scrape down the sides with a rubber spatula, until the mixture is completely smooth, creamy, and uniform with no visible lumps of peanut butter.
+ Show details− Hide details
Ready when: Dip is silky-smooth and completely uniform with no streaks or lumps of peanut butter remaining
Tip: If using a standard blender (not a food processor), you may need to add some of the optional water to help the blades turn—add it gradually while blending
Adjust consistency and seasoning
- Check the consistency: if it's too thick to dip easily or spread, add the optional warm water a tablespoon at a time, blending briefly between additions, until it reaches a thick but pourable texture (like a thick salsa).
- Taste the dip and adjust the flavors to your preference: add more fresh lime juice if you want more brightness and tang, more fish sauce for deeper umami, more brown sugar if it tastes too sharp, or more salt to round out all the flavors.
- Keep in mind the flavors will deepen slightly after the dip sits for a few minutes.
+ Show details− Hide details
Ready when: Dip has a thick but pourable consistency and flavors are balanced—sweet, salty, sour, spicy, and umami work together harmoniously
Tip: If possible, taste the dip at room temperature (its serving temperature) rather than straight from the blender—flavors can taste different when the mixture is cold
Serve with vegetables or crackers
- Transfer the finished peanut dip to a serving bowl.
- If desired, sprinkle the fresh cilantro over the top and add a squeeze of lime juice.
- Arrange the dip in the center of a platter and surround it with fresh vegetables such as sliced cucumber, bell pepper strips, carrot sticks, cherry tomatoes, and snap peas.
- You can also serve it alongside crispy crackers, toasted pita chips, or grilled chicken skewers, shrimp, or rice papers for rolling.
+ Show details− Hide details
Ready when: Dip is presented, garnished, and ready to serve
Good to know
Tips
- For extra peanut depth and a nutty flavor, toast raw unsalted peanuts briefly in a dry pan until fragrant, then blend them with the other ingredients instead of using pre-made peanut butter.
- This dip also works beautifully as a sauce for noodle bowls, rice, grilled meats, fish, and tofu, or as a filling ingredient for spring rolls and lettuce wraps.
- If you don't have or can't use fish sauce, the dip is still delicious without it—just add an extra small pinch of salt and increase the lime juice by ½ tablespoon to brighten the flavors.
- Double this recipe and freeze it in ice cube trays for quick portion-controlled appetizers or sauce servings throughout the month.
Make ahead
Yes. Prepare the dip up to 2 days in advance and store it in an airtight container in the refrigerator. The flavors will deepen and meld as it sits.
Storage & reheating
Refrigerator: 3–5 days in an airtight container. Freezer: up to 1 month in a freezer-safe container. To reheat after freezing: thaw overnight in the refrigerator, then stir well and add a splash of warm water if the dip has thickened. Serve at room temperature or slightly chilled.
Substitutions
- creamy unsalted peanut butter → Almond butter or sunflower seed butter. Use the same amount for a nut-free or different flavor profile. Almond butter will create a milder, more delicate dip.
- canned full-fat coconut milk → Heavy cream or full-fat Greek yogurt. Cream adds richness but less Thai flavor; yogurt adds tang. Use ⅓ cup (80 ml) of either.
- fish sauce → Tamari or soy sauce. Reduces the distinctive Thai flavor but still adds umami depth. Use 1½ teaspoons instead to account for saltiness.
- fresh Thai red chilies → Jalapeño pepper or ¼ teaspoon cayenne pepper. Jalapeños are milder and fresher-tasting; cayenne is hotter but more one-dimensional. Adjust to your preferred heat level.