
Thai Basil Chicken Skewers
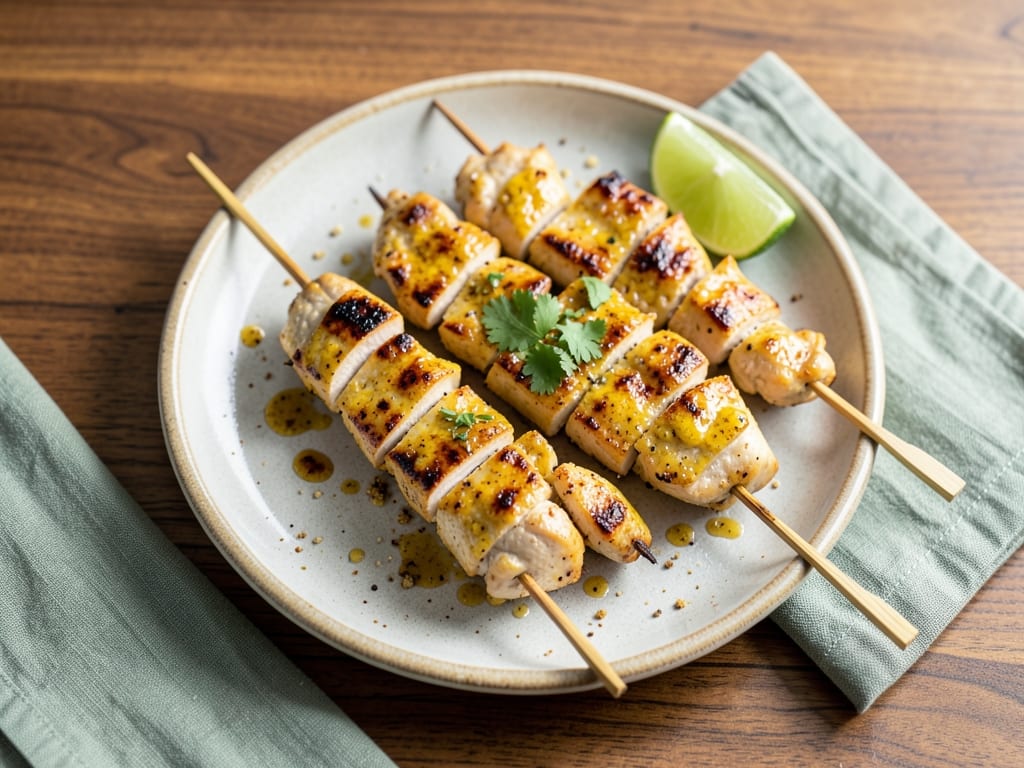
Tender grilled chicken breast infused with the vibrant, complex flavors of fresh Thai basil, pungent fish sauce, bright lime juice, and aromatic garlic. These skewers deliver authentic Thai taste with a delicate char from the grill. Perfectly balanced between herbaceous, savory, and tangy notes, they're ideal as an appetizer or served over jasmine rice with a spicy dipping sauce.
- Prep
- 30 min
- Cook
- 15 min
- Wait
- 1 hr 20 min
- Total
- 2 hr 5 min
- Makes
- 8 skewers (serves 4 as appetizers)
Steps
Before you start
- If using wooden skewers, soak them in water for 30 minutes before assembling (can happen while you prep other ingredients)
- Have all ingredients prepped and measured before you start the marinade
- Preheat the grill after the chicken finishes marinating so it's ready when you are
- Use a meat thermometer to verify chicken reaches 165°F (74°C) internally for food safety
Prepare ingredients
- If using wooden skewers, place them in a bowl of cold water to soak.
- Meanwhile, cut the chicken breast into 1.5-inch cubes and place on a cutting board.
- Cut the bell pepper and red onion into 1.5-inch pieces.
- Mince the garlic cloves into small, uniform pieces.
- Roughly chop the fresh Thai basil leaves (you should have about 1/4 cup after chopping).
- Set all prepped ingredients aside in separate bowls.
+ Show details− Hide details
Tip: Cut all pieces to uniform size so they cook evenly on the grill; smaller pieces cook faster than larger ones.
Make marinade
- In a small mixing bowl, combine the minced garlic, fish sauce (45 ml), lime juice (about 100 ml from the 2 limes), lime zest from 1 lime, palm sugar (12 g), and vegetable oil (30 ml).
- Stir vigorously for about 1 minute until the sugar dissolves completely; you should see no granules remaining.
- Fold in the roughly chopped Thai basil leaves using a spatula.
- If using the red chili, add the finely minced chili to the marinade at this point.
- Taste the mixture carefully (it will be very strong) and adjust salt to taste if needed—note that fish sauce is already quite salty, so start with a small pinch.
+ Show details− Hide details
Ready when: Sugar is fully dissolved, basil is evenly distributed throughout the liquid
Tip: If sugar granules linger, gently warm the marinade in a small saucepan for 30 seconds while stirring; let it cool to room temperature before using.
Marinate chicken
- Place the chicken cubes in a large mixing bowl.
- Pour the entire marinade over the chicken and toss with your hands or two spoons until every piece is evenly coated.
- Cover the bowl with plastic wrap or transfer to a large zip-top bag, pressing out excess air.
- Place in the refrigerator for 45 minutes (minimum 30 minutes, maximum 4 hours).
- Before you assemble the skewers, remove the bowl from the fridge and carefully pour out and reserve 2 tablespoons (30 ml) of the clear marinade liquid that has pooled at the bottom into a separate small bowl; this reserved portion will be used for basting during the final minutes of grilling.
+ Show details− Hide details
Tip: Do not marinate longer than 4 hours; the fish sauce and lime acid will start to denature the proteins, making the texture mushy rather than tender.
Thread skewers
- Remove the chicken pieces from the marinade and pat them dry with paper towels; drying reduces sputtering on the grill and helps achieve better browning.
- Begin threading: start each skewer with a piece of chicken, then alternate chicken, bell pepper piece, onion piece, chicken, pepper, onion, chicken.
- End each skewer with a piece of chicken.
- Leave approximately 1/2-inch (1.25 cm) of space between each piece to allow hot air to circulate evenly around all surfaces.
- Arrange the threaded skewers on a clean plate and set aside at room temperature until you're ready to grill (up to 20 minutes).
+ Show details− Hide details
Ready when: All pieces are threaded securely onto skewers with even, consistent spacing
Tip: Leaving proper spacing between pieces is critical; cramming pieces tightly together creates steam pockets that prevent browning and leads to uneven cooking.
Preheat grillOven 400°F / 205°C
- Preheat your grill or grill pan to medium-high heat, approximately 400°F (200°C).
- If using a stovetop grill pan, set the burner to medium-high.
- Allow 3–5 minutes for the grill to reach full temperature.
- Test readiness by holding your hand (palm down) about 4 inches above the grate; you should only be able to hold it there for 2–3 seconds before it becomes uncomfortable.
- Lightly oil the grill grates with a paper towel that's been dipped in neutral vegetable oil, wiping it across all cooking surfaces.
- This prevents sticking and helps create attractive char marks.
+ Show details− Hide details
Ready when: Water droplets sizzle and evaporate immediately when flicked onto the grates
Tip: A properly preheated grill is essential for developing a flavorful crust on the outside while keeping the inside juicy; don't rush this step.
Grill first side
- Carefully place the skewers on the hot grill, laying them perpendicular to the grate lines (this prevents rolling and makes flipping easier later).
- Do not move, rotate, or flip the skewers for 5 to 6 minutes.
- This initial searing creates a flavorful charred crust and develops deeper, caramelized notes.
- The chicken exterior should turn opaque and light char marks should appear where the meat contacts the grate.
+ Show details− Hide details
Ready when: Chicken exterior is opaque with visible char marks; when you gently nudge a skewer with tongs, it releases cleanly from the grate without sticking
Tip: Resist the urge to move the skewers. Each movement breaks the char crust forming on the surface and prevents browning.
Flip and finishOven 165°F / 75°C
- Using tongs, rotate the skewers 90 degrees to expose a fresh side to the heat (or flip them entirely if they release cleanly).
- Immediately brush the top surface of each skewer with the reserved marinade that you set aside earlier, using about 2 tablespoons total divided among all skewers.
- Continue grilling for another 5 to 6 minutes.
- During this time, insert a meat thermometer into the thickest piece of chicken on one of the skewers.
- It should read 165°F (74°C) internal temperature when the chicken is fully cooked.
- If the pieces are very thick (over 2 inches), they may need an additional 1–2 minutes.
+ Show details− Hide details
Ready when: Chicken reaches 165°F (74°C) internal temperature; juices run clear when pierced with a knife, not pink
Tip: Only brush with the reserved raw marinade in these final minutes, as the chicken will be nearly done. Using freshly reserved (uncontaminated) marinade is safe because the chicken will reach a safe internal temperature.
Rest and serve
- Using tongs, transfer the skewers to a serving plate or cutting board.
- Let them rest, undisturbed, for 5 minutes; this allows the juices to redistribute within the meat, keeping it moist and tender rather than dry.
- Serve the skewers hot with lime wedges on the side for additional brightness.
- Garnish with fresh Thai basil leaves if desired.
- These are excellent on their own or served alongside jasmine rice, cucumber slices, and a spicy dipping sauce made from fish sauce, lime juice, and minced red chili.
+ Show details− Hide details
Tip: Resting is crucial for juicy meat. Skipping it causes juices to spill onto the plate, leaving the meat noticeably drier.
Good to know
Tips
- Soak wooden skewers thoroughly for at least 30 minutes (1 hour is even better). Fully saturated wood resists burning far better than partially soaked skewers.
- Do not skip preheating. A properly heated grill creates a beautiful sear and develops deeper, more complex flavors through the Maillard reaction. If the grill isn't hot enough, the meat steams rather than sears.
- Avoid moving the skewers while they grill on the first side. Constant turning prevents a good char and interrupts crust development. Patience is rewarded with flavor.
- Reserve a portion of raw marinade before adding chicken. This reserved marinade is safe to brush on the final minutes of cooking because the chicken will reach a safe internal temperature, eliminating any food safety concern.
Make ahead
Marinate the chicken in the mixture up to 4 hours in advance (do not exceed this). Assemble skewers up to 2 hours before grilling and keep refrigerated. The final dish is best enjoyed fresh from the grill.
Storage & reheating
Room temperature: Best enjoyed immediately. If left at room temperature, consume within 1 hour. Refrigerator: Leftover skewers keep for 3 days in an airtight container. Reheat gently in a 350°F (175°C) oven for 5–7 minutes or briefly on the grill over medium heat. Freezer: Cooked skewers freeze for up to 2 months. Thaw overnight in the refrigerator and reheat as described above.
Substitutions
- Fresh Thai basil leaves → Regular sweet basil or fresh cilantro. Regular basil is less aromatic and herbaceous; cilantro adds a brighter, more citrusy note. The overall flavor will differ from traditional Thai but will still be delicious and herbaceous.
- Fish sauce → Soy sauce or tamari. Soy sauce is earthier and less pungent than fish sauce, making the overall flavor less distinctly Thai but more familiar to some palates. Use the same amount (3 tablespoons/45 ml).
- Palm sugar → Brown sugar or honey. Brown sugar adds molasses depth; honey adds slight floral sweetness and stickiness. Both work well, though palm sugar is more traditional and provides subtle caramel notes.
- Boneless, skinless chicken breast → Chicken thighs, cut into 1.5-inch pieces. Dark meat is more forgiving and stays juicier due to higher fat content. Thighs may need 1–2 minutes longer cooking time. Check that internal temperature still reaches 165°F (74°C).
More kebabs & skewers
See all →


Find more like this
- Meal
- Dinner
- Cuisine
- Thai
- Main ingredient
- Chicken Breast
- Method
- Grill & BBQ
- Quick & Easy
- Easy