Sourdough Mexican Ancho Chile and Sesame Seed Rolls
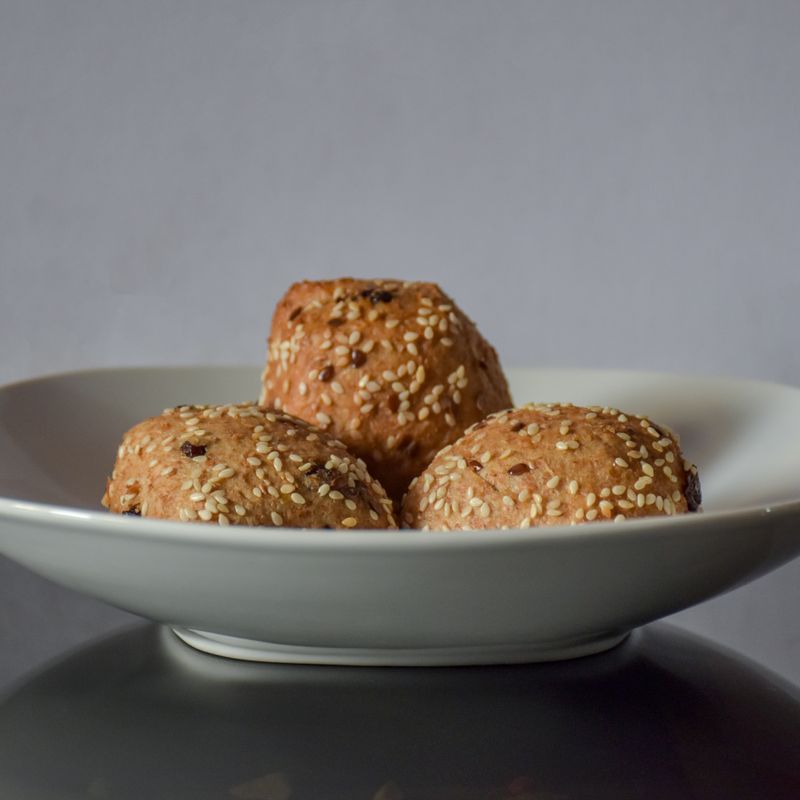
Artisanal sourdough rolls infused with the deep, smoky warmth of toasted ancho chiles, finished with a sesame-garlic butter and sprinkled with sesame seeds. The tangy sourdough base balances the chile's fruity heat, while a hint of lime adds brightness. Perfect for soup, tacos, or simply warm with butter.
Steps
Before you start
- Ensure your sourdough starter is active and bubbly, fed 4–8 hours before mixing
- Dry-toast the ancho chiles in a skillet over medium heat for 1 minute per side to awaken their flavor before soaking
- Have room-temperature water ready for the dough
- Line your work surface with parchment paper for shaping
Toast and rehydrate chiles
- Heat a small skillet over medium heat and lay the ancho chiles flat for 30 seconds per side, pressing gently with a spatula to warm them and release their aromatics—do not let them scorch.
- Place the toasted chiles in a small bowl, cover with hot water, and let soak for 15 minutes until softened and pliable.
- Remove the stem and seeds, chop finely (you should have about ¼ cup / 55 g), and set aside.
+ Show details− Hide details
Ready when: Chiles are dark reddish-brown, fragrant, and softened
Tip: Do not over-toast or the chiles will taste bitter. A few seconds of heat awakens their fruity flavor without burning them.
Mix dough
- In a large mixing bowl, whisk together the sourdough starter and warm water until combined.
- Add the bread flour, salt, chopped ancho chiles, and lime zest.
- Using a stand mixer with the dough hook on low speed, mix for 4–5 minutes until a shaggy dough forms.
- If mixing by hand, stir vigorously for about 10 minutes with a wooden spoon or sturdy spatula until the flour is fully incorporated.
- The dough will be slightly sticky and should come together into a cohesive mass.
+ Show details− Hide details
Ready when: All flour is moistened and the dough is shaggy but cohesive
Tip: Do not overmix; you are just bringing the dough together, not developing gluten yet.
Bulk fermentation
- Cover the bowl with a damp kitchen towel or plastic wrap and let the dough rest at room temperature (68–72°F / 20–22°C) for 3 hours.
- During this time, perform 3–4 sets of stretch-and-fold every 30 minutes for the first 90 minutes: wet your hand, grab one side of the dough, stretch it up and fold it over itself, rotate the bowl 90 degrees, and repeat 4 times.
- After 3 hours total, the dough should be visibly puffy, show some bubbles on the surface, and smell pleasantly sour.
+ Show details− Hide details
Ready when: Dough is airy, soft, and shows visible bubbles; it holds a shape when gently poked but springs back slightly
Tip: Stretch-and-fold helps develop gluten without aggressive kneading. If your kitchen is cold, fermentation may take 4–5 hours instead.
Shape rolls
- Turn the dough out onto a lightly floured work surface.
- Divide it into 8 equal pieces (about 110 g each) using a bench scraper or knife.
- Working with one piece at a time, gently shape each into a round: fold the edges under toward the center, rotate, and repeat until you form a taut, smooth ball.
- Place the shaped rolls seam-side down on the parchment-lined baking pan in a 2×4 arrangement, spacing them about 1½ inches (4 cm) apart.
+ Show details− Hide details
Ready when: Eight uniform rolls, smooth and round, placed on parchment with even spacing
Tip: Avoid overworking the dough; use a light touch so you don't deflate all the air you've built up.
Final proof
- Cover the pan loosely with plastic wrap or a kitchen towel and let the rolls rise at room temperature for 60–90 minutes, or until they're puffy and spring back slowly when you poke them gently—they should fill in the gaps and be touching one another but not compressed.
- For a more sour flavor and open crumb, you can proof them in the refrigerator overnight (up to 16 hours) instead, then bring them to room temperature 30 minutes before baking.
+ Show details− Hide details
Ready when: Rolls are puffy, touching each other, and a gentle poke leaves a shallow indentation that springs back slowly
Tip: If you over-proof them, they may collapse in the oven. Err on the side of slightly under-proofed; they will rise more during baking.
Preheat ovenOven 450°F / 230°C
- Place the oven rack in the middle position and preheat to 450°F (232°C).
- If you have a baking stone or Dutch oven, you can place it in the oven now to preheat for a crisper crust, but it is not essential for these rolls.
+ Show details− Hide details
Ready when: Oven reaches 450°F (232°C) and is ready
Tip: A hot oven helps the rolls oven-spring quickly before the crust sets, giving them an open, airy crumb.
Score and bakeOven 450°F / 230°C
- Using a sharp bread knife or lame, score the top of each roll with a single ¼-inch (6 mm) deep slash across the center, or make a small cross for visual interest.
- Mist the tops lightly with water using a spray bottle.
- Transfer the pan to the preheated oven and bake for 22–28 minutes, rotating the pan halfway through (at about 12 minutes) to ensure even browning.
- The rolls are done when the tops are deep golden brown and the bottoms sound hollow when tapped.
+ Show details− Hide details
Ready when: Tops are deep golden brown and bottoms sound hollow when tapped; internal temperature ~205–210°F (96–99°C) if using a thermometer
Tip: Misting with water creates steam in the first minutes, which helps the rolls expand fully and develop a light, crispy crust.
Cool rolls
- Remove the pan from the oven and place it on a wire rack.
- Let the rolls cool on the pan for 5 minutes so the crust firms up, then transfer them to the rack to cool completely, about 15–20 minutes.
- This allows steam to escape and the crumb to set.
+ Show details− Hide details
Ready when: Rolls are cool enough to handle and have a firm, set crust
Tip: Do not wrap the rolls while they are still warm or steam will soften the crust. Let them breathe.
Make sesame-garlic butter
- While the rolls cool, combine the softened butter, minced garlic, and half of the toasted sesame seeds (about ¼ cup / 35 g) in a small bowl.
- Stir gently until evenly mixed.
- If using, add the lime juice and a small pinch of fleur de sel for brightness and balance.
+ Show details− Hide details
Ready when: Butter is evenly mixed with garlic, sesame seeds, and any optional additions
Tip: Toast the sesame seeds in a dry skillet over medium heat for 2–3 minutes until fragrant before adding to the butter for the most flavor.
Top and finish
- Once the rolls are cool enough to handle (still warm is ideal), brush or spread a teaspoon of the sesame-garlic butter on top of each roll.
- Sprinkle the remaining toasted sesame seeds (about ¼ cup / 35 g) over the buttered tops, pressing gently so they adhere.
- If desired, add a tiny pinch of fleur de sel to each roll for a sophisticated finish.
+ Show details− Hide details
Ready when: All rolls are evenly topped with sesame-garlic butter and sesame seeds
Tip: Applying the butter while the rolls are still warm helps it soften into the crumb slightly. This gives a richer flavor in every bite.
Good to know
Tips
- Active sourdough starter is the key to flavor and rise. If your starter is sluggish, feed it and let it sit at room temperature for at least 4 hours (or overnight) until it's bubbly and shows visible bubbles and a pleasant sour smell before using. A young, weak starter will result in rolls that take much longer to proof and may not rise as well.
- Stretch-and-fold is gentler than kneading and maintains the open crumb structure that makes sourdough rolls light and airy. It also helps develop gluten without aggressive mixing that can toughen the dough.
- Toast your sesame seeds separately just before making the topping. Raw sesame seeds are milder and can taste slightly grassy; toasting for 2–3 minutes in a dry skillet brings out their warm, nutty notes and makes them aromatic.
- The ancho chiles are the soul of these rolls. Do not skip toasting them; even 30 seconds per side in a dry skillet awakens their complex, fruity, slightly smoky flavor. Over-toasting (longer than 1 minute per side) will make them taste burnt and bitter.
Make ahead
Bulk dough can be made through the end of step 3, then refrigerated in an airtight container for up to 2 days. Shape and do a cold final proof overnight (step 5 in the fridge), then bake directly from cold, adding 2–3 minutes to the baking time. Alternatively, fully baked rolls can be wrapped and frozen (see storage).
Storage & reheating
Room temperature (in an airtight container or bread bag): up to 2 days; crust will soften over time. Refresh in a 350°F (175°C) oven for 5 minutes before serving. Refrigerator (in an airtight container): up to 4 days; reheat as above. Freezer (in a freezer bag, wrapped individually or stacked with parchment): up to 3 months. Thaw at room temperature for 2 hours, then warm in a 350°F (175°C) oven for 8–10 minutes, or wrap in a damp towel and microwave for 20–30 seconds per roll.
Substitutions
- dried ancho chiles → guajillo or pasilla chiles. Guajillo is slightly brighter and fruitier; pasilla is deeper and more chocolatey. Both work beautifully and are toasted and rehydrated the same way. Adjust quantity if using pasilla (use 2½ whole) as they are slightly more potent.
- bread flour → all-purpose flour or spelt flour. All-purpose will yield a slightly softer, less chewy roll; spelt will be earthier and denser. Both work; spelt may need an extra 1–2 minutes of bulk fermentation due to its different absorption rate.
- sesame seeds → pepitas (pumpkin seeds), toasted. Pepitas offer a nutty flavor and are equally striking visually. Use the same amount and toast them briefly until fragrant before adding to the butter and sprinkling on top.
- fresh lime → lime juice only (use 1 tbsp in the dough), or omit for a pure chile-forward flavor. Lime zest adds subtle citrus and brightness; if omitted, the chiles take center stage. Lime juice in the dough adds more tang but also moisture, so reduce water by 1 tablespoon if substituting.