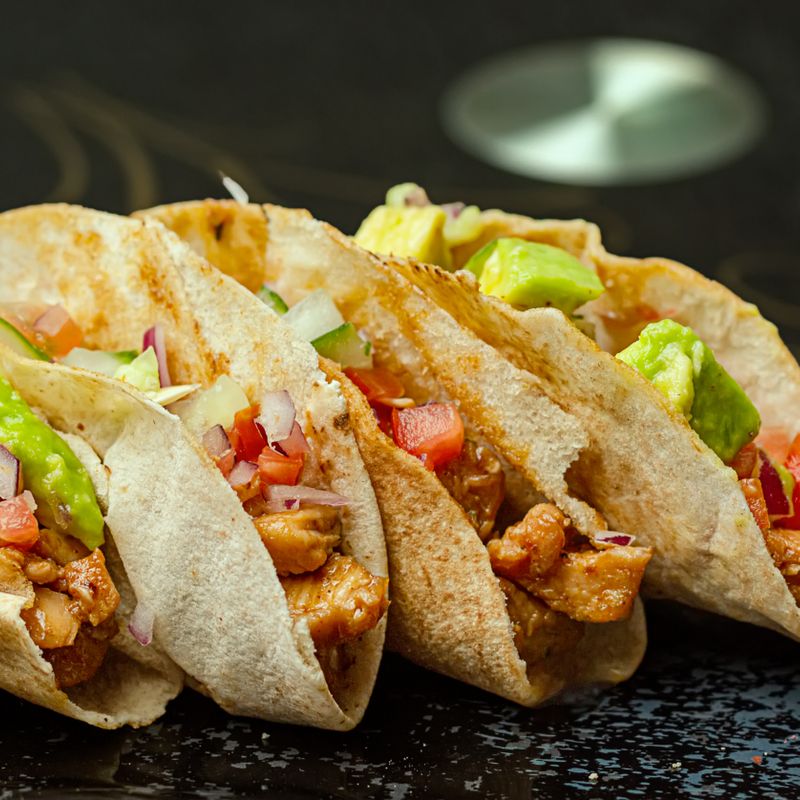
Slow Cooker Chicken and Salsa Panini
Tender slow-cooked shredded chicken mixed with salsa, melted pepper jack cheese, and crispy jalapeños pressed between toasted sourdough in a hot panini maker. This recipe is a complete meal from the slow cooker to the plate—make the filling in advance and assemble fresh paninis whenever you're ready.
Steps
Before you start
- Preheat your panini maker or cast iron skillet on the stovetop for at least 5 minutes before assembling
- If using a slow cooker, place the insert in the base and turn it on 6 hours ahead
- Have all panini fillings prepped and ready to assemble quickly before grilling
Season and cook chicken
- Place chicken breasts in the slow cooker.
- In a small bowl, whisk together cumin, garlic powder, salt, and black pepper.
- Sprinkle this spice mixture evenly over the chicken.
- Pour the salsa over the chicken, stirring gently to coat.
- Cover the slow cooker and cook on low for 6 hours or high for 3.5 hours, until the chicken is very tender and shreds easily.
+ Show details− Hide details
Ready when: Chicken shreds easily with a fork and shows no pink; internal temperature reaches 165°F (74°C)
Tip: For a thicker filling, drain off some liquid after cooking, or shred the chicken and let it sit uncovered for 10 minutes to reduce excess moisture.
Shred and taste chicken
- Transfer the cooked chicken to a cutting board and use two forks to pull it into bite-sized shreds.
- Return the shredded chicken to the slow cooker and stir with the salsa mixture.
- If using lime juice and cilantro, stir those in now for brightness.
- Taste and adjust salt or pepper as needed.
- The filling can be used immediately or kept warm in the slow cooker on the warm setting for up to 2 hours.
+ Show details− Hide details
Ready when: Chicken is evenly shredded and flavors are balanced
Tip: Don't over-handle the chicken; use just enough fork work to separate it into rustic pieces for texture.
Heat panini equipmentOven 400°F / 205°C
- Preheat your panini press to medium-high heat (around 400°F / 200°C).
- If using a cast iron skillet, place it over medium-high heat on the stovetop and let it warm for 5 minutes.
- Have the softened butter, cheese, jalapeños, and shredded chicken filling within reach.
+ Show details− Hide details
Ready when: Equipment is hot (a drop of water sizzles immediately)
Tip: Don't skip the preheat—it ensures even browning and proper cheese melting.
Assemble first panini
- Take two slices of sourdough bread.
- Spread ¾ teaspoon softened butter on the outside of each slice.
- On the inside of one slice, place ½ ounce (15 g) shredded pepper jack cheese, then ⅓ cup (80 ml) shredded chicken filling, a small handful of sliced jalapeños, and another ½ ounce (15 g) cheese on top.
- Top with the second bread slice, buttered side out, pressing gently to adhere.
+ Show details− Hide details
Ready when: Panini is stacked neatly with butter visible on the outside
Tip: Keep the filling layers thin and centered so the panini compresses evenly; too much filling will squish out when pressed.
Grill first panini
- Place the assembled panini on the hot panini press or in the hot cast iron skillet.
- If using a press, close it gently—don't bear down hard, which can squeeze out filling.
- If using a skillet, place a second skillet on top, or use a panini press weight.
- Grill for 3–4 minutes, until the bread is golden brown and crispy and the cheese begins to melt.
+ Show details− Hide details
Ready when: Bread is golden brown and sounds crispy when gently pressed; cheese melts visibly at the edges
Tip: If your press is nonstick, you may not need butter on the outside, but a thin layer helps achieve deep color and crispness.
Flip and finish panini
- Carefully flip the panini using a thin spatula.
- Grill the second side for another 2–3 minutes, until it too is golden brown and crispy and the cheese is fully melted inside.
+ Show details− Hide details
Ready when: Second side is evenly golden brown; cheese is melted throughout (peek inside slightly at the edge to confirm)
Tip: Resist opening the panini repeatedly to check doneness—this cools it and disrupts the browning. Trust the time and listen for sizzle.
Rest and serve
- Transfer the cooked panini to a plate or cutting board.
- Let it rest for 1 minute so the cheese sets slightly and won't ooze out immediately.
- Cut diagonally if desired for a classic presentation.
- Repeat steps 4–7 with the remaining bread and filling to make three more panini, or grill multiple panini at once if your press allows.
+ Show details− Hide details
Ready when: Panini has rested and can be cut without cheese spilling
Tip: Serve immediately while hot and crispy; panini are best enjoyed straight off the press.
Good to know
Tips
- For a creamier panini, spread a thin layer of mayo, crema, or sour cream on the bread before layering the cheese and filling.
- Add extra toppings between the cheese and filling: sliced red onion, crispy bacon, or avocado for richness.
- If the filling is watery, drain it through a fine-mesh strainer for 10 minutes before assembly to prevent soggy bread.
- Toast the bread slices very lightly in a dry skillet before spreading butter if you prefer extra-crispy exteriors.
Make ahead
The slow cooker chicken filling can be made up to 2 days ahead and stored in an airtight container in the refrigerator. Reheat gently in the slow cooker on low or in a saucepan over medium-low heat, stirring occasionally, until warmed through (about 15–20 minutes). You can also assemble the panini up to 4 hours ahead, wrap them individually in plastic wrap, and refrigerate; add 1–2 minutes to the grilling time if they are cold.
Storage & reheating
Store leftover cooked panini in an airtight container in the refrigerator for up to 2 days. Reheat in a toaster oven at 350°F (175°C) for 5–7 minutes, or in a skillet over medium-low heat for 2–3 minutes per side, until warmed through and the exterior is crispy again. The slow cooker filling keeps, covered, in the refrigerator for up to 3 days or frozen for up to 1 month; thaw in the refrigerator before reheating.
Substitutions
- pepper jack cheese → Oaxaca cheese, Muenster, or sharp cheddar. Pepper jack gives the most authentic kick, but these alternatives offer good melting and flavor without the spice.
- sourdough bread → Ciabatta, focaccia, or thick-cut Texas toast. Choose any sturdy bread with structure so it won't collapse under the weight of filling and pressing.
- salsa (mild or medium, fresh or jarred) → Pico de gallo, roasted red pepper coulis, or salsa verde. Fresh pico adds brightness; salsa verde brings tangy complexity; adjust liquid as needed so the filling isn't soupy.
- jalapeños, fresh → Pickled jalapeños, serrano chiles, or roasted poblano peppers. Pickled jalapeños offer consistent heat and tang; serranos are hotter and fresher-tasting; poblanos are milder and sweeter.
More paninis
See all →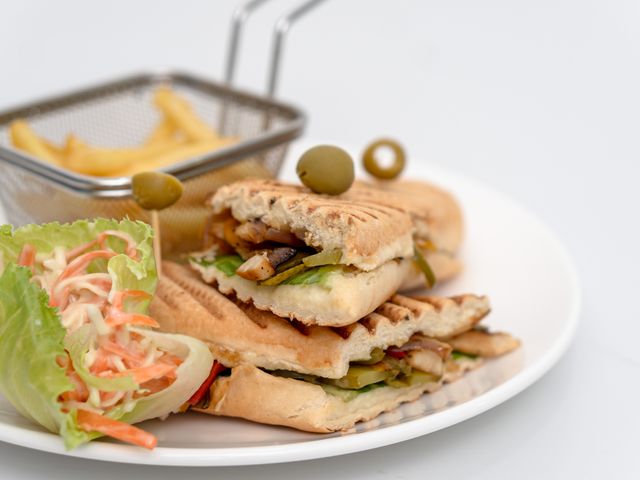
Find more like this
- Meal
- Lunch
- Cuisine
- Tex-Mex
- Main ingredient
- Chicken Breast
- Diet
- HalalSugar-Free
- Method
- Slow CookerSheet Pan
- Quick & Easy
- EasyMake Ahead