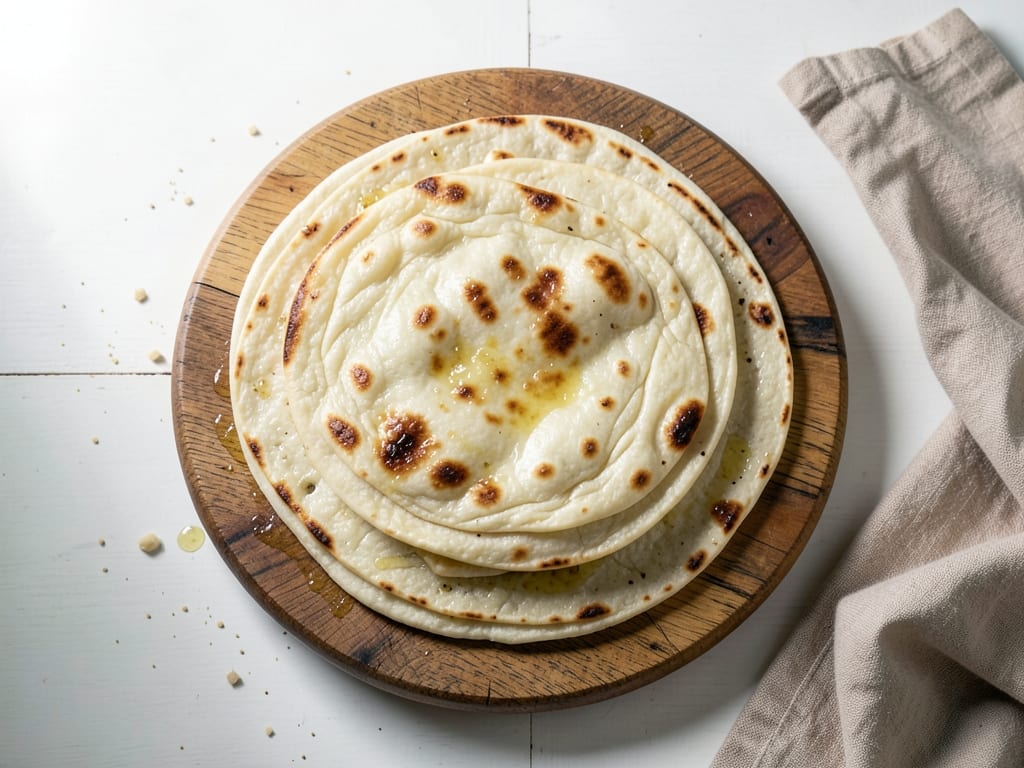
Roti Canai (Malaysian Layered Flatbread)
Crisp-edged, flaky, tender-centered Malaysian flatbread made from a soft, rested dough enriched with egg, condensed milk and ghee. The dough is stretched paper-thin, folded into a coil, rested again, then pan-fried and "clapped" to reveal its layers.
- Prep
- 50 min
- Cook
- 30 min
- Wait
- 4 hr 45 min
- Total
- 6 hr 5 min
- Makes
- 8 roti canai
Steps
Before you start
- Plan for about 6 hours, mostly resting. The long rests make the dough stretchy enough to pull thin without tearing.
- Measure the flour by weight if you can. Dough that is too dry won't stretch, and the right dough is soft and slightly tacky.
- Melt the ghee and let it cool until warm, not hot, before you begin.
- Clear a clean, smooth counter of about 2 feet (60 cm) square for stretching. Don't use a rough or porous surface.
- Serve with dhal or chicken curry, or with sugar and condensed milk for a sweet version.
Mix the dough
- In a large bowl, whisk the flour, salt and sugar.
- In a measuring jug, whisk together the egg, condensed milk, 1 cup (240 ml) lukewarm water and the 2 tbsp melted ghee until the condensed milk dissolves.
- Pour into the flour and stir with your hand or a spatula until no dry flour remains and a shaggy, sticky dough forms.
+ Show details− Hide details
Ready when: No dry flour left; dough is shaggy and sticky.
Tip: If it feels stiff and dry, add 1–2 tbsp more water. It should be softer than bread dough.
Knead until smooth
- Turn the dough onto a lightly oiled counter.
- Knead for 8–10 minutes, pushing and folding, until it is smooth, elastic and soft.
- It will be slightly tacky but should not stick heavily to your hands.
- Rub a little ghee on your palms rather than adding flour.
+ Show details− Hide details
Ready when: Dough is smooth and springs back slowly when poked.
Tip: Adding extra flour makes the dough tough and hard to stretch.
First rest
- Shape the dough into a ball, coat lightly with ghee, place in the bowl and cover tightly with plastic wrap.
- Let it rest at room temperature for 30 minutes.
+ Show details− Hide details
Ready when: Dough is relaxed and slightly puffy.
Divide and oil balls
- Generously brush the shallow dish with ghee.
- Cut the dough into 8 equal pieces (about 100 g each).
- Roll each piece between your palms into a smooth, tight ball.
- Dip or brush each ball well with ghee and set in the dish in a single layer, touching lightly.
- Cover tightly with plastic wrap.
+ Show details− Hide details
Ready when: Balls are smooth and glossy with ghee on all sides.
Tip: Pinch the seam closed on the bottom so the surface stays smooth.
Long rest
- Let the oiled balls rest, covered, at room temperature for 4 hours.
- For even softer dough, rest them for 2 hours, refrigerate overnight, then bring to room temperature for 1 hour before stretching.
+ Show details− Hide details
Ready when: Balls have spread slightly, feel very soft and look shiny.
Tip: Don't skip this rest. A tight dough tears when stretched.
Stretch the dough
- Oil the counter and your hands with ghee.
- Take one ball and flatten it into a disc with your palm, then press it outward into a thin circle about 8 inches (20 cm).
- Pick up two edges, slap the dough on the counter and pull gently outward to stretch it very thin, until you can almost see through it, forming a rough rectangle or circle.
- Small holes are fine.
+ Show details− Hide details
Ready when: Dough is thin and translucent, roughly 14–16 inches (35–40 cm) across.
Tip: Stretch with your fingertips and use gentle pulls. If it springs back, rest it for 5 minutes.
Fold into coil
- Brush the thin sheet lightly with ghee.
- Pleat or fold it into a long rope about 1½ inches (4 cm) wide: fold one long edge over the other, repeating until you have a strip.
- Roll the strip into a tight spiral (snail shape) and tuck the end underneath.
- Set it on the oiled tray and cover.
- Repeat with the remaining balls, then let all coils rest 15 minutes.
+ Show details− Hide details
Ready when: Each coil is a tidy, tight spiral.
Tip: Work with one ball at a time and keep the others covered so they don't dry out.
Flatten coils
- Heat the skillet over medium heat for 2–3 minutes.
- Meanwhile, gently flatten one coil with your palm and stretch it out to a round about 6–7 inches (15–18 cm), pressing from the center.
- Don't roll it with a rolling pin, which crushes the layers.
+ Show details− Hide details
Ready when: A drop of water sizzles briefly on the hot pan.
Pan-fry the roti
- Brush the pan lightly with ghee and lay in the flattened roti.
- Cook for 1½–2 minutes until golden spots appear on the underside, then brush the top with ghee and flip.
- Cook 1½–2 minutes more, until both sides are golden brown with crisp edges and the layers puff slightly.
- Flatten and fry the remaining coils one at a time.
+ Show details− Hide details
Ready when: Both sides are golden brown with darker spots, and edges are crisp.
Tip: If it browns too quickly, lower the heat so the center cooks through.
Clap and serve
- Move the hot roti to a clean counter.
- Push the edges toward the center with both hands and clap it a few times to fluff and separate the layers.
- Serve at once with curry or dhal, and keep finished roti warm wrapped in a clean towel while you cook the rest.
+ Show details− Hide details
Ready when: Roti looks crinkled and flaky with visible layers.
Tip: Use a towel if the roti is too hot to handle.
Good to know
Tips
- Keep everything well oiled: counter, hands, dough balls. Ghee stops sticking and creates the flaky layers.
- A very soft, tacky dough is correct. Resist adding flour.
- If the dough tears or springs back while stretching, cover it and rest 10 minutes.
- For a first attempt, stretch the dough on a large oiled rimmed tray, which is easier to handle than the counter.
Make ahead
After oiling, the dough balls can be refrigerated in the covered, ghee-coated dish for up to 24 hours. Bring them to room temperature for about 1 hour before stretching.
Storage & reheating
Room temperature: cooked roti keep, wrapped in a towel, for up to 4 hours. Fridge: store in an airtight container for up to 3 days. Freezer: separate with parchment and freeze for up to 2 months. Reheat in a dry skillet over medium heat for 1–2 minutes per side, then clap to refresh the layers. Uncooked coils can be frozen on a tray, then bagged, for up to 1 month; thaw in the fridge before cooking.
Substitutions
- ghee → Unsalted butter or neutral oil. Butter adds a milky flavor; oil gives a slightly less rich taste. Use the same amount.
- ghee → Neutral oil such as vegetable or canola. Works well for oiling and frying, but the roti will lack ghee's nutty aroma.
- sweetened condensed milk → 1 tbsp extra sugar plus 1 tbsp milk. Gives a slightly less tender, less rich dough.
- large egg → 3 tbsp (45 ml) milk. For an egg-free dough; it will be a little less rich and flexible.