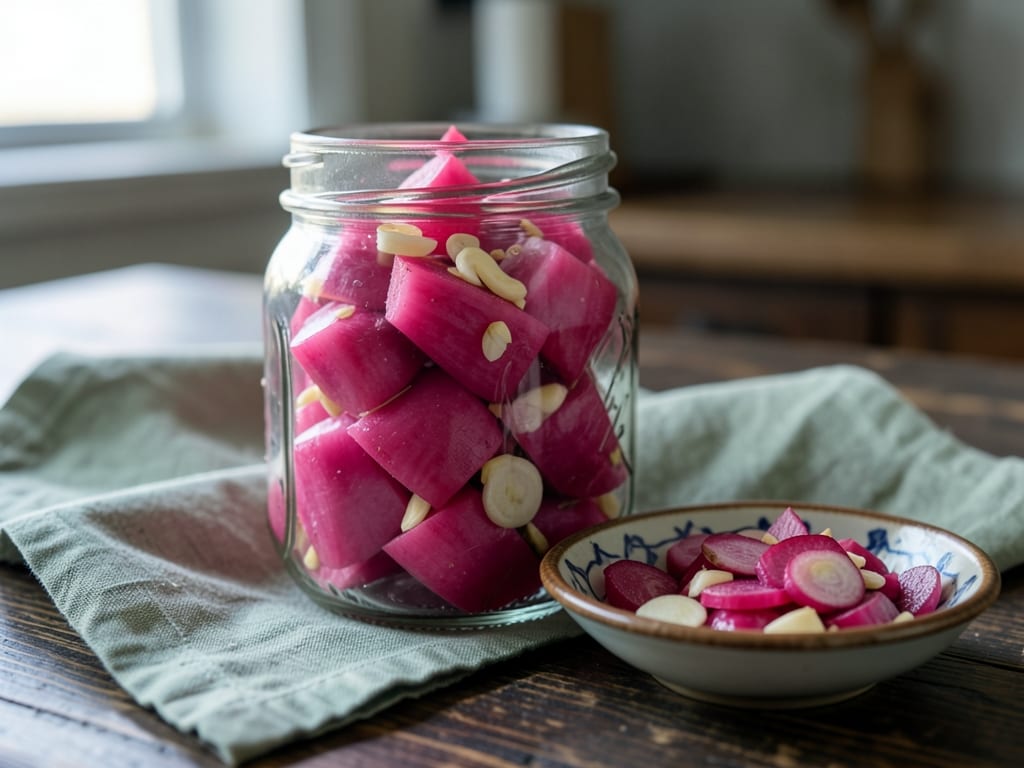
Pickled Turnips for Shawarma
Bright pink pickled turnips with garlic and beet—a tangy, crisp Lebanese condiment essential for shawarma plates. Ready to eat in 3 days but flavors deepen over 2 weeks. Serve cold as a refreshing counterpoint to rich, spiced meat.
- Prep
- 20 min
- Cook
- 5 min
- Wait
- 3 days
- Total
- 3 days
- Makes
- About 1 quart (2 pint-sized jars)
Steps
Before you start
- Sterilize two 1-pint (500 ml) glass jars and lids by boiling or running through the dishwasher
- Use a vegetable peeler or sharp knife to peel the turnips—no need to be fancy
- Have all ingredients measured and ready before you start packing
Peel and cut turnips
- Use a vegetable peeler to remove the thin papery skin from each turnip.
- Rinse under cold water and pat dry.
- On a cutting board, cut each turnip lengthwise into thin batons about ¼ inch (6 mm) thick and 2 inches (5 cm) long.
- Aim for consistent sizes so they pickle evenly.
- Place in a large bowl.
+ Show details− Hide details
Ready when: Turnips are uniformly cut and ready to pack
Tip: Don't peel too thickly—you want just enough to remove the skin. Uniform size ensures even pickling.
Prepare beet
- Peel the beet by running a vegetable peeler or knife over the skin under cold running water until the dark red skin comes away.
- Pat dry.
- Using a sharp knife, slice the beet thinly (about 1/8 inch or 3 mm), then cut each slice into thin matchsticks.
- The beet will stain; this is intentional—it colors the brine pink and flavors the turnips.
+ Show details− Hide details
Ready when: Beet is sliced into thin matchsticks
Tip: Wear gloves if you want to avoid beet stains on your hands. The staining is temporary but can be intense.
Pack jars with vegetables and garlic
- Divide the turnip batons between the two sterilized jars, packing them fairly tightly to fill the bottom third of each jar.
- Scatter half of the beet matchsticks and half of the garlic cloves into each jar, distributing them evenly among the turnips.
- Fill the rest of each jar with the remaining turnip batons, alternating layers with remaining beet and garlic.
- Leave ½ inch (1 cm) of headspace at the top of each jar.
+ Show details− Hide details
Ready when: Both jars are packed with vegetables and garlic, ½ inch headspace remaining
Tip: Pack snugly so vegetables stay submerged once the brine is added, but not so hard that you crush them.
Make the brine
- In a medium saucepan, combine the white vinegar, water, and salt.
- Bring to a boil over medium-high heat, stirring to dissolve the salt, about 3–4 minutes.
- Once boiling, remove from heat and let it cool for 1–2 minutes so it's hot but not dangerously so.
+ Show details− Hide details
Ready when: Brine is at a rolling boil and salt is fully dissolved
Tip: Don't skip heating the brine—it helps the flavors meld and keeps the pickles crisp.
Pour brine and cool
- Carefully pour the hot brine into each jar, distributing it evenly, until vegetables are completely covered and the liquid comes to ½ inch (1 cm) from the rim.
- If you need a bit more liquid, top with room-temperature water.
- Let the jars cool to room temperature on a clean kitchen towel, about 30–40 minutes.
- Once cool, cover tightly with lids.
+ Show details− Hide details
Ready when: Jars are cool to the touch and lids are sealed
Tip: Don't cover with lids while hot or you'll trap steam; let them cool uncovered first.
Refrigerate and cure
- Transfer the sealed jars to the refrigerator.
- The pickles will be mildly tart and crunchy after 3 days, which is the minimum time to wait.
- However, they taste best after 7–14 days as the flavors deepen and meld.
- The longer they sit, the more the beet color will intensify and spread throughout.
- They will keep refrigerated for up to 3 months.
+ Show details− Hide details
Ready when: Turnips are translucent at the edges, pink-tinted throughout, and taste tangy and crisp
Tip: Shake or invert the jars every 2–3 days to distribute the beet color evenly if you like uniform pink coloring.
Good to know
Tips
- The beet stains everything it touches—use gloves and a dedicated cutting board if you prefer to avoid pink hands.
- For a faster pickle, slice the turnips thinner (⅛ inch / 3 mm) and reduce the wait time to 2 days, though some crispness will be lost.
- If your turnips are very large (more than 2 inches in diameter), they may take longer to soften. Medium turnips are ideal.
- Always keep pickles submerged in brine; exposure to air causes discoloration and softening. If liquid evaporates, top up with more vinegar solution (2 parts vinegar to 1 part water with a pinch of salt).
Make ahead
Prepare up to 3 days before serving. Best made 1–2 weeks ahead so flavors fully develop. Will keep refrigerated up to 3 months.
Storage & reheating
Refrigerator: up to 3 months in sealed jars. Always keep submerged in brine. Freezer: not recommended—texture becomes mushy upon thawing. Room temperature: not suitable for long-term storage; always refrigerate after cooling.
Substitutions
- white distilled vinegar → Apple cider vinegar. Use in equal amount for a slightly sweeter, more complex tang. Flavor will be less sharp.
- beet, medium → Omit and add 1 teaspoon of paprika or ¼ teaspoon of red food coloring to the brine. You'll lose the earthy beet flavor and the gradual color deepening, but the turnips will still be good.
- kosher salt → Sea salt. Use the same weight (38 g). Avoid iodized salt, which can cloud the brine.
- garlic cloves, peeled → 4 garlic cloves plus 2 small dried red chiles. Adds subtle heat. Seed the chiles if you prefer mild spice.