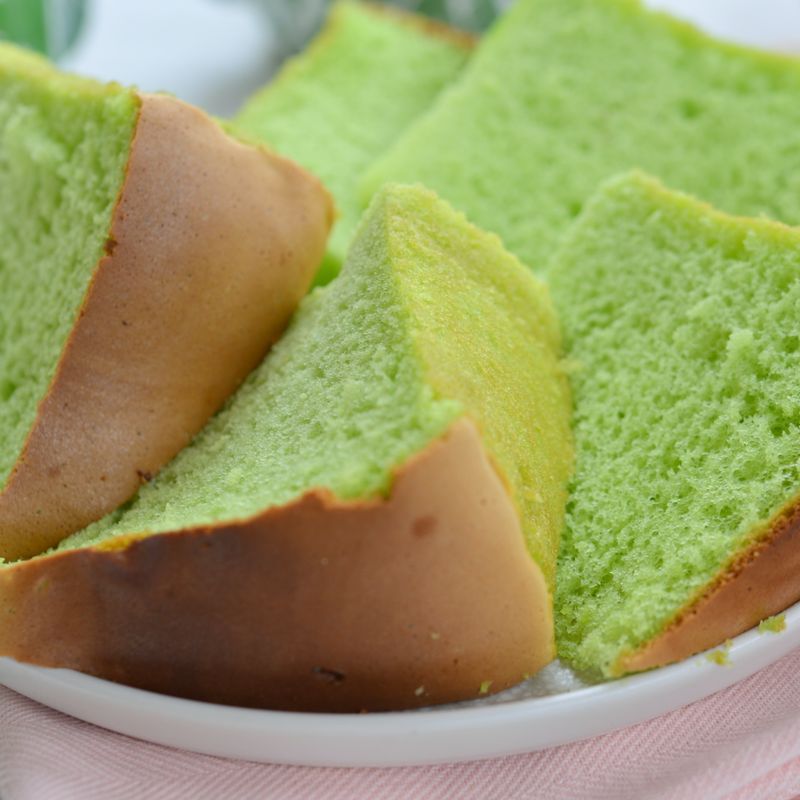
Pandan Coconut Icebox Cake
A Thai-inspired no-bake dessert featuring layers of vanilla wafers soaked in a luscious pandan-coconut cream. The bright green pandan extract infuses the sweetened coconut filling with its distinctive floral, earthy aroma, while condensed milk adds richness and binding structure. After a long chill overnight, the wafers soften into a tender cake-like crumb. Garnish with toasted coconut flakes and serve cold for a refreshing treat.
- Prep
- 20 min
- Cook
- —
- Wait
- 8 hr
- Total
- 8 hr 20 min
- Makes
- 1 loaf cake (12 slices)
Steps
Before you start
- Gather pandan extract (or make fresh pandan juice if available)
- Have all ingredients at room temperature for easier mixing
- Line a 9×5-inch loaf pan with parchment paper, leaving a 2-inch overhang on the long sides
Prepare the pandan-coconut cream
- In a large mixing bowl, combine the room-temperature coconut cream and sweetened condensed milk.
- Using an electric mixer on medium speed or whisking by hand, beat for 1–2 minutes until smooth and well incorporated.
- Add the 1.5 tsp pandan extract and mix for another 30 seconds until the mixture turns a pale jade green and the aroma is evenly distributed.
- The mixture should be thick but spreadable.
+ Show details− Hide details
Ready when: Mixture is pale green, smooth, and pandan aroma is uniform throughout
Tip: Do not overmix or the coconut cream may become grainy; aim for just-combined and smooth.
Whip the cold cream
- In a separate bowl, whip the cold heavy cream using the mixer on medium-high speed (or by hand with a whisk) for 2–3 minutes until soft peaks form.
- The cream should hold a gentle, fluffy texture but not be stiff.
- Gently fold the whipped cream into the pandan-coconut mixture in two additions using a spatula, being careful to preserve the airy texture.
+ Show details− Hide details
Ready when: Whipped cream forms soft peaks; folded mixture is light, pale green, and airy
Tip: Fold gently and avoid overmixing, which deflates the whipped cream and makes the filling dense.
Prepare the wafer soak
- In a shallow dish, combine the whole milk with the 0.25 tsp pandan extract.
- Stir well to distribute the extract evenly throughout the milk.
- This will be used to briefly dip the vanilla wafers.
+ Show details− Hide details
Ready when: Milk is evenly tinted pale green with pandan aroma
Tip: Use just 0.25 tsp pandan in the soak so the milk is subtle; too much will overpower the wafers.
Layer the cake: first wafers
- Working quickly, dip each vanilla wafer into the pandan milk for 1–2 seconds on each side (do not soak; they should absorb liquid but remain intact).
- Arrange a single layer of dipped wafers (about 8–10 cookies, breaking to fit as needed) on the bottom of the parchment-lined loaf pan.
+ Show details− Hide details
Ready when: Wafers are moistened but still hold their shape; they are arranged in a single layer
Tip: Work quickly so the wafers don't become soggy before layering. A 1–2 second dip is enough; excess liquid will soften them too much.
Layer the cake: pandan cream
- Spread about one-third of the pandan-coconut cream (roughly 3–4 tablespoons or 45–60 g) evenly over the first layer of wafers, smoothing with a spatula to create an even layer.
+ Show details− Hide details
Ready when: Cream is spread in an even, smooth layer
Tip: Use a small spatula or the back of a spoon to spread evenly without pressing down too hard and squashing the wafers below.
Repeat layers: wafers and cream
- Dip another set of 8–10 vanilla wafers in the pandan milk and arrange them over the cream layer.
- Spread another third of the pandan-coconut cream on top.
- Repeat one more time: dip the remaining wafers, layer them, and spread the final third of cream over the top, smoothing the surface.
+ Show details− Hide details
Ready when: All wafers and cream are layered; the top is smooth and even
Tip: Work efficiently so each wafer layer is dipped and laid before the cream beneath sets; this ensures layers bond together during chilling.
Chill overnight
- Cover the loaf pan with plastic wrap or aluminum foil and refrigerate for at least 8 hours, preferably overnight (12–24 hours).
- During this time, the wafers will absorb moisture from the cream filling and soften, transforming into a tender, cake-like crumb.
- The pandan flavor will mellow and meld with the coconut.
+ Show details− Hide details
Ready when: After overnight chilling, the cake is firm enough to unmold and slice cleanly
Tip: Do not rush this step; at least 8 hours is essential for the wafers to fully soften and the cake to hold its shape when sliced.
Unmold and slice
- Remove the cake from the refrigerator.
- Gently lift the parchment paper overhang to remove the cake from the pan, then place it on a cutting board.
- Using a sharp, thin-bladed knife (dipped in warm water and wiped between cuts helps for clean slices), cut the cake into ½-inch-thick slices.
- The layers should be visible and distinct.
+ Show details− Hide details
Ready when: Slices are clean, showing visible layers of wafers and cream
Tip: A warm, wet knife produces the cleanest cuts. If the cake has softened too much at room temperature, briefly chill for 10 minutes before slicing.
Serve and garnish
- Arrange slices on a chilled plate.
- If desired, sprinkle lightly toasted coconut flakes over the top of each slice.
- Serve immediately while cold.
- The contrast of the tender cake, cool creamy filling, and crunchy toasted coconut is optimal when served chilled.
+ Show details− Hide details
Ready when: Slices are plated with optional coconut garnish
Tip: Serve straight from the refrigerator; the cake loses its firm texture if left at room temperature for more than 15–20 minutes.
Good to know
Tips
- Pandan extract can be found in Southeast Asian grocery stores or ordered online; it gives the cake its signature pale green color and floral-earthy aroma. If unavailable, substitute fresh pandan leaves or powder as directed.
- Do not skip the overnight chilling step—it is essential for transforming the wafers into a tender, cake-like crumb and for the layers to set firmly enough to slice cleanly.
- For a vegan version, replace the condensed milk with coconut cream sweetened with 3–4 tablespoons of sugar, and use whipped coconut cream instead of heavy cream.
- Toast the coconut flakes in a dry skillet over medium-low heat for 2–3 minutes, stirring frequently, until lightly golden. This adds a wonderful nutty flavor and texture contrast.
Make ahead
Prepare the entire cake 1–3 days ahead and refrigerate covered. The flavors develop and deepen over time. Unmold, slice, and serve cold. Do not freeze as the cream filling and wafer texture will degrade upon thawing.
Storage & reheating
Room temperature (not recommended—the cake will soften within 15–20 minutes). Refrigerator: cover tightly with plastic wrap and store for up to 3 days; the cake remains firm and delicious. Freezer: not recommended due to texture degradation of the cream and wafers upon thawing.
Substitutions
- pandan extract → Fresh pandan juice (made by blending fresh pandan leaves with a little water and straining) or 1–2 tsp pandan powder mixed with 1 tsp water. Use equal amounts by volume. Fresh pandan juice offers a more intense, herbaceous flavor; powder requires mixing into a paste first.
- unsweetened coconut cream (full-fat) → Canned full-fat coconut milk (use only the thick cream that rises to the top, discarding watery liquid). Measure out the solid coconut cream layer. This is slightly less rich but still delivers authentic coconut flavor.
- vanilla wafers → Ladyfinger cookies, digestive biscuits, or Maria biscuits. Choose neutral-flavored, thin cookies that soften quickly when moistened. Avoid cookies with strong spices or toppings.
- heavy whipping cream, cold → Whipped coconut cream (whipped cold coconut cream in place of dairy cream). For a dairy-free version, use cold canned coconut cream whipped to soft peaks. The result will be slightly denser but still delicious.
More no-bake desserts
See all →




Find more like this
- Meal
- Dessert
- Cuisine
- Thai
- Diet
- VegetarianHalal
- Method
- No-Cook
- Quick & Easy
- EasyMake Ahead