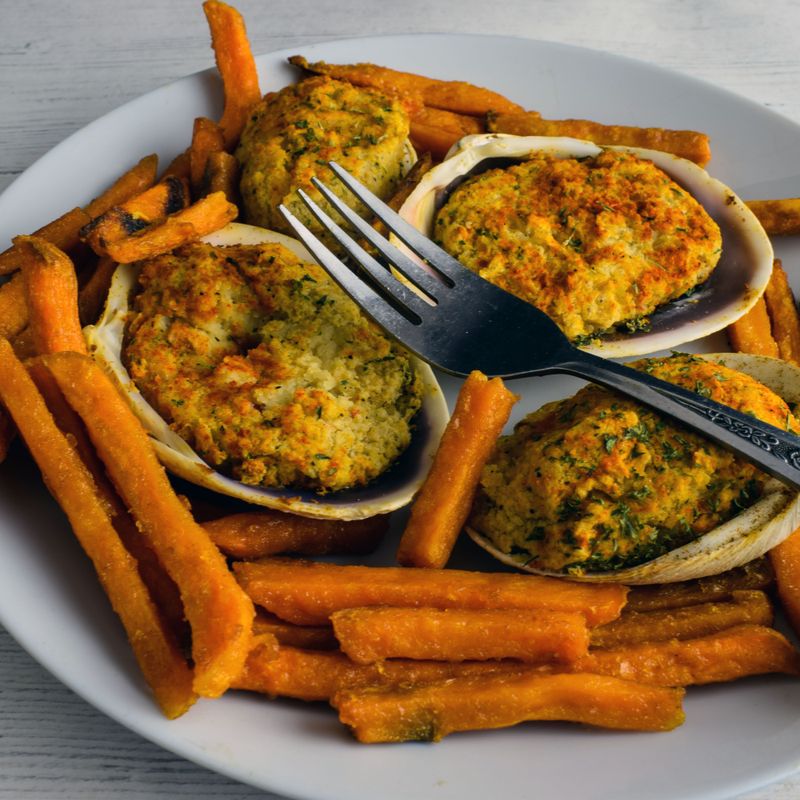
New England Clam Chowder
A creamy, moderately thick classic chowder built on fresh steamed clams, smoky bacon, tender Yukon gold potatoes, and a rich broth made from the clams' own liquor. The clams are soaked to purge sand, and the broth is strained, so every spoonful is clean and tastes of the sea. The cooked clams are kept chilled until they go in, and the chowder is finished to a safe 165°F (74°C).
- Prep
- 35 min
- Cook
- 50 min
- Wait
- 30 min
- Total
- 1 hr 55 min
- Makes
- About 7 cups (6 generous bowls)
Steps
Before you start
- Read the timing first: about 1 hour 55 minutes in all, including a 20-minute clam soak and a short rest at the end. Chop the bacon, onion, celery, and potatoes (about 15 minutes) while the clams soak.
- Check the clams: discard any with cracked shells, and any open clams that don't close when tapped firmly on the counter.
- You need two pots. Steam the clams in the 8-quart pot. Cook the chowder in the 5- to 6-quart pot, so you never have to wash sandy sediment out before cooking.
- Food safety: cooked clams must not sit at room temperature more than 2 hours in total (1 hour if your kitchen is hot). This recipe has you chill them after steaming. Have a thermometer ready.
- Don't salt the chowder until the very end. The bacon, clam broth, and clams are all salty, and the amount varies. Keep the cream and milk in the fridge until step 9.
Soak the clams
- Stir the 3 tablespoons (27 g) kosher salt into 2 quarts (1.9 L) cold water in a large bowl until dissolved.
- Add the scrubbed clams so they are covered by the water, and let them soak for 20 minutes so they spit out sand.
- Meanwhile, chop the bacon, onion, celery, and potatoes.
- Lift the clams out by hand or with a slotted spoon, without pouring them out, so the sand stays on the bottom of the bowl.
- Give them a quick rinse under cold water.
+ Show details− Hide details
Ready when: The water looks cloudy with a layer of grit on the bottom of the bowl, and the clams feel clean.
Tip: Lift the clams out rather than draining the bowl through a colander, or the sand goes right back over them.
Steam the clams
- Put the soaked clams and 2 cups (480 ml) water in the 8-quart pot.
- Cover and bring to a boil over high heat.
- Steam for 6 minutes, then lift the lid.
- Use tongs to move every open clam to a large bowl.
- Re-cover and keep steaming the rest, checking every 1 to 2 minutes, until 10 minutes total.
- Discard any clam still closed at 10 minutes.
+ Show details− Hide details
Ready when: Shells are wide open and the meat looks plump and opaque. Total steaming time is 10 minutes at most.
Tip: Remove open clams right away. Clams left in the pot while others finish turn rubbery.
Strain and chill clams
- Set the fine-mesh strainer, lined with cheesecloth or a coffee filter, over the 2-quart measuring cup.
- Pour the steaming liquid from the pot through it slowly and stop when you see sand near the bottom.
- Then tilt the bowl of clams and pour the juices collected there through the same strainer.
- Measure the broth.
- You need 3 cups (720 ml).
- If you have less, top up with bottled clam juice.
- Let the clams cool for about 15 minutes, then cover the bowl and refrigerate until you shuck them in step 8.
+ Show details− Hide details
Ready when: The broth is clear with no visible grit and measures 3 cups (720 ml). The clams are covered in the fridge.
Tip: Cooked clams must not sit out more than 2 hours in total (1 hour in a hot kitchen). If you have more than 3 cups of broth, set the extra aside to thin the chowder later.
Render the bacon
- Set the clean 5- to 6-quart soup pot over medium heat and add the bacon.
- Cook, stirring occasionally, for 6 to 8 minutes.
- Transfer the bacon with a slotted spoon to a paper towel–lined plate.
- Leave about 3 tablespoons of bacon fat in the pot and pour off any extra.
+ Show details− Hide details
Ready when: Bacon is golden brown and crisp at the edges, and the pot has a layer of clear rendered fat.
Tip: If the bacon browns very quickly, lower the heat so the fat renders without burning.
Soften the vegetables
- Add the butter to the bacon fat and let it melt.
- Add the onion and celery and cook over medium-low heat, stirring often, for 6 to 8 minutes.
+ Show details− Hide details
Ready when: Onion is soft and translucent, and the celery is tender with no browning.
Tip: Browned onions give a darker, sweeter chowder that's out of place here. Lower the heat if they start to color.
Cook the flour
- Sprinkle the 5 tablespoons flour over the vegetables.
- Stir constantly for 2 minutes so the flour coats everything and the raw taste cooks off.
+ Show details− Hide details
Ready when: The mixture looks like a thick, pale, slightly sandy paste and smells lightly toasty.
Add broth and potatoes
- Pour in the 3 cups of strained clam broth about ½ cup at a time, whisking well after each addition so no lumps form.
- Add the potatoes, bay leaves, and thyme sprigs.
- Raise the heat to bring it to a gentle boil, then reduce to low.
- Cover with the lid slightly ajar and simmer for 15 minutes, stirring once or twice, and check the potatoes at 12 minutes.
- Use this time to shuck the clams (next step).
+ Show details− Hide details
Ready when: A potato cube slides off a knife tip with almost no resistance, and the broth has thickened to coat a spoon lightly.
Tip: Keep the simmer gentle. Hard boiling breaks the potatoes apart and can make the chowder gluey.
Shuck and chop clams
- Take the chilled clams from the fridge.
- Pull the meat from the shells over the bowl, discarding the shells.
- Swish each piece briefly in a medium bowl of cold drinking water to rinse off any grit, and lift it out.
- Chop littlenecks into ½-inch pieces.
- Chop cherrystones finer, into ¼-inch pieces, because they are chewier.
- Strain any juice left in the clam bowl through the lined strainer and add it to the chopped meat.
- Cover the clams and keep them in the fridge until the potatoes are tender.
- Expect about 1 to 1¼ cups of chopped meat; the exact amount varies.
+ Show details− Hide details
Ready when: The meat is clean, with no grit when you rub a piece between your fingers, and is chopped to an even size.
Tip: Work in batches if needed and return the shucked clams to the fridge between batches. Cooked shellfish should never sit out more than 2 hours in total.
Add dairy and clams
- Remove and discard the thyme stems and bay leaves.
- Measure the cold cream and milk into a microwave-safe cup and microwave for 60 to 90 seconds, until lukewarm, not hot.
- Stir the dairy into the pot, then add the chopped clams and their juice.
- Heat over low heat, stirring often, for 6 to 8 minutes, until the chowder reaches 165°F (74°C) on an instant-read thermometer.
- Don't let it boil.
+ Show details− Hide details
Ready when: Steam rises from the surface and small bubbles form at the edge, but it never reaches a full boil. A thermometer reads at least 165°F (74°C).
Tip: Boiling toughens the clams and can curdle the dairy. Adding the dairy lukewarm instead of cold helps prevent curdling.
Season and rest
- Taste, then season with salt and pepper, adding the salt gradually because the clams and bacon are salty.
- Take the pot off the heat and let the chowder rest, covered, for 5 minutes so the flavors blend and it thickens slightly.
+ Show details− Hide details
Ready when: The chowder is creamy and coats the back of a spoon, with a moderately thick body, and tastes savory and balanced.
Tip: If it's too thick, thin it with a splash of warm milk. If it's too thin, mash a few potato cubes against the side of the pot.
Serve
- Check the temperature.
- If the chowder has dropped below 140°F (60°C), reheat it over low heat, stirring, to 165°F (74°C).
- Ladle into warm bowls.
- Top with the crisp bacon and chopped parsley.
- Serve with oyster crackers on the side.
- Keep leftovers hot above 140°F (60°C) while serving, and refrigerate within 2 hours.
+ Show details− Hide details
Ready when: Chowder is steaming hot (at least 140°F / 60°C when served) and the bacon is still crisp when it goes on top.
Tip: Add the bacon at the table so it stays crunchy.
Good to know
Tips
- Littlenecks are tender and sweet. Cherrystones give a stronger flavor but are chewier, so chop them finer.
- Add the clams only at the end and keep the heat low. Overcooked clams turn tough and chewy.
- Salt only after tasting the finished chowder, since clam broth and bacon vary in saltiness.
- Use a thermometer: finish at 165°F (74°C), keep it above 140°F (60°C) while serving, and chill leftovers within 2 hours.
Make ahead
"Make the chowder through the season-and-rest step, then cool it to 40°F (4°C) or below within 2 hours: divide it into shallow containers or set the pot in an ice bath, stirring often. Refrigerate at 40°F (4°C) or below and use within 2 days. Keep the bacon separate. Reheat gently over low heat, stirring often, until it reaches 165°F (74°C), adding a splash of milk if it has thickened. Don't boil."
Storage & reheating
"Room temperature: no more than 2 hours (1 hour if the kitchen is hot). Refrigerator: cool to 40°F (4°C) within 2 hours, then keep in an airtight container at 40°F (4°C) or below for up to 2 days. Freezer: not recommended, because the potatoes turn mealy and the dairy can separate. Reheat gently over low heat, stirring often, until it reaches 165°F (74°C). Don't boil."
Substitutions
- fresh littleneck clams (or cherrystone clams) → Three 6.5-oz (184 g) cans chopped clams, drained, with their juice reserved. Skip the soak, steam, strain, and shuck steps. Use the reserved juice plus bottled clam juice to make 3 cups of broth, and add the canned clams with the dairy.
- heavy cream → Half-and-half. This makes a lighter chowder. Keep the heat very low to avoid curdling.
- Yukon gold potatoes → Red or white waxy potatoes. Waxy potatoes hold their shape well. Avoid russets, which fall apart.
- all-purpose flour → Cornstarch (2 tbsp mixed with 3 tbsp cold milk). Skip the flour step. Whisk the slurry in after the potatoes are tender and simmer 1 to 2 minutes until thickened. This makes the chowder gluten-free.
More chowders
See all →
Find more like this
- Meal
- Dinner
- Cuisine
- American
- Diet
- Sugar-Free
- Method
- Stovetop
- Quick & Easy
- One-Pot
- Season
- Winter Comfort Food