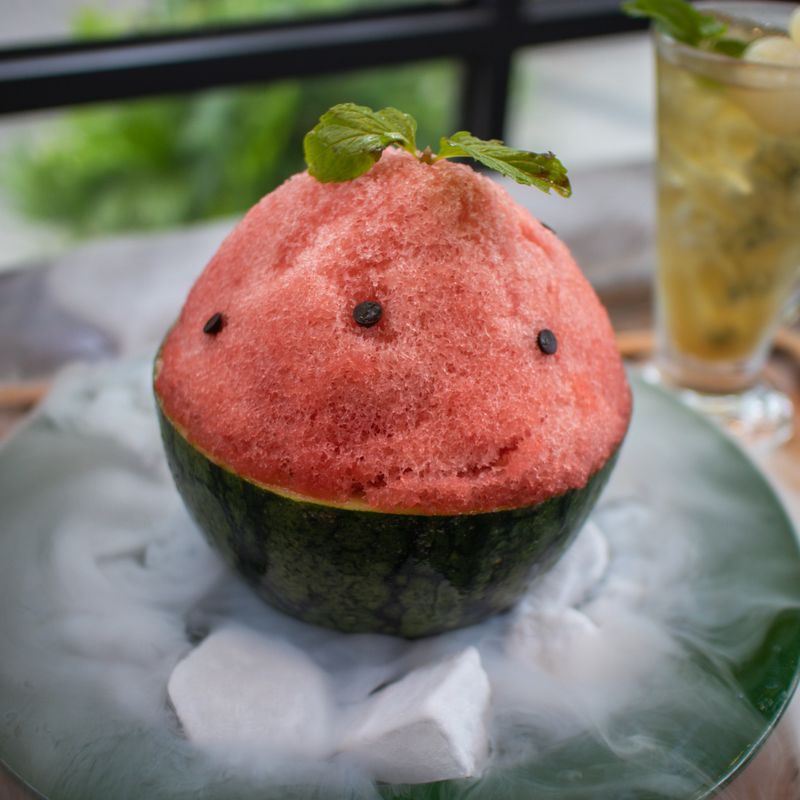
Korean Patbingsu Shaved Ice Tartlet with Red Bean
A sophisticated take on the beloved Korean summer dessert patbingsu, served in crispy butter tartlets. Thin, flaky shells are filled with silky red bean paste, topped with finely shaved ice, and drizzled with sweetened condensed milk and a touch of honey. Served immediately so the ice stays pristine and the shell remains crisp—a play of textures and temperatures that refreshes on hot days.
- Prep
- 45 min
- Cook
- 25 min
- Wait
- 1 hr 30 min
- Total
- 2 hr 40 min
- Makes
- 6 tartlets
Steps
Before you start
- Chill butter 30 minutes before making dough
- Freeze a shallow container of water overnight or 12 hours for shaving
- Have all tartlet ingredients assembled and chilled
- Read through the assembly and serving steps—these tartlets must be assembled and eaten within 5 minutes of ice shaving
Make tartlet dough
- In a food processor, pulse together flour, powdered sugar, and sea salt until combined.
- Add the cold butter cubes and pulse 8–10 times until the mixture resembles coarse breadcrumbs with pea-sized butter pieces still visible.
- Whisk the egg yolk with vanilla extract, then drizzle it over the flour mixture while pulsing just 3–4 times until the dough comes together in shaggy clumps.
- Do not overmix; the dough should be just barely combined and very cold.
+ Show details− Hide details
Ready when: Dough clumps together in shaggy pieces with visible cold butter
Tip: Do not warm your hands or overmix; cold dough makes crisp, flaky shells. Keep the food processor bowl and blade chilled.
Chill and press dough
- Press the dough gently into 6 tartlet pans with removable bottoms (6-inch/15 cm, or use 4-inch/10 cm for smaller tartlets), pressing firmly and evenly up the sides and across the bottom.
- Try not to stretch the dough; let it settle into the pans.
- If there are any gaps, pinch small pieces of excess dough from the rim and patch them.
- Prick the bottom of each shell 3–4 times with a fork to prevent puffing.
- Refrigerate the filled pans for at least 30 minutes, preferably 1 hour, until the dough is very firm.
+ Show details− Hide details
Ready when: Dough is firm to the touch and very cold
Tip: Chill the assembled pans for the full hour if you have time; this makes a noticeably crisper shell and prevents shrinkage in the oven.
Blind-bake tartlet shellsOven 400°F / 205°C
- Preheat the oven to 400°F (200°C).
- Line each tartlet shell with a small square of parchment paper, then fill with dried beans or pie weights to weigh down the dough and prevent puffing.
- Bake for 12 minutes until the sides are pale golden and set.
- Carefully remove the parchment and weights, then bake for another 8–10 minutes until the bottoms are light golden and the shells look dry (they will not be fully baked and will firm up as they cool).
- Watch for browning; they should be pale to light golden, not dark.
+ Show details− Hide details
Ready when: Shells are light golden, dry-looking, and firm to the touch
Tip: Blind-baking (partially baking without filling) prevents soggy shells. If shells are browning too fast, lower the oven to 375°F (190°C).
Cool shells and unmold
- Remove the tartlet pans from the oven and allow them to cool for 10–15 minutes on a wire rack until the shells are set but still warm enough to be fragile.
- Gently push up on the removable bottom of each tartlet pan to release the shell from the rim, then carefully slide each shell onto a plate or cooling rack.
- Let cool completely at room temperature, about 30 minutes.
- Store the cooled shells in an airtight container until ready to assemble (up to 4 hours ahead).
+ Show details− Hide details
Ready when: Shells are completely cool and firm; they sound crisp when tapped
Tip: Cool the shells in a dry place away from steam or humidity. If shells crack slightly during unmolding, they will still hold the filling and ice.
Shave the ice
- Remove the frozen water container from the freezer.
- Using a fine ice shaver or clean snow cone machine, shave the ice block into very fine, fluffy shards, working quickly so the ice doesn't melt.
- You want delicate shavings, not coarse chunks.
- Place the shaved ice in a chilled bowl and work immediately to assembly, or freeze the shaved ice in a shallow container for up to 30 minutes if needed, but assemble within 5 minutes of re-shaving.
+ Show details− Hide details
Ready when: Ice is fine, fluffy, and white; not wet or clumped
Tip: Work fast; shaved ice melts quickly. If your shaver produces coarse ice, try rubbing the frozen block quickly under warm water to smooth the surface, then re-freeze for 10 minutes and shave again.
Assemble tartlets
- Work quickly to assemble within 5 minutes of shaving the ice.
- Place a cooled tartlet shell on a chilled serving plate.
- Spoon 3–4 tablespoons (45–60 g) of red bean paste into the bottom of each shell, spreading it gently to cover the base.
- Top with a generous handful of shaved ice, mounding it slightly and pressing very gently so it holds the shape but doesn't compress into a solid mass.
- Drizzle 2 tablespoons (30 ml) of condensed milk over the ice.
- If using honey, drizzle ½ teaspoon (2.5 ml) over the top for extra sweetness and shine.
+ Show details− Hide details
Ready when: Each tartlet is filled and topped with ice and drizzle, ready to serve
Tip: Assemble tartlets one or two at a time so the ice doesn't melt while you finish the others. Serve immediately for the best contrast of cold ice, crisp shell, and smooth red bean paste.
Garnish and serve
- If using mochi, place a small piece on top of each tartlet.
- Serve immediately, before the ice melts and the shell softens.
- Eat with a spoon, breaking through the crispy shell into the red bean paste and melting ice.
+ Show details− Hide details
Ready when: Tartlets are plated and ready to eat
Tip: This dessert is best eaten immediately; the magic is the contrast between the crispy shell and cold, melting ice.
Good to know
Tips
- Tartlet shells must be completely cool and crisp before filling, or they will absorb moisture and soften. Store them in an airtight container in a dry place.
- Shaved ice melts fast—shave it just before assembly and serve immediately. If you must wait, re-freeze the shaved ice in a shallow container and re-shave for 30 seconds just before serving.
- The red bean paste can be served cold from the refrigerator or at room temperature; both work well. Cold paste lasts longer as you eat, while room-temperature paste blends smoothly with the melting ice.
- For a crowd, pre-shave and re-freeze ice in individual portions in small cups, then unmold onto the tartlets just before serving for speed and minimal melt.
Make ahead
You can prepare the tartlet shells up to 4 hours ahead and store them in an airtight container at room temperature. Freeze the water for ice 12 hours ahead. Assemble the tartlets immediately before serving for the best texture and temperature contrast.
Storage & reheating
Tartlet shells keep in an airtight container at room temperature for up to 4 hours or in the freezer (wrapped individually in plastic wrap) for up to 2 weeks. Reheat frozen shells in a 350°F (175°C) oven for 3–5 minutes to re-crisp them. Red bean paste, once opened, keeps in the refrigerator for up to 5 days. Assembled tartlets must be eaten immediately and cannot be stored.
Substitutions
- sweetened red bean paste → sweetened azuki bean paste or black bean paste. Black bean paste offers a deeper, earthier flavor while still maintaining the creamy texture that contrasts with the ice and crisp shell.
- sweetened condensed milk → evaporated milk or fresh milk mixed with 1 tablespoon honey per ¼ cup milk. Evaporated milk is less sweet; homemade sweetened milk offers lighter flavor. The original sweetened condensed milk is traditional and richest.
- small mochi or glutinous rice cake → roasted peanuts, sesame seeds, or chopped fruit (mandarin oranges, melon, or berries). These toppings are common patbingsu additions and add crunch, nuttiness, or freshness. Frozen berries will stay firm longer than fresh.
- filtered or bottled water → fruit juice (passion fruit, pineapple, or lychee) frozen and shaved. Flavored ice adds fruity sweetness and color. Freeze juice overnight and shave as directed. This is popular in modern patbingsu variations.
More frozen desserts
See all →


Find more like this
- Meal
- Dessert
- Cuisine
- Korean
- Diet
- VegetarianHalal
- Season
- Summer