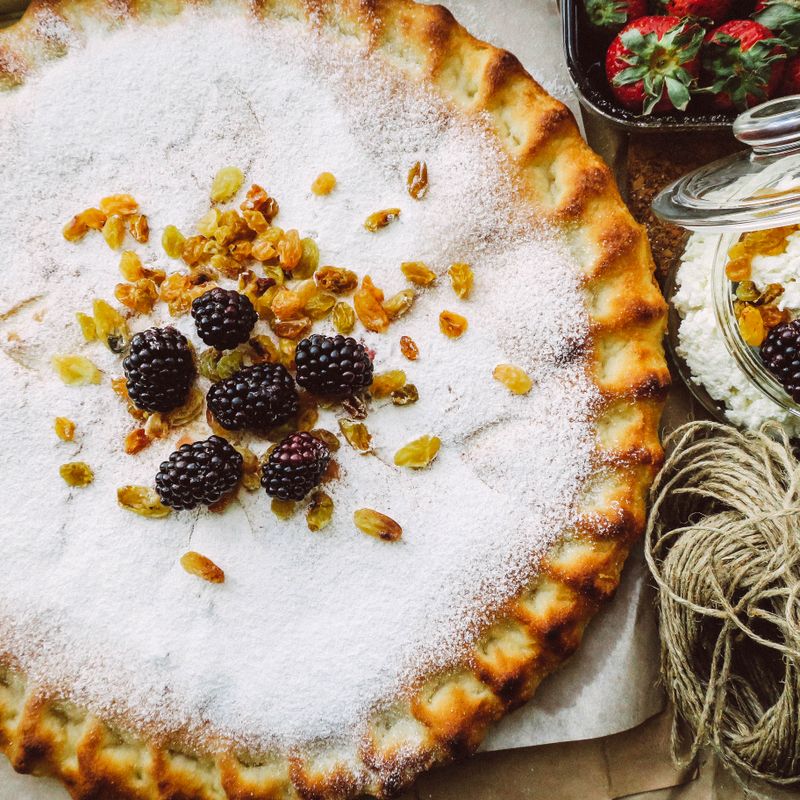
Easy Blackberry Cream Cheese Tart
A simple no-bake tart with a buttery graham cracker crust, silky cream cheese filling, and topped with fresh blackberries glazed in a light syrup. Perfect for summer entertaining or a quick dessert that looks elegant but requires minimal effort.
- Prep
- 15 min
- Cook
- 12 min
- Wait
- 2 hr
- Total
- 2 hr 27 min
- Makes
- 1 tart (8 slices)
Steps
Before you start
- Have all ingredients at room temperature for the filling
- Chill the tart pan or serving plate before assembly
- Read through the recipe to understand the no-bake filling process
Make the graham cracker crustOven 350°F / 175°C
- Preheat your oven to 350°F (175°C).
- In a medium bowl, combine the graham cracker crumbs, melted butter, and sugar.
- Stir until the mixture resembles wet sand and all the crumbs are evenly coated.
- Press this mixture firmly and evenly into the bottom and up the sides of a 9-inch (23 cm) tart pan with removable bottom, using the bottom of a measuring cup to pack it down.
+ Show details− Hide details
Ready when: Crust is evenly packed and holds together when pressed
Tip: Pack the crust firmly so it doesn't fall apart when you slice the tart, but avoid compacting it so much that it becomes hard and dense.
Bake the crustOven 350°F / 175°C
- Bake the crust at 350°F (175°C) for 10 to 12 minutes, until it is light golden brown and fragrant.
- Remove from the oven and let it cool to room temperature on a wire rack (about 15 minutes).
+ Show details− Hide details
Ready when: Crust is light golden brown and smells toasted
Tip: Watch the crust carefully—graham crackers brown quickly. If the edges are darkening too fast, lower the oven to 325°F (163°C) for the last few minutes.
Prepare the filling
- While the crust cools, prepare the cream cheese filling.
- In a medium bowl, combine the room-temperature cream cheese and butter.
- Using a whisk or hand mixer, beat them together for 2 to 3 minutes until they are pale, fluffy, and well combined.
- Add the sifted powdered sugar in three additions, beating well after each addition.
- Stir in the vanilla extract and salt until the filling is smooth and no lumps remain.
+ Show details− Hide details
Ready when: Filling is pale, fluffy, and entirely smooth
Tip: Use room-temperature ingredients so they blend smoothly without lumps. If the filling looks grainy, beat it a bit longer or warm the bowl briefly over hot water.
Fill the tart shell
- Once the crust has cooled, spread the cream cheese filling evenly into the cooled crust using a spatula or the back of a spoon.
- Smooth the top.
- Chill the tart in the refrigerator for at least 1 hour (or up to 4 hours) before adding the blackberries, which allows the filling to set firmly.
+ Show details− Hide details
Ready when: Filling is firmly set and holds its shape
Tip: A well-chilled filling makes the tart much easier to slice cleanly. Don't skip this step.
Make the blackberry glaze
- While the tart is chilling, prepare the glaze.
- In a small saucepan, combine the sugar, water, and lemon juice.
- Bring the mixture to a simmer over medium heat, stirring occasionally to dissolve the sugar.
- Once simmering, stop stirring and let it bubble gently for 8 to 10 minutes, until it has thickened slightly to a light syrup consistency (it should coat the back of a spoon but still drip off easily).
+ Show details− Hide details
Ready when: Syrup coats the back of a spoon and drips slowly
Tip: Don't over-reduce the glaze or it will become too thick and hard when it cools. A light syrup consistency is perfect.
Cool and strain the glaze
- Remove the glaze from the heat and let it cool to room temperature for about 15 minutes.
- If you prefer a seedless glaze, pour it through a fine-mesh strainer, pressing gently on the pulp with a spoon, then discard the solids.
- (You can also leave some of the berries and juice in the glaze if you prefer texture.) Set the strained glaze aside.
+ Show details− Hide details
Ready when: Glaze is cool to the touch but still pourable
Tip: If the glaze seems to be solidifying as it cools, gently reheat it just until pourable. A perfectly cooled glaze is easier to work with.
Top with blackberries and glaze
- Remove the chilled tart from the refrigerator.
- Arrange the fresh, rinsed, and patted-dry blackberries evenly over the cream cheese filling in concentric circles or a casual scattered pattern, whichever you prefer.
- Brush or spoon the cooled glaze gently over the blackberries, allowing it to drip slightly down the sides of the filling.
- Some glaze should pool slightly between the berries.
+ Show details− Hide details
Ready when: Blackberries are evenly coated with glaze
Tip: If the glaze is still warm, let it cool a bit more before applying it to the fresh berries or it may cause them to weep. Pat the berries completely dry so the glaze adheres.
Chill and serve
- Return the tart to the refrigerator for at least 30 minutes (or up to 2 hours) to allow the glaze to set.
- Remove the tart from the pan by pushing the bottom up gently, then slide it onto a serving plate.
- Slice with a sharp, thin-bladed knife, wiping the blade clean between cuts for neat slices.
- Serve chilled.
+ Show details− Hide details
Ready when: Glaze is completely set and tart slices cleanly
Tip: A hot, damp knife will cut through the glaze more cleanly than a cold one. Dip your knife in hot water, wipe it dry, and make each cut with a smooth downward motion without sawing.
Good to know
Tips
- To easily remove blackberries from their container without bruising, tilt the container and roll them gently out onto a paper towel.
- Make sure all your ingredients—especially the cream cheese and butter—are truly at room temperature before mixing, or you'll end up with a lumpy filling.
- If you want a seedless glaze, press the cooked glaze through a fine strainer while still slightly warm, when the mixture flows more easily.
- This tart is forgiving: you can assemble it up to 4 hours ahead, which makes it perfect for entertaining.
Make ahead
You can assemble the entire tart (filling and all) up to 4 hours ahead, keeping it covered in the refrigerator. Add the blackberries and glaze up to 2 hours before serving for the best appearance and texture of the berries.
Storage & reheating
Store the tart, loosely covered, in the refrigerator for up to 2 days. It is best served chilled and does not freeze well because the fresh blackberries become mushy when thawed. You can freeze the unfilled baked crust for up to 1 month, wrapped tightly.
Substitutions
- fresh blackberries → raspberries, blueberries, or a combination of berries. Use the same total weight. Note that softer berries like raspberries may release more juice into the glaze.
- graham cracker crumbs (about 12 full crackers) → digestive biscuit crumbs or gingersnap crumbs. This will change the flavor slightly but works well. Use the same weight.
- vanilla extract → almond extract or omit entirely. Use 0.5 teaspoon (2.5 ml) almond extract for a subtle, different flavor.
- fresh lemon juice → fresh lime juice or a splash of fresh orange juice. Citrus brightens the glaze; use the same amount. Orange juice will produce a slightly thicker syrup.
More pies & tarts
See all →

Find more like this
- Meal
- Dessert
- Main ingredient
- Cream Cheese
- Diet
- VegetarianHalal
- Method
- Oven
- Quick & Easy
- Easy